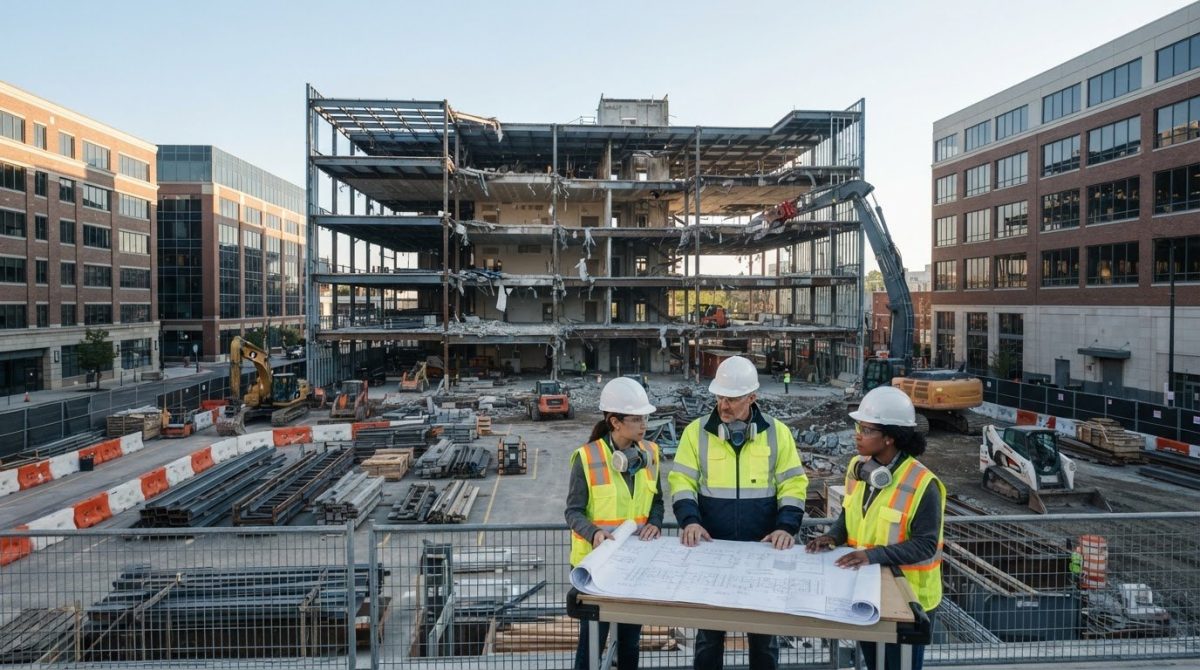
Commercial Structural Demolition: Planning, Safety, and Project Delivery

A sound demolition method can still fall behind if utility shutdowns, hazardous-material controls, and structural sequencing are not coordinated….

A sound demolition method can still fall behind if utility shutdowns, hazardous-material controls, and structural sequencing are not coordinated. Commercial structural demolition projects, like other commercial demolition work, require a scope that distinguishes full structural removal from selective demolition and interior gutting. It must also identify materials and structures that need to remain.

Concerns about hidden asbestos or lead, site safety, schedule disruption, and damage to adjacent areas are best addressed in the project plan. A clear scope defines responsibilities, sequences decommissioning and abatement where needed, and prepares the site for the next phase. TSIAC International brings more than 15 years of industry experience in structural and selective demolition, interior gutting, and asbestos and lead abatement.

This article explains how these scopes differ, how hazardous-material work and decommissioning fit into a demolition plan, and why sequencing matters. It also covers how material recovery can support site management. Use these considerations to define a practical scope before work begins and understand how a demolition and abatement partner can support project delivery.

Key Takeaways

  • Separate structural demolition, selective removal, and decommissioning in the project scope to clarify what will be removed and what must remain.
  • Plan hazard assessment, site preparation, demolition, and documentation as connected phases, adapting the sequence to building conditions and project requirements.
  • Compare full structural removal with selective demolition by the extent of removal, retained elements, and intended site condition.
  • Define project boundaries, access, structural information, known material concerns, adjacent operations, and debris handling before mobilization.
  • Coordinate demolition with asbestos and lead abatement to support organized project delivery; TSIAC International brings more than 15 years of industry experience.

What Commercial Structural Demolition Involves, and Where Decommissioning Fits

Structural demolition is the planned removal of a building or specified structural components to achieve a defined site condition while accounting for elements that must remain. The scope may cover an entire structure or selected structural sections. When planning commercial structural demolition charleston sc work, start by defining the required removal and what must be retained, rather than relying on a general project label.

Demolition covers different methods and processes, as outlined in this overview of Demolition. Available drawings and structural information help the team understand load paths, connections, and interfaces with retained areas. Use these details to set work boundaries and plan for the specific building. Sites and scopes differ, so the method and sequence should reflect the actual conditions.

How commercial demolition differs from interior gutting

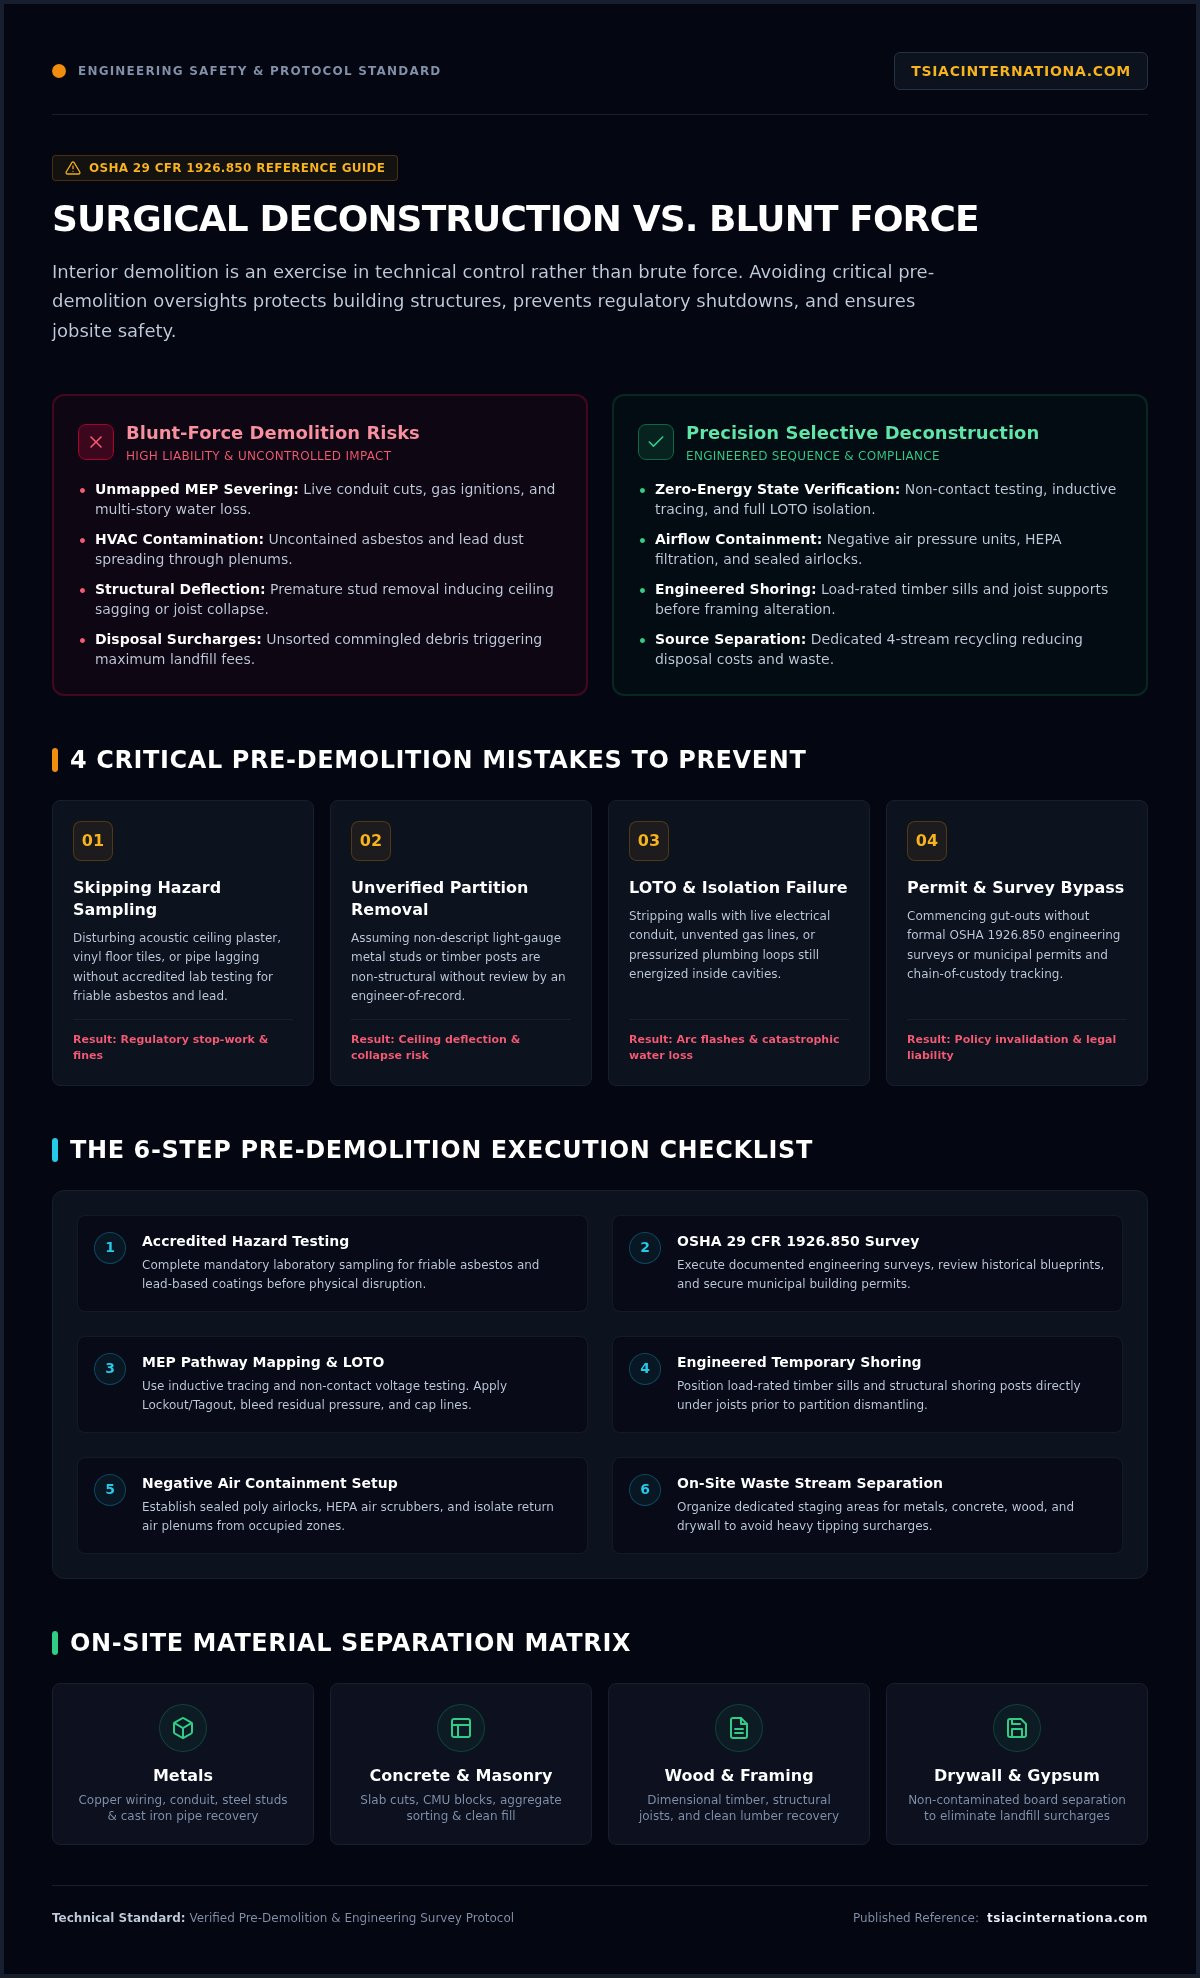
Structural demolition removes load-bearing or other structural elements within the agreed scope. Interior gutting strips finishes, fixtures, and other nonstructural components while retaining the building shell. Removing a partition is not the same as altering a structural wall or frame. Review drawings and identify retained components to set precise limits. For more on interior removal, see this guide to commercial interior gutting services.

Clear boundaries let teams distinguish interior work from structural removal before field activities begin. They also identify components that must remain undisturbed and clarify how demolition work meets retained spaces.

What industrial decommissioning contributes to the project

Decommissioning means taking a facility or its systems out of operation; demolition is the physical removal of a building or structural components. If equipment or industrial processes are present, planning may coordinate shutdown, isolation, and equipment removal with demolition. These activities are related but distinct, and not every commercial project involves industrial systems.

The scopes intersect when equipment removal or system isolation affects access, work limits, or sequencing. Define responsibilities and handoffs to avoid gaps in the plan. The required work depends on the intended site condition, whether that means removing a structure, retaining part of it, or stripping the interior while leaving the shell in place.

How Decommissioning, Hazard Controls, and Demolition Work in Sequence

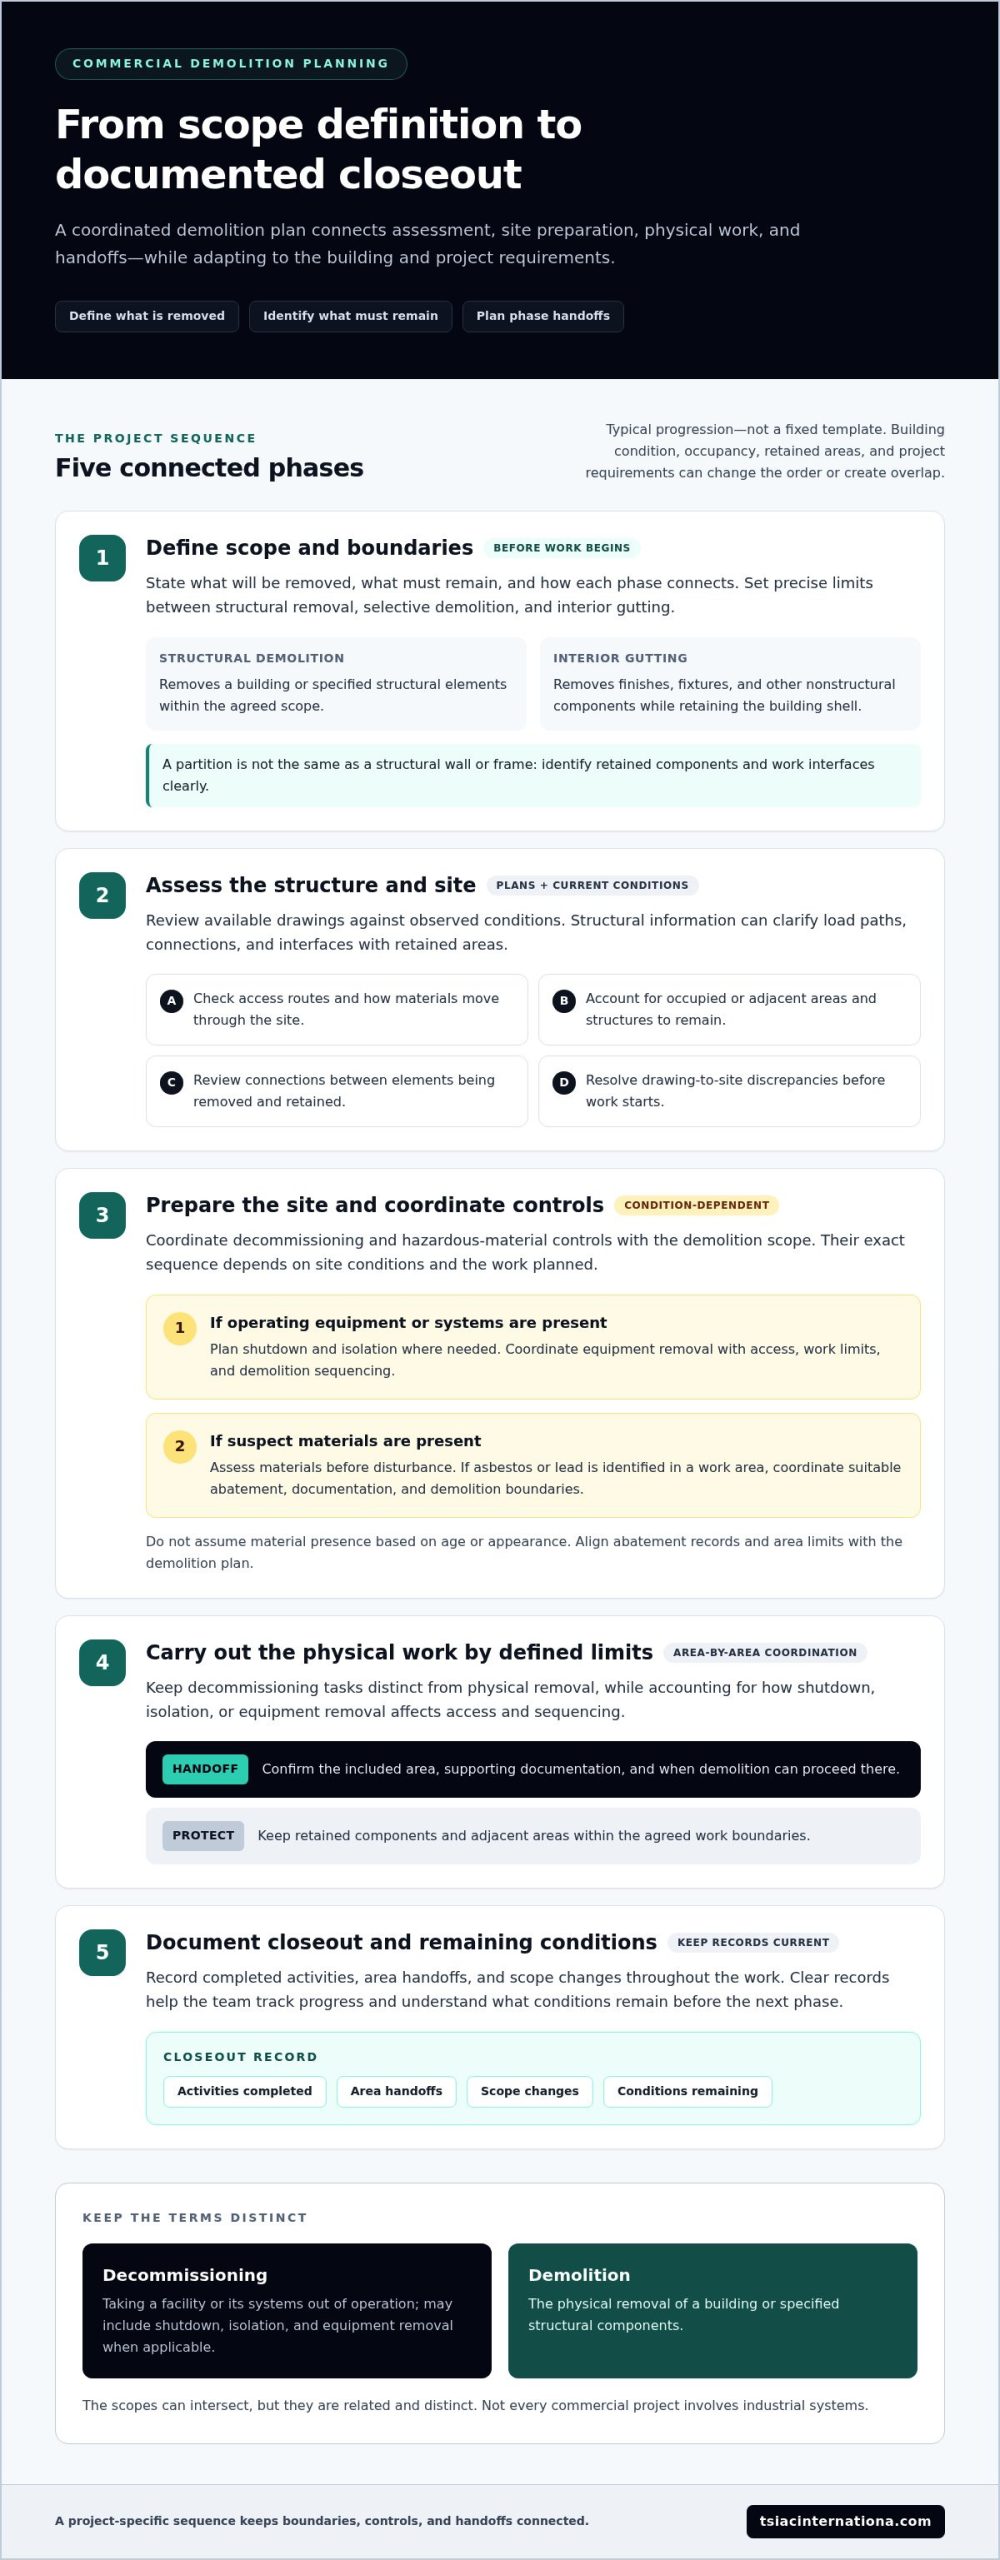
A coordinated project typically moves from scope definition to assessment, site preparation, physical work, and closeout documentation. This sequence helps teams manage handoffs between decommissioning, hazardous-material controls, and demolition. It is not a fixed template: building condition, occupancy, retained areas, and project requirements can affect the order or overlap of activities.

Before work begins, define what will be removed, what must remain, and how each phase connects to the next. If a facility has operating equipment or systems, shutdown and isolation planning may need to come before equipment removal and demolition. Keep decommissioning tasks distinct from physical removal while accounting for their effect on access and work boundaries.

Assess the structure, site conditions, and project boundaries

Review available plans against current site conditions. Access routes, occupied or adjacent areas, and retained structures can influence where work proceeds and how materials move through the site. Structural connections between removed and retained elements may also affect demolition limits and sequencing. Base the assessment on the building and planned work rather than applying a one-size-fits-all rule.

Early reviews can reveal differences between drawings and observed conditions. Resolve those discrepancies before work begins to give the team a clearer basis for sequencing and reduce the risk of unexpected constraints changing the scope in the field.

Coordinate hazardous-material abatement with demolition

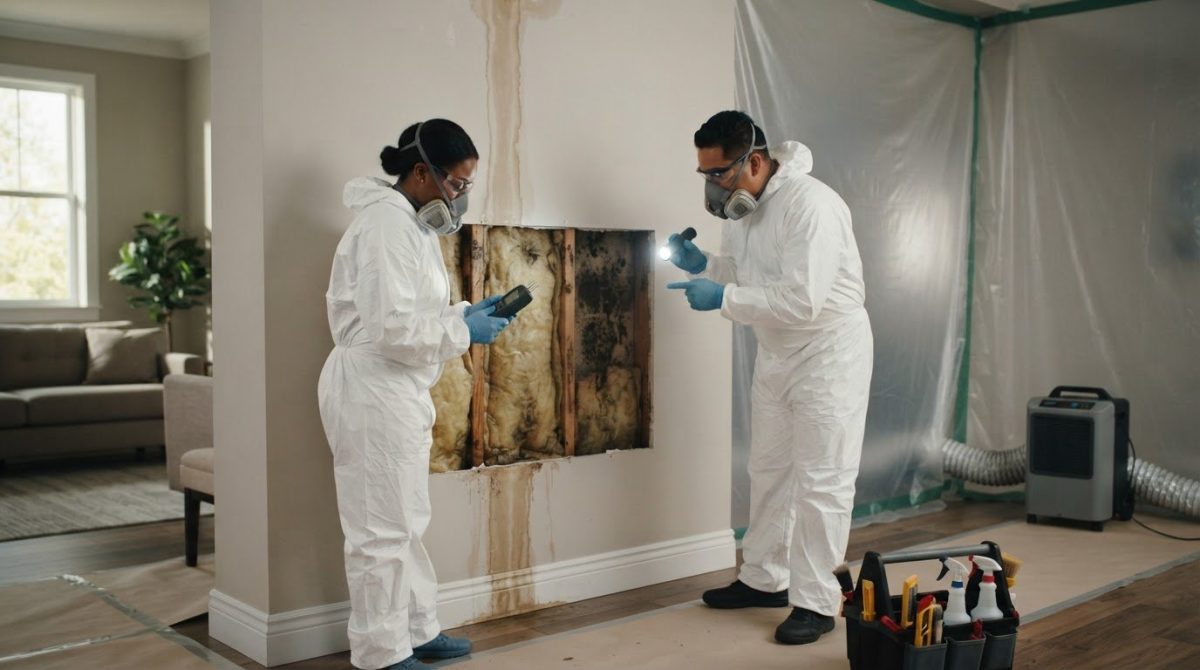
Do not disturb suspect materials based on assumption alone. Assessing materials before disturbance helps identify potential exposure risks and plan appropriate controls. If assessment identifies asbestos or lead in a work area, coordinate suitable abatement, documentation, and demolition boundaries in the project plan. Establish material presence through assessment rather than assuming it based on a building’s age or appearance.

Align abatement records and work limits with the demolition plan. The team needs to know which areas are included, what documentation supports the handoff, and when demolition can proceed in each area. TSIAC’s hazardous material abatement guide offers additional planning context. OSHA’s demolition safety resources also provide guidance on demolition planning and hazard controls.

Document completed activities, area handoffs, and scope changes throughout the work. Clear records help the project team track progress and understand what conditions remain before the next phase begins.

Structural Demolition vs. Selective Demolition: Compare Scope and Site Outcomes

Structural and selective demolition serve different project objectives. Structural demolition removes a building or a defined portion of its structural system; selective demolition removes specified elements while preserving components identified for retention. Neither approach is inherently safer, faster, or less disruptive. Choose the scope according to project objectives, site conditions, and technical assessment.

Scope factor Structural demolition Selective demolition
Removal extent A building or defined structural components are removed. Specified elements or areas are removed within set limits.
Retained elements May leave few or no above-grade building components, depending on the scope. Identified structural or architectural components remain in place.
Intended site condition The designated structure or portion is cleared for the next project phase. The property remains partly intact, often to support renovation or phased work.

When full structural removal aligns with project objectives

Full structural removal suits a project when the defined outcome is to remove the existing building rather than retain its shell or selected structural elements. Planning still needs to account for site access, removal boundaries, material handling, and debris management. The scope ends at the agreed demolition outcome; it does not automatically include subsequent construction or redevelopment.

The National Demolition Association provides industry resources on demolition practices and coordination. For each project, the method and sequence must fit the specific structure and site conditions.

When selective demolition preserves parts of a building

Selective demolition can support renovation or phased property work when only defined areas or components need removal. For example, a project may require removing one section while adjacent spaces or structural elements remain. Identify retained components and interfaces between work areas so removal activities can be planned around preservation requirements. Do not assume that limited removal is automatically less disruptive; clear boundaries are essential.

Review retained elements alongside removal limits to clarify the intended site condition and work sequence. TSIAC provides guidance on the demolition process and safety for additional context. Whether the project calls for full removal or selective work, a precise scope gives the team a shared basis for planning and delivery.
Commercial Structural Demolition: Planning, Safety, and Project Delivery

Plan a Commercial Demolition Scope Before Mobilization

A clear pre-mobilization scope turns project objectives into work limits, responsibilities, and field coordination points. Before activities begin, the owner, general contractor, and demolition team need a shared understanding of what will be removed, what will remain, how crews and materials will access the site, and what documentation will guide the work. Clarifying these details helps prevent gaps between the planned scope and actual site conditions.

Define scope, interfaces, and project responsibilities

Start by recording the intended site condition and marking removal limits against available structural information and site plans. Identify retained components, adjacent operations, access routes, and interfaces with other work areas. If demolition meets a shared wall, retained section, or occupied area, define how that boundary will be communicated and managed.

Set clear communication points among the owner, general contractor, demolition team, and other site teams. Establish who distributes current drawings, communicates changed conditions, coordinates access, and documents scope decisions. Sequence the work using available plans and documented site conditions, with a process for addressing discrepancies before they affect work boundaries.

Include safety, documentation, and material recovery

Planning should account for site controls, known material concerns, hazard assessment and abatement coordination, and the project records needed for work handoffs. Relevant documents may include scope drawings, site access information, hazard or abatement records, and notes on retained areas. The documentation set will vary by project; the goal is to make responsibilities and work limits clear to everyone involved.

Include debris handling in the scope. Identify how materials will be separated, staged, and moved through the site. Sorting recoverable wood, metal, and plastic can support material recovery and keep those streams distinct from debris designated for disposal. TSIAC provides guidance on demolition debris recycling as part of its demolition process resource.

Before mobilization, align the scope, site access, adjacent operations, hazard controls, communication responsibilities, and debris plan. TSIAC International brings more than 15 years of industry experience across structural and selective demolition, abatement, and material recovery. Discuss your commercial demolition scope with TSIAC.

How TSIAC Coordinates Commercial Demolition and Abatement

Commercial demolition scopes can involve connected workstreams, but each project has its own requirements. TSIAC International provides structural and selective demolition, asbestos and lead abatement, interior gutting, and debris recycling. When a project includes both demolition and abatement, defining how the activities relate helps establish clear work boundaries, sequencing, and handoffs.

Connect demolition, abatement, and debris management

TSIAC coordinates demolition and abatement as parts of a project-specific scope. For example, if assessment identifies asbestos- or lead-containing materials within a planned removal area, the work plan can coordinate abatement boundaries and documentation with the demolition limits. The relevant services depend on the building, materials identified, and intended site condition. A project does not automatically require both types of abatement or a particular demolition approach.

Material handling also affects how work areas are organized. TSIAC implements recycling practices for materials such as wood, metal, and plastic on project sites. Planning for sorting and handling can keep recoverable streams distinct from other debris and clarify how materials move through the work area. Recovery practices are part of the site plan, not a substitute for defining the demolition scope.

Move from project objectives to a defined scope

To develop a workable scope, the project team needs a clear picture of the intended outcome and site conditions. Useful planning information includes:

  • Which structures or components will be removed, and which must remain.
  • Available drawings, known material concerns, and relevant assessment or abatement records.
  • Site access, adjacent operations, and interfaces with other work areas.
  • Debris handling needs and the responsibilities of the owner, general contractor, and project teams.

With these elements defined, sequencing can reflect actual project conditions rather than assumptions. TSIAC serves commercial clients, general contractors, and government agencies, bringing demolition and abatement experience to scopes that require coordinated planning. This gives the team a clearer basis for setting work limits, communicating handoffs, and managing material recovery as part of project delivery.

Discuss your commercial demolition project with TSIAC to begin defining the scope around your project objectives and site conditions.

Set the Scope Before Demolition Begins

Commercial structural demolition requires more than defining what will come down. A workable scope distinguishes structural removal from selective demolition and interior gutting, identifies what must remain, and coordinates decommissioning and hazard controls with the work sequence. Assessing site conditions and material concerns before disturbance helps teams plan boundaries, responsibilities, and documentation around the project.

Start by defining the intended site condition, clarifying interfaces with adjacent operations, and including debris handling in the scope. TSIAC International brings more than 15 years of industry experience in structural demolition and asbestos and lead abatement. Its recycling practices also recover materials such as wood, metal, and plastic on project sites.

A clearly defined scope gives the project team a sound basis for coordination from planning through site delivery. Discuss your commercial demolition project with TSIAC and take the next step toward a carefully planned approach.

Frequently Asked Questions

What is commercial structural demolition?

Commercial structural demolition is the planned removal of a commercial building or specified structural components. The scope defines what comes out, what must remain, and the intended condition of the site after the work. It may include full building removal or removal of structural sections, depending on project objectives and site conditions. Planning accounts for structural information, work boundaries, adjacent areas, hazard controls, and debris handling.

What is the difference between structural demolition and selective demolition?

Structural demolition removes a building or defined structural elements, while selective demolition removes specified components and preserves identified parts of the structure. A project may require removing an entire building or taking out a defined area while retaining adjacent spaces. The right scope depends on the intended site outcome and technical assessment. Neither approach is automatically safer, faster, or less disruptive; conditions and work limits matter.

How does industrial decommissioning relate to demolition?

Industrial decommissioning takes a facility or its systems out of operation, while demolition physically removes the building or structural components. Where equipment or industrial processes are present, project planning may coordinate shutdown, isolation, and equipment removal with demolition activities. These scopes can affect one another through access, sequencing, and work boundaries, but they remain distinct. Not every commercial demolition project includes industrial equipment or decommissioning tasks.

Does a commercial demolition project require hazardous-material abatement?

Not every project requires abatement. The presence of hazardous materials must be determined through appropriate assessment rather than assumption. If asbestos or lead is identified within the work area, the project plan can coordinate suitable abatement, documentation, and demolition boundaries. Assess suspect materials before disturbance so potential hazards can be addressed in the work plan. TSIAC International provides asbestos and lead abatement alongside demolition services.

How is a commercial demolition project planned?

Planning begins by defining the project objective, removal limits, retained elements, and intended site condition. Teams review available structural information, site access, adjacent operations, known material concerns, and debris handling needs. The owner, general contractor, and project teams clarify responsibilities, communication points, and required documentation. The sequence is project-specific and can change with building condition, occupancy, assessment findings, and the relationship between demolition and any decommissioning or abatement work.

Can demolition materials be recycled?

Yes. Suitable demolition materials can be sorted for recovery rather than treated as a single debris stream. TSIAC International implements recycling practices for materials such as wood, metal, and plastic on project sites. The handling plan can identify how these materials will be separated, staged, and moved. What can be recovered depends on the materials and site conditions, so include sorting and debris management in the defined scope.
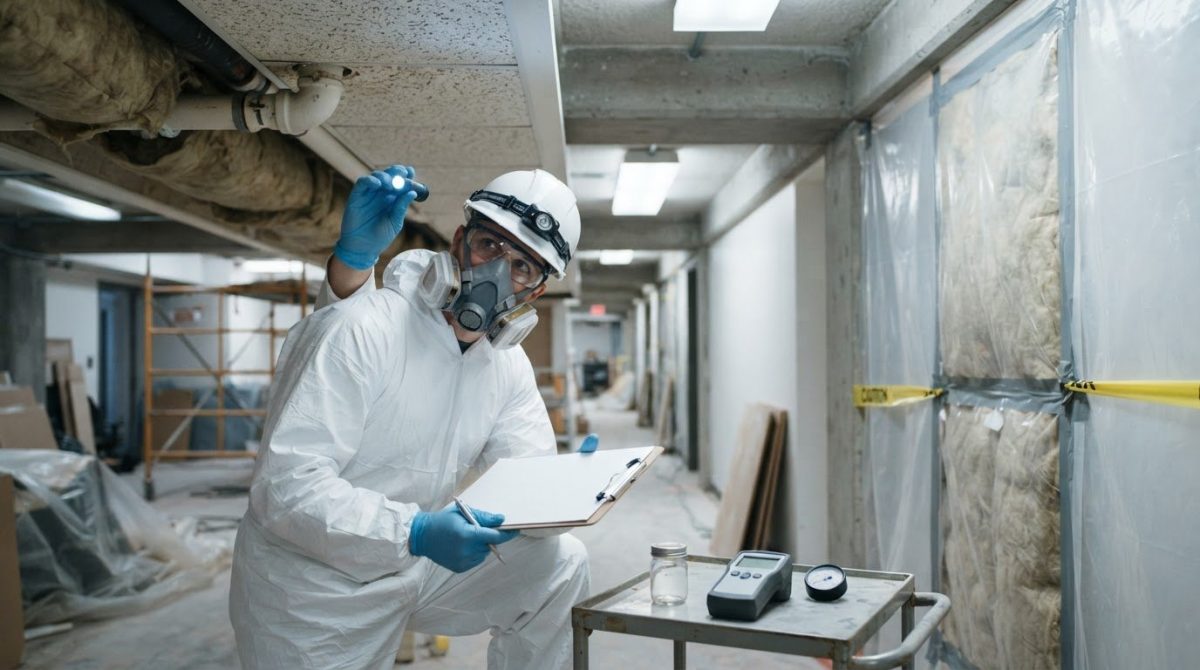

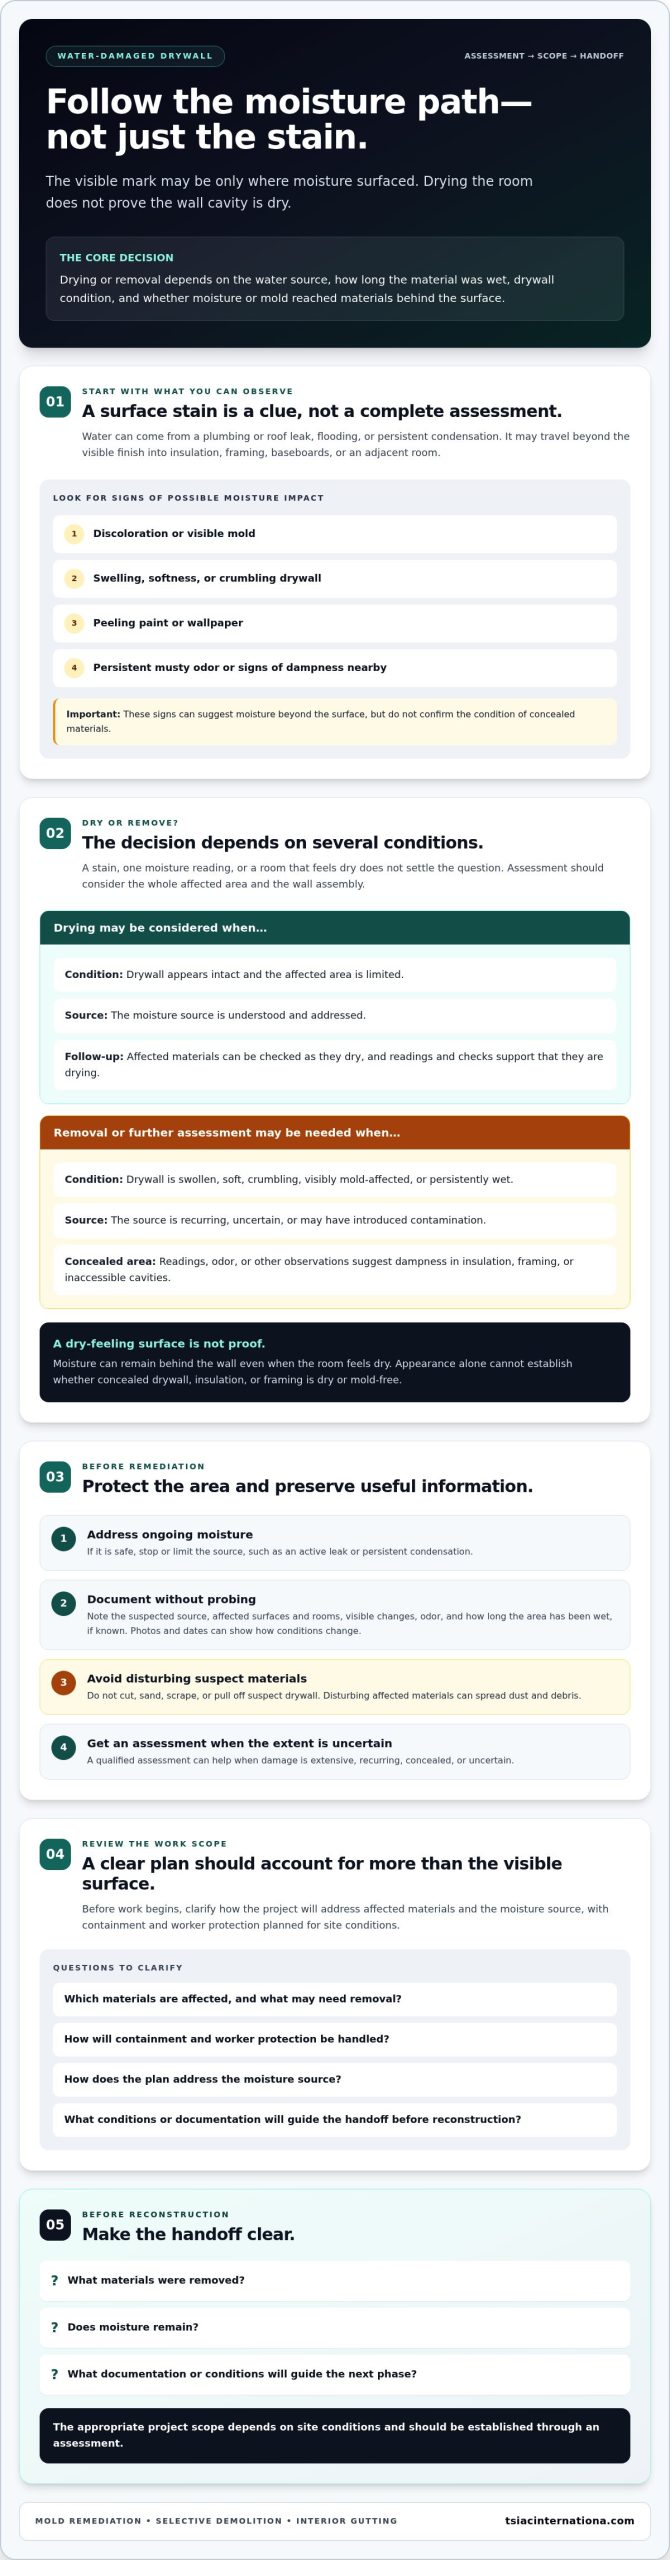
Asbestos Fiber Release Risk Assessment: A Practical Guide

An intact asbestos-containing material and one that is damaged or about to be cut, drilled, or removed don’t present the same fiber-release concern….

An intact asbestos-containing material and one that is damaged or about to be cut, drilled, or removed don’t present the same fiber-release concern. Appearance alone, however, can’t show what planned work may disturb. An asbestos fiber release risk assessment considers the material, its condition, and the activities that could affect it.

If you’re unsure whether you need an inspection, a risk assessment, or air sampling, that uncertainty is understandable. Each serves a different purpose. Sampling alone doesn’t explain how renovation or maintenance could disturb asbestos-containing material. This guide explains what can drive fiber release and what a useful assessment should consider and document, so you can make informed decisions before work begins.

You’ll learn how material condition, the type and extent of disturbance, potential exposure, and planned controls fit together. You’ll also see how assessment differs from inspection and air sampling, and what next steps may be appropriate when asbestos is suspected. The goal isn’t to assume every finding requires abatement. It’s to identify when a controlled response is warranted and reduce the chance of uncontrolled exposure during planned work.

Key Takeaways

  • An asbestos fiber release risk assessment considers material condition, planned disturbance, potential exposure, and controls together.
  • A defensible process follows the proposed work from records review and material identification through condition assessment and documented findings.
  • Visual inspection, material sampling, and air monitoring answer different questions. Choose methods based on the decision that needs to be made.
  • If a suspect material’s identity or condition is uncertain, avoid disturbing it and establish appropriate access controls while arranging qualified evaluation.
  • When abatement is warranted, use assessment records to define the work scope and confirm responsibilities, containment, documentation, and disposal procedures.

What Is an Asbestos Fiber Release Risk Assessment?

An asbestos fiber release risk assessment evaluates whether fibers could become airborne from suspect or confirmed asbestos-containing material and reach people under particular conditions. It considers the material and its surroundings alongside the work planned nearby. It is a property-level, task-focused assessment, not an EPA chemical risk evaluation. That type of evaluation examines asbestos-related risks at a broader agency level rather than determining what may happen to a particular material during a specific project.

Three terms describe different parts of the issue. Hazard means asbestos is present in a material and can cause harm. Release likelihood concerns whether fibers may become airborne. Exposure risk considers whether people could encounter those fibers, and under what conditions. The distinctions matter: the presence of a hazard doesn’t, by itself, establish that fibers are currently being released or that a person has been exposed.

Intact, undisturbed material presents a different situation from material that is deteriorating or will be cut, drilled, or removed. That difference doesn’t establish that intact material is safe to disturb. It means the assessment must account for its condition and the proposed activity. If work is needed, planned controls should follow documented conditions. An overview of asbestos abatement procedures describes methods intended to control fiber release during abatement work.

What factors determine whether asbestos fibers may be released?

Assessors consider the material type, its physical condition, whether it is friable (easily crumbled or reduced to powder by hand pressure when dry), and whether paint, a sealant, or another surface treatment remains intact. Location matters too. Material in a protected, low-traffic area may face different disturbance conditions from material beside a planned opening or in a frequently used space.

Vibration, abrasion, impact, cutting, drilling, removal, and gradual deterioration can damage material or its surface and change its release potential. A visual check can document visible damage, but appearance alone can’t reliably confirm asbestos content or establish whether fibers are airborne. For a planned project, identify which specific materials may be affected, where the work will occur, and how the work could contact or disturb them.

How does release potential differ from exposure risk?

Exposure requires a pathway: asbestos-containing material is disturbed or deteriorates, fibers become airborne, and people may breathe them in. The possibility of contact depends partly on the task’s duration, a person’s proximity, ventilation, and whether barriers separate the work area from occupied spaces. These factors help describe exposure conditions, but none can be assessed reliably in isolation from the material and planned work.

A sound conclusion draws on available evidence and site context, rather than relying on a single observation such as “the surface looks intact” or “dust is visible.” When material identity is uncertain, visual assessment alone can’t settle the question.

How Does an Asbestos Fiber Release Risk Assessment Work?

A useful assessment starts with the planned work, not just a snapshot of a material’s current appearance. A ceiling tile that seems intact may still be affected by a planned cut or removal. The purpose of an asbestos fiber release risk assessment is to connect what’s known about suspect materials to the specific activities, locations, and people involved, then document what remains uncertain.

What information should be gathered before the assessment?

Collect available building history, previous asbestos surveys, records of past abatement, and a clear description of the proposed work. Include drawings or notes showing where work will occur, what materials may be affected, and the expected sequence of activities. Record who may enter nearby areas and when, so the assessor can consider access and occupancy as well as the task itself. If the work plan changes, update the information before relying on the assessment to guide the next steps.

The practical sequence is:

  • Define the work: Identify the task, its boundaries, and any cutting, drilling, abrasion, or removal involved.
  • Review records: Compare available building and project documents, noting gaps or conflicting information.
  • Locate suspect materials: Map their location, estimated quantity, accessibility, condition, and proximity to occupants.
  • Evaluate disturbance: Consider how the work could affect each material, including areas that may be concealed or inaccessible.
  • Document findings: Relate observations and evidence to the planned task, then state appropriate next steps and unresolved questions.

Visual observations can identify suspect materials and visible damage, but they don’t confirm asbestos content. Where identity must be established, appropriate sampling and laboratory analysis may be needed. Sampling should be performed by qualified professionals using methods appropriate to the material and project. Don’t disturb a suspect material to collect a sample yourself.

What should an assessment report document?

A clear report identifies the areas reviewed, methods used, relevant limitations, observations, and any laboratory results. It should connect each finding to the specific planned activity rather than offering a general statement about the building. If air monitoring is selected for a particular purpose, the report should explain what it can and can’t establish. The EPA describes it as supplemental air monitoring to visual inspection.

The report should also state remaining uncertainties and document recommendations supported by the evidence, such as further evaluation, access restrictions, work controls, or an abatement scope when warranted. A recommendation doesn’t automatically mean every suspect material should be removed. Federal, state, and local requirements, as well as qualification expectations, can vary with the material and work. Confirm the rules and professional qualifications applicable to the specific project before proceeding.

When documented findings indicate that abatement is appropriate, they can help define a controlled scope. TSIAC International provides asbestos abatement, including containment, removal, compliance documentation, and safe disposal. Review its asbestos abatement services as one potential way to address a documented abatement scope, and confirm how responsibilities will align with the assessment records.

Visual Inspection, Sampling, or Air Monitoring: Which Answers the Question?

These methods answer different questions. An asbestos fiber release risk assessment may use one or more of them, depending on whether the priority is locating suspect material, identifying its composition, or measuring airborne fibers during defined conditions. OSHA’s overview of asbestos hazards provides workplace context, but method selection for a particular property and task depends on the evidence needed and applicable requirements.

Method Question it answers Main limitation
Visual inspection Where are suspect materials, and what visible damage or deterioration is present? Appearance can’t confirm asbestos content or reveal every concealed material.
Bulk sampling and analysis Does a collected material sample contain asbestos? A result applies to the sample analyzed. It doesn’t by itself establish airborne fiber levels or future exposure conditions.
Air monitoring What airborne fibers were measured at a particular location and time? The result reflects the sampling conditions and period, not every area, task, or future condition.

No single method answers every question about what a material contains, how a task may disturb it, and whether people may be exposed. The assessment connects the methods, where appropriate, to the project’s specific decision.

What can a visual inspection establish?

A visual inspection can map accessible suspect materials, note their location and condition, and document visible cracks, abrasions, deterioration, or disturbance. It helps identify where further evaluation may be needed. It can’t confirm composition: materials that look similar may differ, and asbestos-containing materials may be concealed inside walls, above ceilings, or beneath finishes. An informal walkthrough is not a substitute for an appropriately scoped asbestos survey.

When are bulk sampling or air monitoring considered?

When material identity matters to a work decision, qualified professionals determine whether bulk sampling is appropriate, which locations or materials to sample, and how samples should be collected and analyzed. Sampling itself can disturb material, so it shouldn’t be treated as a casual check or attempted without appropriate expertise. Verify applicable qualifications, laboratory methods, and interpretation requirements for the project and jurisdiction.

Air monitoring measures airborne fibers under defined conditions, such as a specified location and sampling period. It may help answer a question about conditions during that period, but it can’t identify the source material by itself or guarantee that another task or time will present the same conditions. Interpret the method and results in context, including the activity underway and the areas represented by the sample.

Asbestos Fiber Release Risk Assessment: A Practical Guide

What Should You Do When an Assessment Identifies Possible Release Risk?

Pause work that could disturb the suspect material. Don’t cut, drill, scrape, remove, or otherwise alter it while its identity and condition remain uncertain. If damage is present, limit access to the affected area as appropriate and keep people from contacting or disturbing the material. These are interim precautions, not a substitute for professional evaluation or a project-specific control plan.

What should happen before renovation or maintenance begins?

Before work resumes, give the relevant project professionals the available building records, assessment findings, and an exact description of the planned work. A scope that says “open the wall” may not be enough. Clarify where the opening will be, what materials may be affected, and how the work will be carried out. This allows the evaluation and work plan to address the actual disturbance, not just the material’s current condition.

Confirm who is responsible for checking applicable requirements and managing project responsibilities, including any required notifications, controls, documentation, and waste handling. Obligations can depend on the material, work, and jurisdiction, so verify them for the specific project rather than relying on a general checklist.

A practical decision path is:

  • Suspect material is damaged or may be disturbed: Pause the affected work and restrict access as appropriate.
  • Identity or condition is uncertain: Arrange evaluation by qualified professionals and share relevant records and the work scope.
  • Findings are available: Confirm the required controls, responsibilities, and next steps before work proceeds.
  • Work is ready to resume: Keep the decision and agreed scope documented, and ensure the people carrying out the work understand them.

When does assessment lead to abatement or additional controls?

Abatement isn’t an automatic result of every assessment. The decision should follow verified findings, the proposed task, and applicable requirements. Depending on those factors, qualified project professionals may determine that work can proceed with specified controls, that additional evaluation is needed, or that abatement is warranted. Select measures such as containment or removal for the project and carry them out within a defined scope, rather than treating them as interchangeable fixes.

A documented asbestos fiber release risk assessment helps connect those decisions to evidence: which material is involved, what work could affect it, and what controls are appropriate. No single precaution should be presented as eliminating every risk. Avoid do-it-yourself removal or improvised cleanup. Ask the responsible professionals to explain the planned controls, waste procedures, and how the work and decisions will be documented.

If the findings support abatement, TSIAC International provides asbestos abatement that includes containment, removal, compliance documentation, and safe disposal. Explore asbestos abatement support as a potential next step when the documented scope calls for it.

How Can a Qualified Abatement Contractor Support the Next Step?

When assessment findings indicate that specialist work may be needed, an abatement contractor can review available records and help align proposed work with the documented scope. The contractor should understand which materials and locations are involved, what renovation or maintenance activities are planned, and what decisions remain unresolved. This review supports coordination. It doesn’t replace an independent assessment or determine requirements outside the contractor’s role.

What should you ask an asbestos abatement contractor?

Ask how the proposed scope corresponds to the assessment findings and the exact work planned. If the findings identify material in one ceiling area, for example, clarify how the work boundary will be defined and how adjacent areas will be addressed. Request a clear explanation of proposed containment, occupant protection, work sequencing, and project documentation.

Before awarding work, confirm the contractor’s relevant qualifications for the specific project and clarify who is responsible for each project duty. Discuss how applicable regulatory responsibilities, required notifications, records, and waste handling will be addressed. Requirements can vary with the work and jurisdiction, so verify them for the project rather than relying on assumptions.

How do assessment findings support controlled project delivery?

Location-specific findings give the project team a practical reference for defining work boundaries, communicating which materials are involved, and coordinating the sequence of renovation or maintenance. Clear records can also identify limitations, areas requiring further evaluation, and decisions that need to be resolved before work begins. This reduces the chance that a crew acts on an unclear or outdated scope.

Use the assessment documentation to check that the contractor’s proposed measures match the materials and tasks described. Confirm what containment is planned, how affected occupants or nearby workers will be considered, what records will be provided, and how waste will be handled. Ask how changes to the work area or scope will be reviewed and documented before proceeding.

TSIAC International provides asbestos abatement, including containment, removal, compliance documentation, and safe disposal, and reports more than 15 years of industry experience. These services may be relevant when documented findings indicate that abatement is warranted. Review the proposed scope against the assessment records and confirm that project responsibilities are clearly assigned.

A well-documented asbestos fiber release risk assessment can help turn findings into a defined work scope, but the next step should follow the evidence and the project’s applicable requirements. If specialist abatement is indicated, the assessment records and planned work can help guide a discussion with TSIAC International about the abatement scope.

Make the Next Step a Documented One

An asbestos fiber release risk assessment is most useful when it connects material condition to the work planned and the people who may be affected. Visual inspection, material sampling, and air monitoring answer different questions, so interpret findings alongside their methods, limitations, and site context.

If material may be damaged or disturbed, pause the affected work while its identity and condition are evaluated. Then use documented findings to clarify work boundaries, responsibilities, and appropriate controls. Abatement isn’t automatic, but when specialist work is warranted, a defined scope helps guide a controlled response.

TSIAC International provides asbestos abatement, including containment, removal, compliance documentation, and safe disposal, and reports more than 15 years of industry experience. If your project findings indicate abatement may be needed, discuss an asbestos abatement project with TSIAC International. Share the relevant assessment records and planned work to start a conversation about the potential abatement scope.

Frequently Asked Questions

Can asbestos fibers be released from material that looks intact?

Yes, fibers may be released if apparently intact material is disturbed, damaged in a concealed area, or deteriorates. A sound-looking surface can’t confirm asbestos content or show what may happen during cutting, drilling, abrasion, or removal. Material that remains intact and undisturbed presents a different situation from material affected by work, but appearance alone can’t establish that it’s safe to disturb. Have uncertainty evaluated before renovation or maintenance begins.

Is a visual inspection enough to assess asbestos fiber release risk?

No. A visual inspection can document accessible suspect materials and visible damage, but it can’t confirm asbestos content or measure airborne fibers. A qualified professional may recommend bulk sampling and laboratory analysis to identify material, or air monitoring to measure airborne fibers under defined conditions. The appropriate method depends on the question, planned work, and available evidence. An informal walkthrough shouldn’t replace an appropriately scoped asbestos evaluation.

How is asbestos fiber release risk assessed before renovation or demolition?

An asbestos fiber release risk assessment begins by defining the exact work, including where and how materials may be disturbed. The assessor reviews available building records, identifies suspect materials, evaluates their condition and location, and considers who may be nearby. If material identification is needed, qualified professionals may arrange appropriate sampling and analysis. Findings and limitations should be documented, with next steps matched to the evidence and applicable project requirements.

Does an air test show whether asbestos-containing material is present?

No. An air test measures airborne fibers in a particular location during a specified sampling period; it doesn’t identify which building material contains asbestos. A result also represents the conditions during sampling, not necessarily other rooms, tasks, or times. To determine whether a material contains asbestos, qualified professionals may collect a bulk sample for laboratory analysis. The methods answer different questions, so results should be interpreted in context.

What should I do if damaged material may contain asbestos?

Don’t touch, cut, sweep, or remove it. Pause nearby work that could disturb the material, keep people away from the affected area as appropriate, and contact the person responsible for the building or project. Share what you observed and any available records with a qualified asbestos professional for evaluation. Avoid collecting a sample or cleaning debris yourself. Follow project-specific guidance before allowing renovation or maintenance to resume.

Who should assess asbestos fiber release risk at a property?

Ask a qualified asbestos professional whose training, credentials, and experience match the assessment needed and applicable project requirements. Clarify whether the professional is evaluating material condition, arranging sampling, interpreting results, or assessing potential exposure during planned work. These roles may involve different responsibilities. Verify relevant qualifications and applicable federal, state, and local requirements before work begins. An abatement contractor may review records and perform abatement, but don’t assume they provide assessment or testing.

When does an asbestos risk assessment lead to abatement?

An assessment leads to abatement when verified findings, the planned work, and applicable requirements support specialist intervention. It doesn’t automatically mean every suspect or confirmed material must be removed; the appropriate response depends on the material’s condition and how the project may affect it. TSIAC International provides asbestos abatement, including containment, removal, compliance documentation, and safe disposal. The company reports more than 15 years of industry experience.

Challenges of Gutting a Historic Property: A Practical Guide

A broader interior gut may seem like the simplest way to prepare a historic property for renovation, but removing more can also mean losing features…

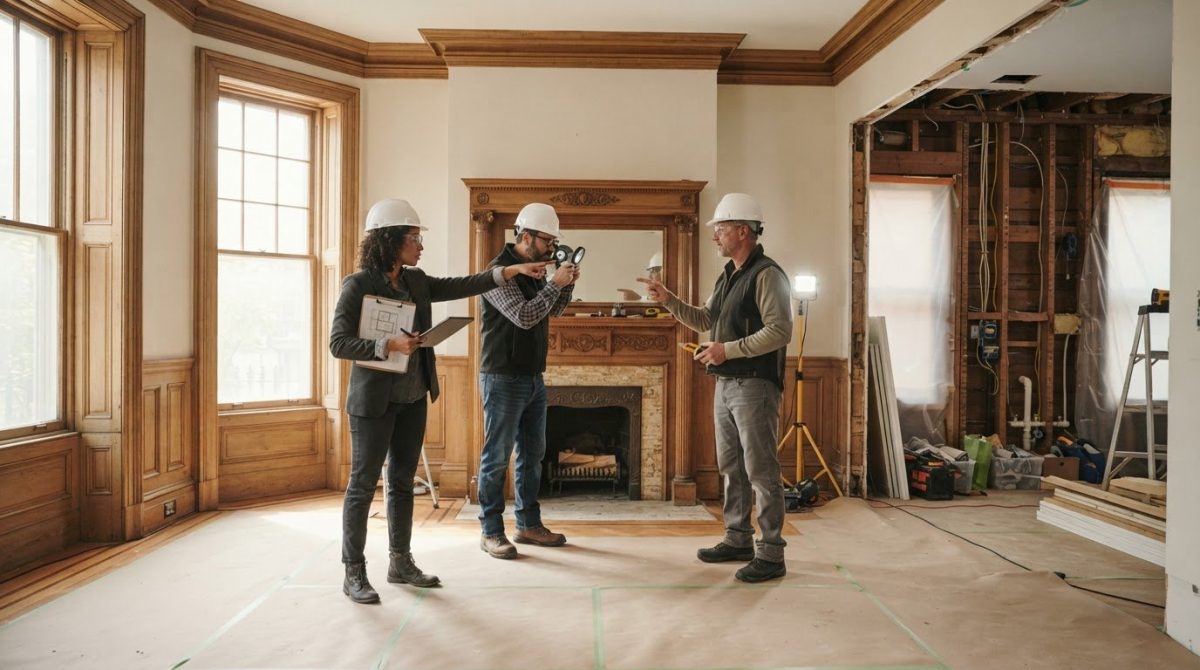
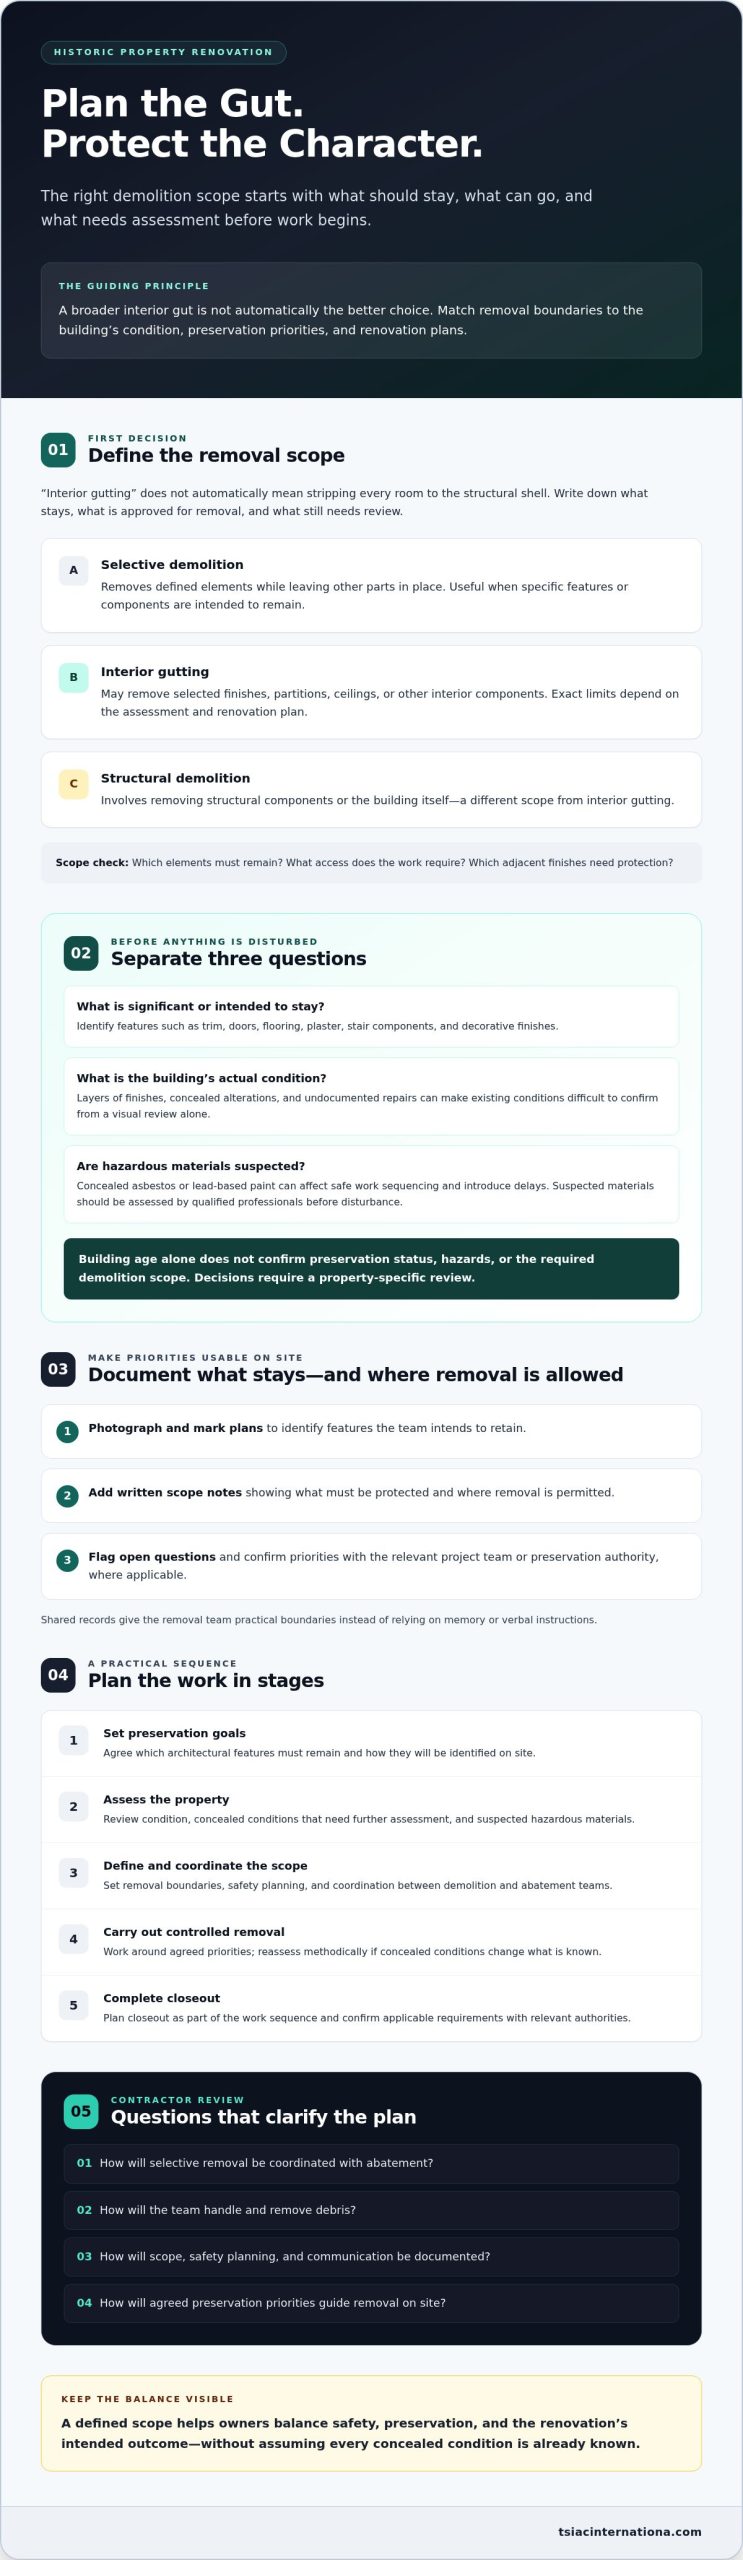
A broader interior gut may seem like the simplest way to prepare a historic property for renovation, but removing more can also mean losing features that give the building its character. The challenges of gutting a historic property begin with deciding what should stay, then planning removal around those priorities while accounting for fragile materials and concealed hazards.

It’s reasonable to be concerned about what demolition might uncover. Older finishes, trim, flooring, and other architectural details may warrant protection, while concealed asbestos or lead-based paint can affect the safe sequence of work and introduce delays. The right scope depends on the property’s condition, preservation goals, and renovation plans, not on a one-size-fits-all approach.

This guide explains how to set preservation priorities before work begins, why hazardous-material assessment matters to project planning, and how selective demolition compares with a broader interior gut. With a defined scope and demolition and abatement teams coordinating removal around agreed priorities, owners can make informed decisions while balancing safety, preservation, and the renovation’s intended outcome.

Key Takeaways

  • The challenges of gutting a historic property are easier to manage when removal boundaries are based on preservation priorities and the building’s assessed condition.
  • Distinguish interior gutting from selective removal and structural demolition to define a scope that fits the renovation.
  • Compare selective demolition with a broader gut by considering which elements must remain and what access the work requires.
  • Plan the work in sequence, from setting preservation goals and assessing the property to removal and closeout; confirm applicable requirements with the relevant authorities.
  • When evaluating contractors, ask how they coordinate selective removal and abatement, handle debris, and document scope, safety planning, and communication.

Why Gutting a Historic Property Requires More Planning Than Standard Interior Demolition

A gut renovation can be less predictable in an older building because the visible room rarely tells the whole story. Finishes may cover earlier alterations, repairs may be undocumented, and details worth retaining can sit beside materials the renovation plan calls for removing. The challenges of gutting a historic property come from managing these conditions without letting the demolition scope erase features the owner intends to preserve.

Interior gutting generally means removing selected interior finishes and components to prepare a space for renovation. It doesn’t automatically mean stripping every room to the structural shell. Selective demolition removes defined elements while leaving others in place; structural demolition involves removing structural components or the building itself and is a different scope. The right approach supports the project’s intended adaptive reuse while following the agreed preservation priorities.

What does gutting a historic property involve?

The scope might include finishes, partitions, ceilings, or other interior components, but the exact limits depend on the assessment and renovation plans. Original trim, doors, flooring, or decorative features may be retained, while later additions may be approved for removal. Documenting what stays and what goes gives the removal team practical boundaries and helps prevent assumptions from becoming irreversible decisions.

Why can an older building be less predictable?

Layers of finishes, concealed alterations, and undocumented repairs can make existing conditions difficult to confirm from a visual review alone. Fragile materials or unusual assemblies may also call for controlled removal rather than broad, forceful methods. Concealed hazardous materials can affect the work sequence, so suspected materials should be assessed by qualified professionals before disturbance. Verify applicable requirements for the property and jurisdiction.

Age raises the need for investigation; it doesn’t, by itself, determine preservation status, hazards, or the required work. A building’s age alone can’t confirm that a feature is protected, that a material is hazardous, or that a particular demolition scope is appropriate. Those decisions require a property-specific review.

Before removal begins, owners and project teams should align on:

  • Which architectural features must remain, and how they’ll be identified on site.
  • Which components are approved for removal, including any limits around adjacent finishes.
  • What conditions need further assessment before work proceeds.

This definition of the work is a starting point, not a guarantee that every concealed condition is known. A clear scope gives the team a basis for responding methodically if discoveries require reassessment, while keeping preservation goals central to removal decisions.

How Preservation Priorities, Building Conditions, and Hazardous Materials Shape the Work

Once the initial scope is defined, connect preservation goals with the conditions found on site. A feature may look original but need review before it’s designated for retention; a wall that appears straightforward to remove may conceal earlier work or materials that need assessment. Separating these questions early helps teams set removal boundaries that reflect both the renovation plan and the property’s specific needs.

Which architectural features should be documented before removal?

Identify the details the project team intends to keep, such as trim, doors, flooring, plaster, stair components, or decorative finishes. Record them with photographs and marked plans, then add written scope notes showing what must be protected and where removal is permitted. Confirm priorities with the relevant project team or preservation authority, where applicable, before work begins. Clear records give the demolition team a shared reference instead of relying on memory or verbal instructions.

Historic significance, physical condition, and hazardous-material status are separate questions; one does not establish the answer to the others. A feature can merit preservation while being damaged, and a building’s age alone can’t confirm the presence or absence of asbestos or lead-based paint. Those materials require qualified evaluation based on the property and planned work.

How do concealed hazards affect a historic gut renovation?

Suspect materials should be assessed before disturbance, and owners should verify applicable requirements with relevant authorities for the property’s jurisdiction. If asbestos or lead is identified, abatement planning can affect which areas are accessible, the order in which removal proceeds, and how work areas are contained. It also informs how affected debris must be handled. Coordinating demolition and abatement keeps these decisions connected to the agreed preservation boundaries.

For hazardous-material assessment and planning, consult qualified specialists and confirm that their recommendations address the specific property, planned work, and applicable requirements.

The challenges of gutting a historic property aren’t resolved by choosing preservation or safety in isolation. Documented priorities, condition findings, and hazardous-material assessments each inform the work plan. Ask demolition and abatement teams how they’ll coordinate removal around identified features, communicate newly discovered conditions, and manage debris, including recyclable materials where appropriate. For projects requiring selective demolition or interior gutting, review the contractor’s scope and abatement capabilities to see whether the proposed plan matches the project’s priorities.

Selective Demolition or Full Gutting: Choosing the Right Scope for a Historic Building

The choice isn’t simply between removing a little or removing everything. Selective demolition targets specific components while retaining others; broader interior gutting removes more finishes and interior elements to support a renovation with a wider scope. The appropriate method depends on what the project needs, what the property can retain, and what assessment reveals. A larger removal scope is not automatically faster, safer, or more suitable for a historic building.

Use these factors to compare approaches before setting the demolition scope:

Decision factor Selective demolition Broader interior gutting
Project goals Targets defined components or areas while retaining other interiors. Supports renovation plans that call for extensive interior removal.
Preservation needs Can suit a plan to retain significant rooms, finishes, or assemblies. Requires clear decisions about which features can be removed and which must remain.
Assessment findings Boundaries can be shaped around identified conditions and retained elements. Should proceed only when condition findings and preservation decisions support the broader scope.
Coordination requirements Demolition and renovation teams need precise limits around retained areas. Teams must coordinate the wider removal scope with assessment findings and the renovation sequence.

When might selective demolition suit a historic property?

Selective removal may fit a project that keeps original finishes in one room, retains a staircase, or removes only specific partitions and later additions. Its narrower scope calls for especially clear boundaries: identify what remains, mark where removal stops, and coordinate the work with renovation teams so retained materials aren’t damaged. For related scope concepts, consult this selective demolition guide.

When might a broader interior gut be considered?

A broader gut may be considered when the approved renovation plan requires extensive interior removal, but it isn’t a default choice for an older property. Assessment findings and preservation decisions should establish what can be removed, what must be protected, and whether any conditions require additional review before work proceeds. The final scope should reflect the building, not an assumption that wider removal is inherently simpler.

Preserving more material can mean more protection measures, tighter removal boundaries, and careful sequencing around retained rooms or features. That added coordination is part of the scope, not a reason to remove more by default. The challenges of gutting a historic property are best addressed by comparing both approaches against documented project goals and assessment findings, then choosing the least extensive method that still supports the renovation plan.

Challenges of Gutting a Historic Property: A Practical Guide

How to Plan a Historic Property Gut: A Practical Sequence for Owners and Project Teams

A controlled project moves from preservation decisions to assessment, scope, removal, and closeout. The sequence matters: if teams define removal boundaries before clarifying what must remain or assessing suspect materials, they may need to pause and revise the plan. Permit and preservation-review requirements vary by property and jurisdiction, so confirm them with the relevant authorities before scheduling work.

What should owners establish before requesting proposals?

Collect the information available, even if it’s incomplete. Existing plans, records of previous renovations, photographs, and known preservation requirements can help bidders understand the building and identify gaps that need investigation. Mark each area or feature as intended for retention, approved for removal, or requiring further review.

Then ask bidders to describe their assumptions and exclusions, what assessment they expect before work, and who will coordinate demolition with abatement and other project teams. Proposals are easier to compare when they respond to the same written scope. Include protection boundaries, known hazard findings, and a process for reviewing conditions that differ from the information provided.

How should removal work be coordinated on site?

Before crews begin, review the marked plans and written scope together. Confirm which features require protection, where removal may proceed, and how the team will communicate if it encounters concealed materials, unexpected repairs, or conditions that don’t match the assessment. Document discoveries and have the appropriate project representatives review them before changing the scope. This keeps field decisions traceable and reduces the risk of unapproved removal.

A practical sequence is:

  • Set priorities: Identify preservation goals and verify which reviews or approvals may apply.
  • Assess: Gather available records, inspect relevant conditions, and arrange qualified evaluation of suspect materials before disturbance.
  • Define: Document removal limits, retained features, protection needs, assumptions, and coordination responsibilities.
  • Coordinate: Confirm site boundaries and communication procedures before work starts; review unexpected conditions before proceeding beyond the agreed scope.
  • Close out: Review completed work against the scope and document material handling, including separation for recycling where materials and project conditions allow.

These steps give owners a usable framework for managing the challenges of gutting a historic property without assuming every building or jurisdiction follows the same process. Use the sequence to discuss assessment, written scope, work coordination, and closeout with prospective contractors, and verify project-specific requirements with the relevant authorities.

For a historic-property project, discuss demolition and abatement scope with TSIAC International as part of evaluating how the work can align with documented preservation priorities.

Choosing a Historic-Gutting Contractor: Turn Preservation Goals Into a Controlled Plan

Historic gutting requires a contractor who can work to defined boundaries, communicate clearly about discoveries, and coordinate removal with preservation and hazard-assessment decisions. A confident promise isn’t a substitute for a proposal that explains the work. Evaluate the scope, safety planning, communication process, and documentation you can review before choosing a team.

What should a contractor proposal explain?

Look for a written description of what will be removed and what must remain. The proposal should identify protection measures for retained features, note assumptions and exclusions, and explain how assessment findings will shape the work. Ask how the team will respond if concealed conditions differ from expectations, including who reviews a proposed scope change and how that decision is recorded.

Use these questions to compare contractors:

  • What experience do you have with older or historic buildings, and how will that experience inform this project’s removal plan?
  • How will crews distinguish approved removal areas from features and assemblies designated for retention?
  • How will potential asbestos or lead findings affect abatement coordination, work sequencing, and site protections?
  • How will debris be sorted, handled, and directed for recycling where materials and project conditions allow?
  • What documentation will owners receive about scope, unexpected conditions, and completed work?

Clear answers let you assess whether the contractor understands the project’s constraints without relying on unsupported guarantees. The challenges of gutting a historic property call for a plan that connects preservation boundaries, assessment information, and safe work practices.

How can TSIAC International support a carefully scoped gut renovation?

TSIAC International provides interior gutting, selective demolition, asbestos abatement, lead abatement, and recycling services. The company has more than 15 years of industry experience. For a specific property, ask how the proposed scope would address retained features, assessment findings, abatement coordination, and debris handling. The right method depends on the project’s documented needs, not a one-size-fits-all approach.

Review the proposal for defined responsibilities, clear communication, and a process for documenting changes before work proceeds. These practical details help owners determine whether the contractor’s approach aligns with the project’s preservation priorities and requirements.

Discuss your demolition or abatement project with TSIAC International to review project requirements and consider suitable next steps.

Set the Scope Before Work Begins

The challenges of gutting a historic property are easier to manage when preservation priorities, building conditions, and removal boundaries are considered together. Document the features to retain, assess suspected hazards before disturbance, and verify applicable preservation reviews and requirements with the relevant authorities.

Choose selective demolition or broader interior gutting based on the property’s condition and approved renovation scope, not on assumptions that more removal is automatically simpler. A clear proposal should explain protections, hazard coordination, debris handling, and how unexpected conditions will be reviewed and documented.

TSIAC International provides interior gutting, selective demolition, asbestos abatement, lead abatement, and recycling services. The company implements recycling practices for wood, metal, and plastic on project sites and has more than 15 years of demolition and abatement experience.

To discuss your project’s requirements and potential next steps, Discuss your historic-property gutting project with TSIAC International. With careful planning and a scope grounded in the building’s specific needs, you can move forward with greater clarity and confidence.

Frequently Asked Questions

What is the biggest challenge when gutting a historic property?

The central challenge is matching the removal scope to preservation priorities while accounting for concealed building conditions. Older construction may contain altered assemblies, fragile finishes, or materials that need assessment before disturbance, but these are possibilities, not assumptions about every property. A building survey, written scope, and coordinated project team help owners decide what to retain, what to remove, and what requires further evaluation before work begins.

Can you gut a historic property without damaging its character?

Sometimes, depending on the renovation scope and which features carry architectural or historical value. Selective demolition may allow designated materials or spaces to remain, but protection measures and removal boundaries need to be planned in advance. No method can guarantee that every feature will be unaffected. Document preservation priorities, confirm them with the project team, and verify any applicable preservation requirements with the relevant authorities before work starts.

Do historic properties need asbestos or lead testing before gutting?

Age alone can’t confirm whether asbestos or lead is present, so suspect materials should be evaluated by qualified professionals before disturbance. Applicable assessment and work requirements depend on the property and jurisdiction, and should be confirmed with qualified specialists and relevant authorities. Findings can affect sequencing, containment, and debris handling. Addressing these questions before removal helps the project team plan based on identified conditions rather than assumptions.

Is selective demolition better than a full gut for a historic building?

Neither approach is universally better. Selective demolition may suit a project that retains identified finishes, rooms, or interior assemblies, while broader interior gutting may fit a renovation requiring more extensive removal. The appropriate scope depends on preservation goals, building condition, hazard findings, and design needs. Compare proposals by reviewing removal boundaries, protection measures, and coordination plans, rather than choosing based on the method’s label alone.

How do you protect historic features during interior demolition?

Begin by identifying and documenting the features intended to remain. Photographs, marked plans, and written scope notes can show crews where protection is required and where removal may proceed. Confirm protection measures and work boundaries before demolition starts, then monitor conditions as work progresses. If unexpected conditions arise, document and review them before changing the scope. Specific measures should reflect the materials, project design, and site assessment.

What should I ask a contractor before gutting a historic property?

Ask how the contractor defines removal boundaries, protects retained features, coordinates hazardous-material assessment, and documents unexpected conditions. Request clear information about proposal assumptions, exclusions, debris handling, and communication with other project professionals. Also confirm that relevant qualifications and applicable requirements are appropriate for the work and jurisdiction. A useful proposal should explain responsibilities and the process for addressing new findings, so owners can evaluate the plan before work begins.

Can historic-building materials be recycled during a gut renovation?

Some materials may be suitable for reuse or recycling, but their condition, composition, contamination status, and available processing options matter. A feature may also have preservation value, making removal inappropriate. Discuss material sorting and recovery with the project team before demolition, and confirm how each material can be handled responsibly. TSIAC International implements recycling practices for wood, metal, and plastic on project sites, but not every removed material can be recovered.

How to Dispute a Demolition Contractor’s Invoice: A Practical Checklist

The final demolition invoice arrives, but added labor, equipment, or disposal charges don’t appear in the accepted bid. Before assuming there’s an…

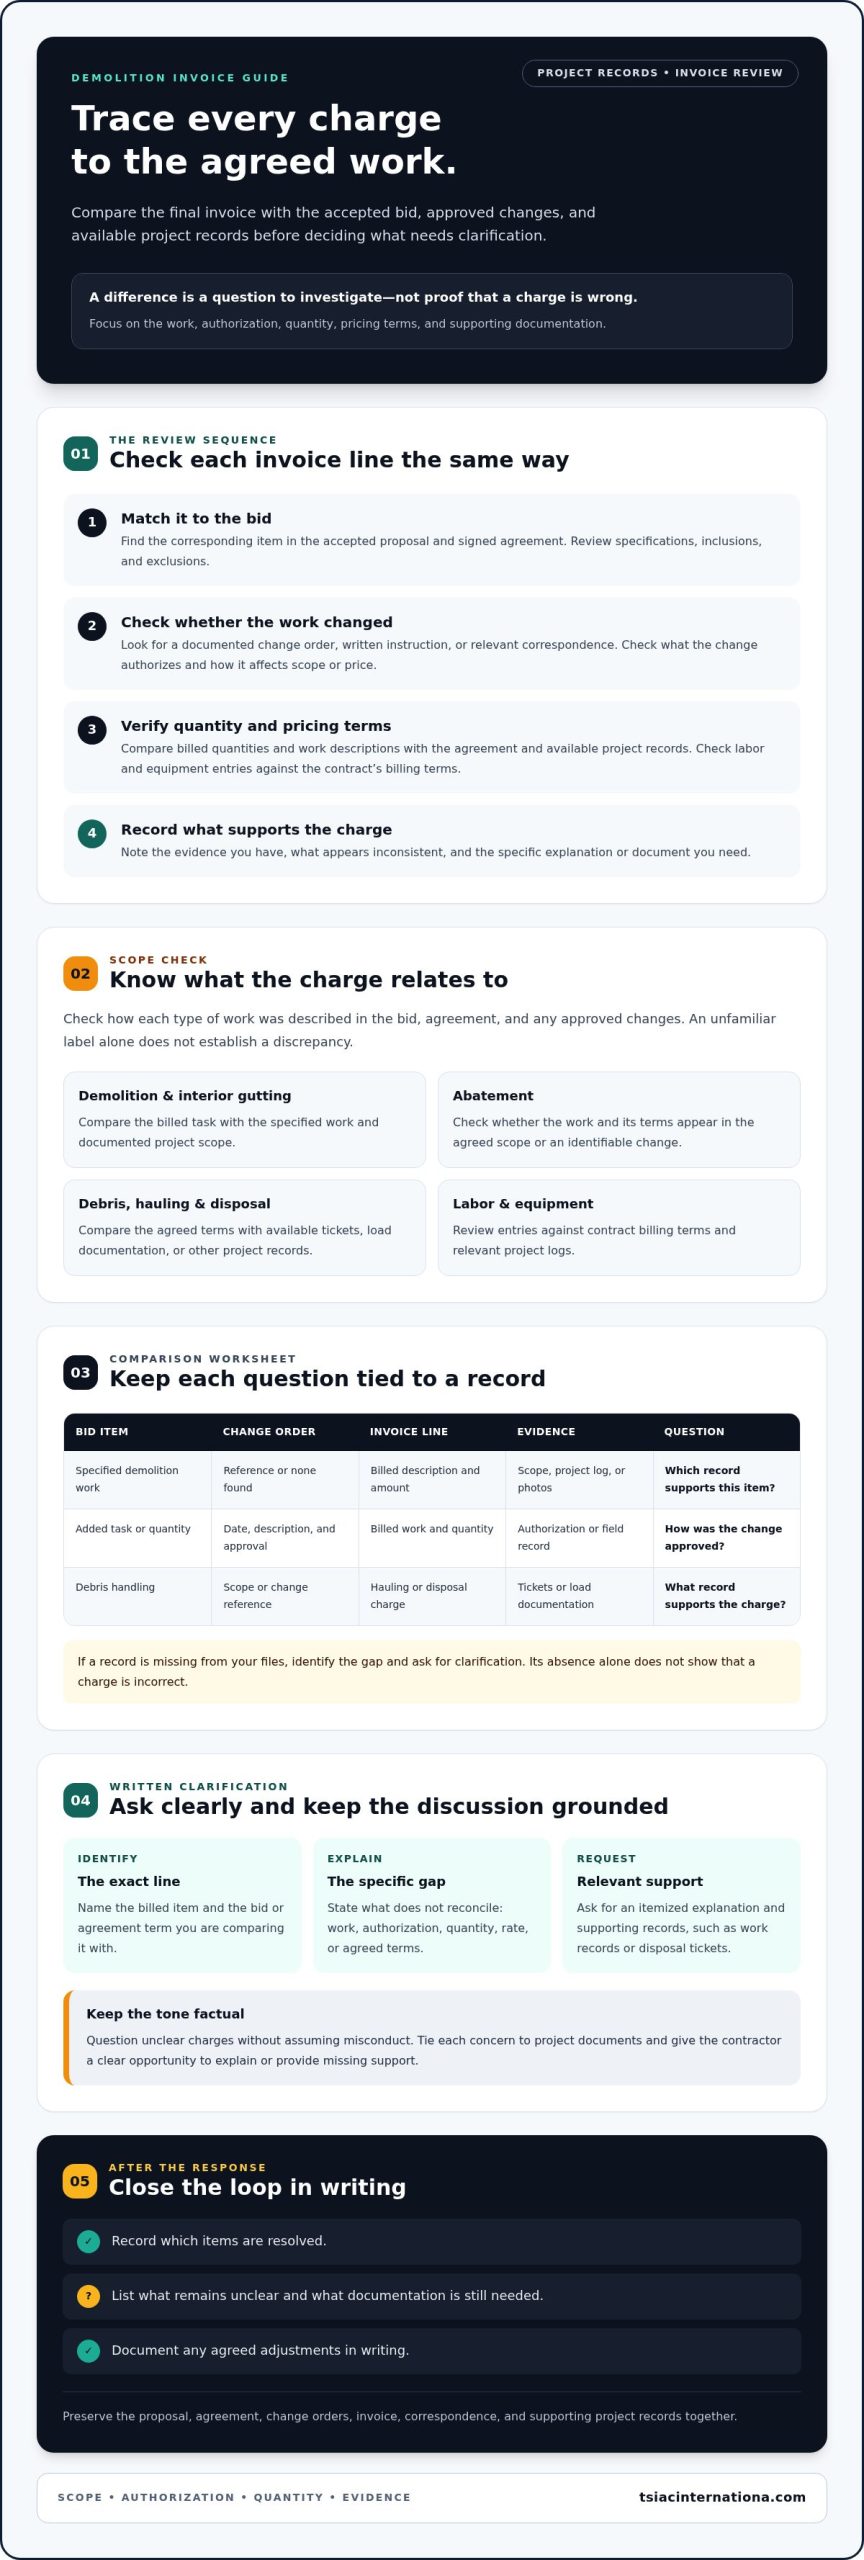
The final demolition invoice arrives, but added labor, equipment, or disposal charges don’t appear in the accepted bid. Before assuming there’s an error or accusing the contractor of overbilling, use a demolition bid comparison checklist to trace each charge to the agreed scope, exclusions, and any approved changes. A clear comparison can show whether a line item needs explanation or reflects work documented during the project.

It’s reasonable to question charges that are unclear or differ from what you expected. Demolition work can involve changing site conditions and separate handling of debris or hazardous materials. The key is to ask for specifics and keep the discussion grounded in project records.

This guide explains how to compare the invoice with the proposal and change orders, record discrepancies, and request an itemized explanation with supporting documents such as work records or disposal tickets. It also covers how to raise questions calmly and preserve project communications as you consider next steps.

Key Takeaways

  • Focus on specific differences in billed work, quantities, rates, or agreed terms, not unfamiliar wording alone.
  • Use a demolition bid comparison checklist to match each invoice line with the original scope, any change order, and available supporting records.
  • Check how demolition, interior gutting, abatement, disposal, and other charges were scoped before deciding whether an item needs clarification.
  • Send a written, itemized request that identifies each question and asks for the relevant explanation or documentation.
  • After the contractor responds, record which items are resolved, what remains unclear, and any agreed adjustments in writing.

When Does a Demolition Invoice Justify a Closer Review?

A higher final total or unfamiliar line item is a reason to check the project records, not proof on its own that the invoice is wrong. A useful question is specific: does the charge match the agreed work, an authorized change, the recorded quantity, and the terms used to calculate it? An unfamiliar charge may still be supported by the accepted bid, contract, or written project instruction.

An invoice discrepancy is a billed item that cannot be reconciled with the agreed scope, an identifiable authorization, the recorded quantity, or supporting project documentation. Keep the distinction clear: asking for evidence is not the same as alleging misconduct. A demolition bid comparison checklist helps organize the review around what the documents show.

Which documents establish the agreed demolition scope?

Review the accepted proposal and signed agreement together, including specifications, inclusions, and exclusions. Gather approved changes, written instructions, and relevant project correspondence as well. A change order records a modification to the original agreement. Check whether added work or revised quantities appear in a written approval, and how that approval affects the price or scope.

Keep the final invoice with those records rather than treating it as a stand-alone document. For context on how work may progress through project stages, consult this demolition process guide.

Which invoice differences deserve clarification?

Flag charges for work that doesn’t appear in the original scope or an identifiable approved change. Also mark descriptions too broad to identify the task, and quantities that don’t align with field reports or completion records. For example, if the invoice lists a quantity of removed material, ask which project record supports that measurement and how it was calculated.

Review the accepted proposal, approved changes, and invoice side by side. For each difference, note the invoice line, the document it appears to conflict with, and the question you need answered. This gives the contractor a clear opportunity to explain an unfamiliar but agreed charge or provide missing support. If the documents still don’t reconcile, you’ll have a precise issue to discuss instead of a general objection.

How to Compare a Demolition Invoice With the Bid and Change Orders

Use the same sequence for every invoice line: identify the corresponding bid item, check whether the work changed, confirm the billed quantity and pricing method against the agreement, then note the record that supports the charge. This makes the review specific and repeatable. A written estimate and carefully reviewed contract provide useful reference points, as consumer protection officials also advise.

Check each change order against its documented approval, the work it authorizes, and the pricing method it records. Don’t treat an entry as approved or improper simply because a record is missing from the files you have. Identify the gap and request clarification.

Reconcile added demolition work and change orders

For each added task, compare its description and date with the written authorization and agreed pricing method. Field directives or revised drawings may help explain why the original demolition scope changed, but check whether the project documents show how the change was approved. If the record is incomplete, flag it as an open question rather than assuming the work was authorized or unauthorized.

Review quantities, labor, equipment, and debris handling

Compare billed quantities and work descriptions with available daily reports, photographs, completion records, or other project documentation. Check labor and equipment entries against the contract’s billing terms and project logs. For hauling, disposal, or recycling charges, look for records such as tickets or load documentation, then compare them with the agreed scope. If a particular record isn’t in your files, ask for it. Its absence alone doesn’t show that the charge is incorrect.

Use a working table to make mismatches visible and keep each question tied to its supporting document:

Bid item Change order Invoice line Evidence Question
Specified demolition work Reference or none found Billed description and amount Scope, project log, or photos Which document supports this item?
Added task or quantity Date, description, and approval Quantity and pricing method Directive, revised drawing, or ticket How was the billed quantity determined?

For lump-sum work, compare the billed item with the contracted scope rather than trying to infer a unit price. For unit-rate work, check the measured quantity and applicable rate. For allowances or time-and-material terms, use the contract’s stated basis and available records of the work performed. Don’t substitute one billing method for another.

Once the table shows where the documents align and where they don’t, you can ask focused questions. The same scope and pricing details can help when discussing a future demolition project with TSIAC International.

Which Demolition Charges Need Evidence Before You Accept Them?

Review each charge against the written agreement and work records, not the line-item label alone. A demolition invoice may combine structural or selective demolition, interior gutting, debris handling, recycling, or separately scoped abatement. These categories can involve different tasks and documentation. An unfamiliar charge may still be covered by the accepted scope; if an unexpected charge can’t be traced to the agreement or an approved change, ask for clarification.

Use your demolition bid comparison checklist to note the billed item, relevant contract language, available records, and remaining question. Don’t call a charge invalid without evidence. The agreement and documented work determine what needs an explanation. Industry-wide price assumptions won’t establish whether a particular line is supported.

Check debris, hauling, disposal, and recycling entries

Start with the agreement. Does it include debris handling, specify separate hauling or disposal charges, or describe sorting and recycling as part of the work? If the invoice includes a separate entry, request records referenced by the contract or used to support the charge, such as applicable weight tickets, hauling logs, or disposal documentation. Compare those records with the billed description and project scope. If wood, metal, or other materials were sorted for recycling, check whether that activity was included, separately authorized, or excluded.

The distinction between removing selected interior components and broader demolition can affect what the scope describes. For more context, see this commercial interior gutting guide.

Separate abatement work from demolition billing

Check whether asbestos or lead abatement appears in the original agreement or was authorized separately. Compare invoice task descriptions with the contract and available project records, keeping abatement entries distinct from demolition or interior gutting unless the documents combine them. If the invoice doesn’t identify what work was performed or how it relates to the agreed scope, ask for an itemized explanation and relevant supporting records. A document missing from your files is a question to resolve, not proof that the work was unauthorized.

This hazardous material abatement guide provides broader work-context information. If a disagreement progresses beyond an information request, the applicable process depends on the contract and circumstances. The formal dispute process discussed by PilieroMazza concerns government-contract claims, so it shouldn’t be assumed to govern a private demolition project.

How to Dispute a Demolition Contractor’s Invoice: A Practical Checklist

How to Raise a Demolition Invoice Dispute Clearly and Professionally

Once you’ve identified a line that doesn’t reconcile with the contract or project records, put your question in writing. A focused request gives the contractor a clear opportunity to explain the charge or provide supporting documents. Keep the message factual: identify what you’re comparing, describe the mismatch, and state what information would help resolve it.

Before sending the request, check the agreement for communication, payment, and dispute procedures. Requirements can depend on the contract and applicable law, so don’t assume a deadline or legal right based on general guidance. If you’re unsure how a term applies or what to do about payment, consult a qualified attorney.

Prepare a concise invoice clarification request

Include the invoice number and project reference, then list each questioned item separately. For each one, identify the invoice description, the bid or approved change you’re comparing it with, and the specific point that needs clarification. Attach only relevant pages or records, with filenames or labels that make them easy to identify. This keeps the exchange organized and avoids burying the issue in unrelated project material.

For example, ask, “Please explain how this labor entry relates to the approved scope and provide the supporting work record.” Request an itemized response and suggest a reasonable time to discuss any items that remain unresolved. Avoid threats or claims about legal rights you haven’t verified. If the contract permits separate treatment, distinguish amounts you accept from entries you’re asking about. Check the contract before assuming how payment should be handled.

Keep a reliable project and communication record

Save the signed agreement, accepted bid, invoices, change orders, relevant correspondence, photographs, and site records together. Keep copies of your request and the contractor’s response. After a call or meeting, make a dated note of who participated, what was discussed, and any promised follow-up. If the parties agree to a correction or another action, ask for that understanding in writing so both sides can refer to the same record.

Use the communication channel named in the contract, if one is specified, and retain evidence that your message was sent. A demolition bid comparison checklist keeps each question tied to its supporting document, while a clear record helps prevent unresolved details from getting lost in later discussions.

For future demolition or abatement work, the scope documentation and project services offered by TSIAC International can be part of the planning conversation.

Next Steps After Contractor Responds to Invoice Dispute

Assess the contractor’s reply against your question, the original agreement, approved changes, and supporting project records. A response is useful when it explains the specific line item and identifies documentation that helps reconcile it. If the contractor sends a revised invoice, compare its descriptions and amounts with the earlier version, then save both so the changes remain clear.

Evaluate explanations, corrections, and remaining disagreements

Update your review record line by line. Mark each item as resolved, still requiring evidence, or unresolved after the response. For an agreed correction, request a revised invoice or written confirmation stating the corrected description or amount. Record any agreed payment treatment in writing, and check it against the contract before acting.

Don’t assume that silence, a partial payment, or a verbal conversation changes either party’s rights or obligations. If a material issue remains, follow the contract’s stated dispute procedure and seek qualified legal advice before taking legal or payment action. Relevant rights and deadlines may depend on the contract and applicable jurisdiction.

Reduce invoice disputes on future demolition projects

Clear project documents make later billing easier to review. Before work begins, define what the scope includes and excludes, including boundaries for structural removal, selective demolition, interior gutting, and any separately scoped asbestos or lead abatement. Agree how changes will be approved and recorded, and specify how quantities, labor, equipment, disposal, and recycling will be documented and billed.

A practical demolition bid comparison checklist can also guide future bid reviews: confirm that proposals describe comparable work and state their billing basis clearly. Keep the accepted scope, written changes, and project records together as work progresses. That gives both parties a consistent reference if questions arise at closeout.

For future work, TSIAC International’s demolition and abatement services include structural and selective demolition, interior gutting, and hazardous-material abatement. See TSIAC International’s demolition and abatement services.

Make Your Next Step Clear and Documented

A demolition invoice review is strongest when each question points to a specific difference between the invoice, agreed scope, approved changes, and available project records. Use a demolition bid comparison checklist to organize those details, request explanations in writing, and record which items are resolved. If questions remain, follow the contract’s procedures and get qualified advice before taking legal or payment action.

Clear scope boundaries and documented changes can also make future project closeout more straightforward. TSIAC International brings over 15 years of demolition and abatement industry experience, with capabilities in structural and selective demolition, interior gutting, and hazardous-material abatement. Its project-site recycling practices include wood, metal, and plastic.

Discuss your demolition or abatement project with TSIAC International. A well-documented plan gives you a more dependable starting point for the work ahead.

Frequently Asked Questions

How do I dispute a demolition contractor’s invoice?

Compare the invoice with the accepted bid, signed contract, approved changes, and available project records, then raise specific questions in writing. Identify each line item, explain which document or quantity it doesn’t appear to match, and request an itemized explanation or supporting records. Keep the tone factual and save the correspondence. Before withholding or changing payment, check the contract’s procedures and seek qualified legal advice if your rights or obligations are unclear.

Can I dispute a demolition charge that was not included in the original bid?

You can ask for clarification, but a charge absent from the original bid isn’t automatically invalid. Check the contract for exclusions, allowances, separate billing terms, and approved changes that may explain it. Ask the contractor to identify the authorization, work performed, and pricing basis for the charge. If the records don’t resolve the question, document the remaining discrepancy and follow the contract’s communication and dispute procedures.

What documents should I gather before questioning a demolition invoice?

Gather the signed agreement, accepted bid, scope specifications, inclusions and exclusions, invoices, and any approved change orders or written instructions. Add relevant correspondence, field reports, photographs, completion records, and applicable labor, equipment, hauling, or disposal documentation. You don’t need to send every project file with your first question. Select the records that show the specific difference you’re asking about, and keep a complete copy of the project documents for your records.

What should a written demolition invoice dispute include?

Include the invoice number, project reference, and each questioned line item. For every item, state what document you’re comparing it with and why the description, quantity, authorization, or billing method needs clarification. Identify relevant attachments and request an itemized explanation or supporting records. Keep the message professional, avoid unverified accusations, and suggest a time to discuss unresolved questions. Check the contract for any required communication method or dispute procedure.

How do I compare a demolition invoice with approved change orders?

Match each changed invoice item to the relevant change order, then compare the documented approval, date, work description, quantity, and pricing method. Check that the invoice reflects the work the change authorized, and review supporting records where available. A demolition bid comparison checklist can help track the original bid item, change order, invoice line, evidence, and outstanding question. If approval or scope is unclear, ask for clarification rather than assuming the item was accepted or rejected.

Can a contractor charge separately for debris hauling or disposal?

Separate hauling or disposal charges may be appropriate if the contract treats them as separate, excludes them from the bid, or documents an authorized change. Check the scope and billing terms before deciding whether the charge needs clarification. If supporting records are available or referenced in the agreement, request applicable hauling logs, weight tickets, or disposal documentation. Don’t rely on a general assumption about industry practice; the project agreement and records are the relevant reference points.

What happens if the contractor and property owner cannot resolve an invoice dispute?

Review the contract for the process that applies to unresolved billing questions, and keep records of the disputed items, responses, and any proposed corrections. The next steps and time limits can depend on the contract and applicable jurisdiction, so don’t assume one process applies everywhere. Before taking legal or payment action, consult a qualified attorney familiar with the relevant contract and location. A careful record helps clarify what remains unresolved and what advice you need.

Mold Remediation for Water-Damaged Drywall: A Guide

What if the visible stain is only where moisture surfaced, while damp material remains hidden behind the wall? That’s why mold remediation for…

What if the visible stain is only where moisture surfaced, while damp material remains hidden behind the wall? That’s why mold remediation for water-damaged drywall must follow the moisture path, not just the mark you can see. Drying the room may not dry the wall cavity, and disturbing suspect materials can spread dust and debris.

It’s reasonable to wonder whether the drywall can be dried or needs to be removed. The answer depends on the water source, how long the material was wet, the drywall’s condition, and whether moisture or mold has reached insulation or other materials. This guide explains how to address ongoing moisture, assess the damage without disturbing suspect areas, and understand the factors that shape drying, removal, and remediation decisions.

You’ll also learn what to look for when choosing a qualified contractor and reviewing a clear scope of work, including how it addresses affected materials and the source of moisture. TSIAC International offers mold remediation, selective demolition, and interior gutting, with more than 15 years of industry experience. The appropriate project scope depends on site conditions and should be established through an assessment.

Key Takeaways

  • Use the water source, exposure duration, drywall condition, and signs of concealed dampness to help determine whether materials need further assessment or removal.
  • Effective mold remediation for water-damaged drywall accounts for affected materials beyond the visible surface and includes planning for the moisture source.
  • Before work begins, clarify how the project scope addresses material removal, containment, and worker protection based on site conditions.
  • Surface cleaning may not be suitable when drywall is damaged or moisture and mold may extend into the wall. Disturbing affected materials can spread debris.
  • Before reconstruction, ask what materials were removed, whether moisture remains, and what documentation or conditions will guide the handoff.

How to assess mold on water-damaged drywall before remediation

Visible staining signals a concern, but it doesn’t establish how far water or mold extends. A plumbing or roof leak, flooding, or persistent condensation can wet the drywall and materials behind it. The mark on the room-facing surface may be only one clue in a larger wall assembly, so start by documenting what you can observe without opening or disturbing the area.

Visible mold is evidence of a surface problem, not a complete assessment of the wall assembly. Porosity affects whether a material can be salvaged, as described in this general overview of disaster restoration. Appearance alone cannot establish whether concealed drywall, insulation, or framing is dry or mold-free.

What signs suggest water damage extends beyond the drywall surface?

Look for discoloration, swelling, softened or crumbling drywall, peeling paint or wallpaper, and a persistent musty odor. These signs can indicate that moisture has affected more than the visible finish, but they don’t confirm the condition of hidden materials. Dampness may also reach insulation, framing, baseboards, or an adjacent room, particularly if water has traveled along the wall or floor.

Record what you observe without probing the wall. Note the suspected water source, affected surfaces and rooms, visible staining, changes in the drywall’s shape or firmness, any odor, and how long the area has been wet, if known. Photos and dates can help show how conditions have changed.

What should you do first after finding mold on wet drywall?

If it’s safe, stop or limit the source of moisture before planning repairs. That may mean addressing an active leak or reducing persistent condensation. Don’t assume that drying the room has dried the wall cavity. Avoid cutting, sanding, scraping, or pulling off suspect drywall, since disturbing affected material can release dust and debris.

  • Keep people from unnecessarily contacting or disturbing the affected area.
  • Document visible conditions and the known or suspected moisture history.
  • Seek a qualified assessment if damage is extensive, recurring, concealed, or uncertain.

These steps help preserve useful information while the next scope is determined. Mold remediation for water-damaged drywall should be planned around the extent of moisture and affected materials, not just the visible stain. A site assessment can help clarify whether further investigation or controlled material removal is appropriate.

Dry or remove water-damaged drywall? How remediation decisions are made

Drying or removal is not decided by a stain, a single moisture reading, or a universal time limit. An assessment considers how far moisture traveled, what caused it, the drywall’s condition, how long it stayed wet, and whether concealed materials remain damp or are affected. The water source matters because it can affect what hazards or contamination need to be considered before work begins.

Drying the visible face of drywall doesn’t prove that the wall cavity behind it is dry. Moisture can remain in insulation, framing, or enclosed spaces even after the room feels dry. The EPA guide on mold investigation describes approaches for assessing concealed areas, including inspection tools used behind walls.

Potentially dryable, subject to assessment Removal or further assessment may be needed
Drywall appears intact, and the affected area is limited. Drywall is swollen, soft, crumbling, visibly mold-affected, or persistently wet.
The moisture source is understood and corrected, and drying can be monitored. The source is recurring, uncertain, or may have introduced contamination.
Moisture readings and follow-up checks support that affected materials are drying. Readings, odor, or other observations suggest dampness in insulation, framing, or inaccessible cavities.

When might drying and monitoring be considered?

Drying may be considered when an assessment finds that the drywall remains intact, the moisture source has been addressed, and affected materials can be checked as they dry. A surface that feels dry to the touch isn’t enough evidence by itself. Moisture readings taken in relevant locations, followed by monitoring, give a clearer basis for deciding whether drying is progressing. Salvage isn’t guaranteed; the decision depends on site-specific findings.

When is removal or further investigation more likely?

Professionals should evaluate drywall that is visibly deteriorated, remains wet, or shows mold growth, especially if moisture may extend into insulation or an inaccessible cavity. Recurring leaks and dampness in adjacent materials also affect the scope. Before reconstruction, confirm that the source has been corrected and that affected surrounding materials have been assessed. The appropriate scope may involve additional investigation, removal, or both.

For a project that may require remediation alongside material removal, review TSIAC International’s mold remediation and selective demolition services. The appropriate scope should be established from the conditions found at the site.

How professional mold remediation for water-damaged drywall proceeds

Professional mold remediation for water-damaged drywall should follow a defined sequence: control the moisture, assess the affected assembly, plan the work, then remove or address materials according to their condition. The precise scope depends on site findings, the water source, and any hazards identified. Containment and worker protection should match those conditions and the planned work, rather than follow a one-size-fits-all prescription.

How assessment, containment, and removal fit together

A clear work plan connects investigation to material work. It should identify affected areas and, where possible, concealed materials before the wall is disturbed. It should also define work boundaries, access, protection measures, and debris handling. If drywall or other materials may contain asbestos or lead, assess their status before disturbance where applicable. Confirm project-specific technical guidance and requirements before work begins.

  • 1. Address the moisture source. Identify and correct the leak, flooding pathway, or condensation condition so new moisture doesn’t undermine the work.
  • 2. Assess and document. Record affected surfaces and evaluate whether dampness or visible contamination may extend behind the drywall or into adjacent materials.
  • 3. Set the scope and protections. Establish work boundaries, access, containment, worker protection, and debris handling based on the site and planned tasks.
  • 4. Remove or retain materials as specified. Remove drywall identified for removal using the planned controls. Removal is distinct from cleaning or treating materials that remain, which must be assessed separately.

What happens after affected drywall is removed?

Once the wall is open, exposed framing and nearby materials can be evaluated for moisture and visible contamination. The findings may change the work scope. Cleaning or drying methods depend on the material, its condition, and the approved plan. Don’t assume that surface treatment alone will resolve a problem within porous or concealed materials. The health department’s mold guidance explains that killing mold isn’t the same as removing it, and that contaminated materials such as drywall may need removal.

  • 5. Clean and dry as appropriate. Address remaining materials according to their condition and the project scope, while managing moisture and checking drying progress.
  • 6. Confirm readiness for repair. Replacement should wait until the moisture problem has been addressed and affected materials are suitably dry for the planned repair.

Before work proceeds, ask what findings would change the scope, how remaining materials will be evaluated, and what conditions must be met before replacement begins. A well-defined sequence connects assessment, removal, and repair decisions without assuming every wall needs the same treatment.

Mold Remediation for Water-Damaged Drywall: A Guide

DIY cleanup or professional remediation: how to choose the right scope

A small area of surface growth on an intact, nonporous surface is different from mold on wet drywall. Limited cleaning may be reasonable for some surface conditions, but damaged drywall, signs of concealed moisture, or widespread affected materials call for a more careful assessment. Scrubbing, cutting, or pulling off mold-affected material can spread dust and debris, so DIY work isn’t automatically safe just because the visible patch looks manageable.

Choose the scope based on the material and moisture conditions, not appearance alone. If the damage is extensive, recurring, hidden inside a wall, or uncertain, seek a qualified evaluation. Use added caution if occupants are especially vulnerable to mold exposure or if building materials may contain asbestos or lead. Don’t disturb suspect materials until their status and appropriate precautions are understood.

Which conditions call for a qualified remediation contractor?

Professional evaluation is prudent when drywall is soft, swollen, crumbling, persistently damp, or visibly mold-affected; when a leak has returned; or when moisture may have reached insulation or other concealed areas. If you’re considering a size threshold for DIY cleanup, check current guidance from an authoritative source such as the U.S. Environmental Protection Agency rather than treating a general limit as a guarantee of safety. Porous, water-damaged drywall requires a different assessment from a small spot on a hard surface.

What should a clear remediation proposal explain?

A written scope helps you understand what will happen and how the work area may affect daily routines. Ask the contractor to define the affected-area boundaries, planned removal, containment approach, moisture-source responsibilities, debris handling, and how exposed materials will be assessed and dried. The proposal should also explain the work sequence and how changes in scope will be communicated if concealed damage is found.

  • Which materials are included for removal, and which will remain?
  • How will moisture control and drying be addressed before repair?
  • What documentation will be provided during or after the work?
  • Is testing or post-remediation verification included? If so, who performs it?

A defined work area and sequence can make disruption easier to anticipate, though the final scope depends on site conditions. For a project that may involve both mold remediation and controlled material removal, contact TSIAC International about mold remediation and clarify which assessment, containment, and verification tasks are included in the proposed work.

Plan drywall repair after mold remediation and choose your next steps

Replacing drywall before the moisture problem is corrected can leave the conditions for damage in place. Treat reconstruction as a separate stage of mold remediation for water-damaged drywall: first confirm the water source has been addressed, then review what was removed and whether remaining materials are suitably dry for repair.

What should be confirmed before replacing drywall?

Before scheduling replacement, establish what the remediation work found and what still needs attention. Ask how moisture in framing and adjacent materials was evaluated, what documentation is available, and whether any areas remain damp or inaccessible. The handoff should make clear that the remediation scope is complete and site conditions support reconstruction, rather than relying on the room-facing surface alone.

  • Has the source of water been identified and addressed?
  • Which drywall and other materials were removed, and which remain?
  • How were exposed framing and adjacent materials assessed for moisture?
  • What records, readings, or other documentation can be shared?
  • Are there any unresolved conditions that should delay replacement?

Clear answers help the repair contractor understand the condition of the assembly and avoid closing in materials before the work is ready to proceed. If the scope changes after concealed materials are exposed, ask that the findings and next steps be documented before reconstruction continues.

How can TSIAC support a complex removal or remediation project?

When a project involves both mold remediation and a broader interior removal scope, TSIAC International may be a resource to discuss the work. Its listed services include mold remediation, selective demolition, and interior gutting. The company reports more than 15 years of industry experience. The appropriate scope depends on site conditions, so confirm directly which assessment, containment, cleaning, or verification tasks are included in any proposed work.

If materials may contain asbestos or lead, avoid disturbing them until their status and appropriate next steps are understood. TSIAC also provides hazardous-material abatement. For broader removal work, ask how the proposed scope defines affected areas, material handling, and the sequence of work.

Once moisture conditions and the repair handoff are clear, discuss the project scope with TSIAC to determine whether its listed remediation or removal services fit the work required.

Move Forward With a Clear Remediation Plan

Visible staining can reveal a problem, but it doesn’t show the full condition of the wall. The decision to dry or remove drywall depends on moisture, material condition, and what an assessment finds behind the surface. Before repairs begin, confirm that the moisture source has been addressed and that affected materials are suitably dry.

A clear scope also helps keep remediation and reconstruction aligned. Confirm what will be removed, how the work area will be managed, what documentation you’ll receive, and what conditions must be met before drywall replacement.

TSIAC International has more than 15 years of industry experience, with listed services that include mold remediation, selective demolition, and interior gutting. If you’re weighing the next steps for mold remediation for water-damaged drywall, discuss your drywall remediation project with TSIAC International.

A careful assessment and a well-defined scope can help you move ahead with greater confidence.

Frequently Asked Questions

Can water-damaged drywall be dried instead of removed?

Sometimes, if an assessment finds the drywall is intact, the water source is addressed, and moisture levels can be monitored as materials dry. The decision also depends on the water source, how much of the wall was affected, how long it remained wet, and whether moisture reached insulation or other concealed materials. If drywall is mold-affected or deteriorated, removal may be necessary. Touch alone can’t confirm that the wall is dry.

How do you know if mold is behind water-damaged drywall?

You can’t reliably confirm hidden mold from the room-facing surface alone. Musty odors, recurring dampness, staining, swelling, or soft drywall can raise concern, but they don’t show the full extent. A qualified assessment may use moisture measurements or appropriate inspection methods to investigate concealed areas. Avoid cutting or pulling drywall off just to check, since disturbing suspect material can release dust and debris into the room.

What happens if moldy drywall is not removed?

If mold-affected drywall remains in place, the material may continue to deteriorate, and mold may persist if moisture conditions remain. Moisture can also affect concealed materials, so covering a stain with paint or installing new drywall over an unresolved problem won’t address its cause. The right response depends on which materials are affected and why they became wet. Seek an assessment if growth is recurring, damage is concealed, or the scope is unclear.

Is it safe to remove moldy drywall yourself?

Not in every situation. Cutting, sanding, or pulling mold-affected drywall can disperse dust and debris, and the work may expose concealed moisture or materials that need special handling. Consider qualified help if the affected area is extensive, recurring, hidden, or uncertain, or if occupants are especially vulnerable to mold exposure. Suspected asbestos- or lead-containing materials should not be disturbed until their status and appropriate precautions are understood.

How long does mold remediation for water-damaged drywall take?

There isn’t one reliable timeline for mold remediation for water-damaged drywall. Duration depends on the extent of affected materials, whether concealed areas need investigation, how removal is scoped, and how long drying takes after the moisture source is corrected. Repair or replacement may be a separate stage. Ask the contractor to explain the expected sequence, what could change the schedule if hidden damage is found, and how drying progress will be assessed.

Should drywall be replaced after a water leak if there is no visible mold?

Not automatically. No visible mold doesn’t prove the drywall or wall cavity is wet, but it also doesn’t confirm that everything is dry. The decision depends on the amount and duration of water exposure, the drywall’s condition, the water source, and whether insulation or framing was affected. Have moisture assessed where appropriate, address the source, and base repair or replacement on the condition of the materials rather than appearance alone.

Can mold return after water-damaged drywall is remediated?

Yes, mold can return if moisture conditions persist or develop again. A repair may not remain effective if a leak is unresolved, condensation continues, or damp affected materials remain behind the replacement drywall. Before reconstruction, confirm that the moisture source has been addressed and that remaining materials are suitably dry. If staining, dampness, or musty odors recur, investigate the cause rather than simply covering or cleaning the visible area again.

Salvaging Architectural Elements Before Demolition: A Practical Planning Guide

A reusable door, light fixture, or timber beam can become debris before anyone has time to assess it. Salvaging architectural elements before…

A reusable door, light fixture, or timber beam can become debris before anyone has time to assess it. Salvaging architectural elements before demolition works best when recovery is planned in advance, not improvised as materials are removed. Early planning matters when you’re deciding what’s worth saving, concerned demolition could damage it, or coordinating recovery with hazardous-material abatement.

Start by identifying potential salvage candidates and assessing their condition, removal requirements, and likely destination. Then plan for safe handling, temporary storage, and the sequence of selective demolition, abatement, and debris removal. This guide explains how to evaluate reuse options, decide when materials may be better suited to recycling, and coordinate the work before demolition begins. A demolition contractor experienced in selective demolition, abatement, and recycling can help align these activities. Confirm project-specific recovery capabilities before scheduling work.

Key Takeaways

  • Build a candidate inventory that records each feature’s material, dimensions, condition, attachment method, and intended destination.
  • Plan salvaging architectural elements before demolition as a defined work sequence, with priorities aligned to access, structural conditions, and project scope.
  • Keep safety assessment and qualified review ahead of disturbing components that may contain hazardous materials.
  • Choose an approach based on project needs, and evaluate experience with selective demolition, safety planning, documentation, and material handling.
  • When direct reuse isn’t suitable, consider whether recovered materials can be directed to recycling instead.

Why Salvage Architectural Elements Before Demolition Starts?

Architectural salvage is the planned recovery of building features for reuse, resale, or preservation before demolition. It differs from ordinary debris removal, where materials are cleared as part of the demolition process, and from recycling, which processes materials for use as raw material rather than retaining an intact feature. The broader practice of Deconstruction describes taking a building apart to recover components rather than removing it only as debris.

Planning matters because features can be fragile, difficult to detach, or integrated with surrounding construction. Once demolition begins, routine removal can crack, bend, or break an item that might otherwise have been recovered intact. Identifying priorities early gives the project team time to plan the removal sequence, access, labor, and storage. Salvage still depends on each item’s condition and whether it can be accessed and removed safely within the project schedule.

Which architectural elements may be candidates for salvage?

Potential candidates include doors and hardware, millwork, decorative metalwork, lighting, stone, and specialty fixtures. Age or visual appeal alone doesn’t establish that an item is sound, safe to remove, or suitable for another use. Record each candidate with photographs, its location, approximate dimensions, and observed condition. Note visible damage and how it appears to be attached, but don’t disturb uncertain or potentially hazardous materials before appropriate assessment.

When does salvage make sense for a demolition project?

Compare the feature’s preservation value and likely reuse with the effort required to remove it, the time available, and the storage conditions needed after recovery. A sound door with accessible hardware may be a more practical candidate than brittle trim bonded to a wall or a large fixture with no confirmed destination. Built-in, damaged, contaminated, or difficult-to-access elements may not be suitable for salvage.

Make the decision item by item before finalizing demolition plans. Confirm who will remove each feature, how it will be handled, and where it will go. Without a safe removal plan and protected storage, an item can be damaged after recovery. Don’t assume salvage will produce a financial return or that every recovered component will be reusable. A project-specific assessment can help weigh preservation goals against labor, timing, access, and condition. If direct reuse isn’t appropriate, recycling may be more suitable than treating the material as ordinary debris.

How to Assess Salvage Value, Condition, and Reuse Potential

A candidate list is useful only if it supports a clear decision. Before finalizing demolition plans, assess each item’s condition, material, dimensions, attachment method, removal effort, and likely destination. A feature that appears valuable may be difficult to remove intact or have no confirmed recipient. This structured review makes salvaging architectural elements before demolition a project decision rather than an assumption.

What should a salvage inventory record?

Use one inventory entry per item or consistent group of items. Record the element name, location, approximate quantity, dimensions, visible defects, and photographs from more than one angle when practical. Add a removal priority, handling notes, and proposed destination, such as reuse, resale, donation, recycling, or disposal. Flag unknown coatings, insulation, or other suspect materials for qualified assessment before anyone disturbs them.

Keep observations separate from assumptions. “Cracked at lower hinge” is more useful than “poor condition”; “destination not confirmed” is more accurate than assuming an item will sell or be accepted. This record gives the project team a shared basis for comparing options and planning removal.

How can teams decide between reuse and recycling?

Direct reuse is most practical when an element is in suitable condition, can be removed safely, and has a realistic next use or recipient. Resale or donation may be options, but neither should be treated as a guaranteed outlet. If a material can be recovered but the component is damaged or unsuitable for reuse, recycling may be worth evaluating. The U.S. EPA’s Sustainable Management of Construction and Demolition Materials provides broader guidance on material recovery and management.

Use this compact comparison to set the next step for each inventory entry:

  • Direct reuse: Sound condition and a plausible use; removal effort is manageable; protect and store intact; confirm the recipient or project use.
  • Resale or donation: Usable condition, but no owner reuse plan; assess removal and handling needs; verify interest and acceptance before scheduling recovery.
  • Recycling: Recoverable material, but unsuitable as an intact feature; separate and handle by material type; confirm an appropriate recycling route.
  • Disposal: Unsafe, contaminated, badly damaged, or without a suitable recovery path; follow project handling requirements and include it in debris planning.

Compare condition, demand, labor, timing, and storage together. If selective removal is part of the project, discuss the inventory and handling priorities with a demolition team before setting the sequence. For broader context on recycling demolition debris, see recycling demolition debris, and confirm which recovery capabilities apply to the specific project.

How to Salvage Architectural Elements Before Demolition: A Work Sequence

Recovery works best when it is built into the demolition plan, with clear boundaries and an agreed order of work. Salvaging architectural elements before demolition requires coordination between the owner, design team, and relevant contractors so removal priorities fit the project scope, site access, structural conditions, and schedule. The appropriate removal method depends on how each element is constructed and should be confirmed through qualified project assessment.

What happens during pre-demolition planning?

Walk the site with the owner, design team, and relevant contractors before scheduling removal. Mark which components will remain, which are designated for salvage, and which are slated for demolition. Agree on access, responsibilities, removal priorities, and temporary protection. Resources from Build Reuse can also help teams consider building-material recovery and reuse during project planning.

A practical work sequence can then move from survey to protected storage:

  • 1. Confirm the scope: Review the candidate inventory and verify which items still have a proposed destination and a viable removal plan.
  • 2. Assess the work area: Confirm access routes, nearby retained components, structural conditions, and any safety or abatement requirements before disturbance.
  • 3. Set boundaries and priorities: Mark salvage areas clearly and identify the order of removal. Resolve conflicts with demolition activities before work begins.
  • 4. Prepare protection: Establish how adjacent surfaces and retained elements will be protected, and confirm how recovered items will be moved out of the work area.
  • 5. Remove selectively: Use a method suited to the element’s material, attachment, and condition. Careful separation can limit avoidable damage to both the item and components designated to remain.
  • 6. Document and transfer: Update the inventory after removal, note any damage or change in condition, and record where each item is being transferred or stored.

How should recovered elements be handled and stored?

Keep each item connected to its inventory record. Label it with an identifier that matches the record, then use handling and packaging suited to its material, fragility, and exposure risks. A fragile fixture, for example, needs different protection from a substantial metal component. Assign a secure, suitable storage location before removal and confirm who accepts custody at each transfer. Without clear ownership and storage arrangements, recovered elements can be damaged, misplaced, or left exposed before they reach their intended destination.

Salvaging Architectural Elements Before Demolition: A Practical Planning Guide

How to Coordinate Salvage with Safety, Abatement, and Demolition

Salvage priorities must fit the project’s safety plan and demolition sequence. Before anyone disturbs a component, confirm what is known about its materials, condition, and surroundings. A reusable-looking feature isn’t a reason to bypass qualified assessment or applicable project requirements. If recovery conflicts with worker protection, containment, or safe access, pause salvage work until the responsible professionals resolve the issue.

What if a feature may contain hazardous materials?

Stop and seek qualified assessment if coatings, insulation, or the contents of a fixture or assembly are unknown and could present a hazard. Don’t take samples, scrape finishes, open enclosed components, or attempt removal without appropriate qualifications and direction. The assessment should inform whether the item can be recovered, whether abatement must occur first, and how the work area needs to be managed. Salvage goals remain secondary to protecting workers and meeting applicable project requirements. Consult the project team’s hazardous-material abatement guidance before setting a recovery date.

How do demolition teams protect retained building components?

Before demolition starts, mark retained and salvage-designated features on the work plan and establish clear physical separation from components scheduled for removal. Identify access routes and agree who is responsible for protection, removal, and moving each item. Coordinate the sequence so salvage does not conflict with containment needs or expose workers to active demolition areas.

Selective demolition can support careful removal when components must remain intact, but the appropriate method depends on the assembly, its connections, and structural conditions. Qualified project review should determine how the work proceeds. A method suitable for a detached fixture may not be appropriate for a feature integrated into a wall or structural system. Coordinate salvage, abatement, and demolition schedules before work begins, and communicate changes in condition or access to the responsible parties. For broader process and safety context, review the project’s demolition planning materials.

Clear coordination helps prevent salvage tasks from becoming unplanned work inside an active demolition zone. Information about selective demolition and abatement is available from TSIAC International.

How to Choose a Salvage Approach and Prepare for Demolition

The right coordination model depends on the building and recovery goals. A straightforward project with a few accessible items may suit owner-led coordination, provided someone has time and expertise to manage removal, storage, and transfer. Fragile, integrated, or technically complex features may call for specialist salvage involvement. Coordination with a demolition contractor can help align selective removal with demolition sequencing, site access, and abatement activities. No single approach fits every project, and none can guarantee that a component will be recovered intact or find a next use.

Which salvage coordination option fits the project?

Compare the project’s complexity, element fragility, schedule, and available expertise before assigning responsibilities. Clarify in writing who identifies candidates, approves removal, arranges labor and storage, coordinates transport, and accepts recovered materials. Ask about relevant experience with selective removal, safety planning, documentation, and material handling. For salvaging architectural elements before demolition, clear decision-making authority matters: the person approving recovery should understand both the preservation priority and the project constraints.

What should owners confirm before demolition begins?

Use a final readiness check to resolve gaps before scheduling demolition or abatement work:

  • Inventory: Confirm each item’s location, condition notes, removal priority, and intended destination.
  • Responsibilities: Name who approves removal, performs or coordinates the work, arranges storage and transport, and accepts custody.
  • Access and protection: Confirm access routes, separation from demolition areas, and measures to protect retained components.
  • Safety review: Resolve questions about suspect materials through qualified assessment before disturbance.
  • Sequence: Check that salvage activities fit the demolition scope, abatement work, site access, and overall schedule.
  • Disposition: Confirm whether each recovered item is intended for reuse, resale, donation, recycling, or another planned route. Don’t assume an outlet is secured until it has been confirmed.

TSIAC International provides selective demolition, hazardous-material abatement, and recycling services. These capabilities may be relevant to project planning, but confirm specific material recovery needs and responsibilities for each job. Recycling can be considered for materials that aren’t suitable for direct reuse.

Discuss your demolition requirements and project scope with TSIAC International to determine how selective demolition, abatement, and recycling may fit the work plan.

Plan Recovery Before the Demolition Work Begins

Successful salvaging architectural elements before demolition starts with clear decisions: identify candidates early, assess condition and safe removal requirements, and confirm where each item will go. A documented inventory and coordinated sequence help align salvage with abatement, selective demolition, access, and storage. Not every feature will be suitable for reuse, so evaluate each one on its merits and consider recycling when direct recovery isn’t appropriate.

TSIAC International has more than 15 years of industry experience and provides selective demolition, structural demolition, and hazardous-material abatement. Its project-site recycling practices include recovery of wood, metal, and plastic. Confirm the specific scope and material recovery capabilities relevant to your project before scheduling work.

Start with a clear project plan and assigned responsibilities. Discuss your demolition and selective-removal requirements with TSIAC International to review the scope and how the work may be coordinated. Careful preparation helps your team make informed decisions before demolition begins.

Frequently Asked Questions

What architectural elements can be salvaged before demolition?

Doors, hardware, millwork, decorative metalwork, lighting, stone, and specialty fixtures may be candidates for salvaging architectural elements before demolition. Suitability depends on more than age or appearance: assess visible damage, material, attachment, safe access, and whether there’s a realistic destination. Photograph each item, note its location and approximate dimensions, and record concerns. Don’t disturb components if their materials or coatings are uncertain until they’ve been assessed by qualified professionals.

When should architectural salvage be planned before demolition?

Plan salvage during early project development, before finalizing demolition and abatement schedules. This gives the owner and project team time to identify candidates, assess removal needs, confirm access, and arrange labor, handling, and storage. It also allows salvage priorities to be coordinated with components that must remain and areas scheduled for demolition. Waiting until debris removal is underway can reduce access and leave little time to recover fragile or integrated features carefully.

How do you decide whether an architectural element is worth salvaging?

Compare the item’s condition, material, dimensions, attachment method, preservation or reuse value, and removal effort. Then consider timing, safe access, storage requirements, and whether a recipient or future use is confirmed. A sound, accessible fixture with a clear destination may be a stronger candidate than brittle trim that is difficult to separate intact. If direct reuse isn’t practical, evaluate resale, donation, or recycling without assuming an outlet or financial return.

Can architectural elements be salvaged during demolition?

Yes, some elements can be recovered during a planned selective-demolition sequence, but salvage should be scheduled rather than improvised as general demolition proceeds. Identify items in advance, define which components must remain, and coordinate removal with access, structural conditions, and any abatement work. The appropriate method depends on how each feature is attached and constructed. If recovery could compromise safety or damage retained components, pause and seek qualified project review.

What should happen if salvaged materials may contain hazardous substances?

Stop work on the uncertain component and arrange qualified assessment before disturbing it. Don’t scrape coatings, open enclosed components, collect samples, or attempt removal without appropriate expertise and direction. The assessment should guide whether abatement or other controls are needed and whether recovery can proceed safely. Salvage goals never take priority over worker protection or applicable project requirements. Coordinate decisions with the responsible abatement and demolition professionals before setting a removal sequence.

How should salvaged architectural elements be stored?

Label each recovered item with an identifier that matches its inventory record, including its condition and intended destination. Choose packaging and handling suited to the material and fragility, and protect items from relevant exposure risks during transfer and storage. Confirm a secure, suitable storage location before removal, then identify who accepts custody and responsibility for the item. Without a planned destination and clear handoff, recovered features may be damaged, misplaced, or left exposed.

Who should coordinate architectural salvage before demolition?

The owner or project lead should ensure responsibilities are assigned among the design team, demolition contractor, abatement professionals, and any salvage specialist involved. The right arrangement depends on the building’s complexity, element fragility, schedule, and available expertise. Put in writing who identifies candidates, approves removal, coordinates labor, arranges storage and transport, and accepts recovered materials. A contractor experienced in selective demolition and hazardous-material abatement can help align salvage priorities with the broader work plan.

Commercial Real Estate Due Diligence for Asbestos: A 2026 Checklist

What if the asbestos survey in a property file doesn’t cover the areas your renovation will disturb? In commercial real estate due diligence for…

What if the asbestos survey in a property file doesn’t cover the areas your renovation will disturb? In commercial real estate due diligence for asbestos, a report is useful only when its scope, findings, and limitations match the building and the work being considered. A missing room, inaccessible material, or outdated assumption can leave buyers and project teams making decisions without a complete picture.

Due diligence should clarify whether asbestos is present and what the findings mean for the transaction. Consider them alongside plans for occupancy, renovation, or demolition and the requirements that apply to the project. Treating asbestos as a documented risk management process helps surface questions before responsibilities and project plans become difficult to change.

This 2026 checklist explains which records to request, how to review survey coverage, and how to identify information gaps. It also covers questions to raise with qualified assessment professionals, ways to compare consultant findings, and when an abatement contractor can help turn confirmed materials into a defined work scope. Use it to clarify responsibilities and establish practical next steps with the right professionals.

Key Takeaways

  • Build a property-specific asbestos file, then verify each record’s date, coverage, limitations, and inaccessible areas.
  • Use commercial real estate due diligence for asbestos to distinguish confirmed materials from assumed, inaccessible, or unverified conditions.
  • Compare material condition and location with planned disturbance to identify where existing information may not answer project questions.
  • Assign pre-closing actions to the buyer, seller, consultant, property manager, or project lead, and document decisions about unresolved risks.
  • Coordinate independent assessment findings with an abatement contractor when results point to monitoring, repair, removal, or further evaluation.

Why commercial real estate asbestos due diligence belongs in the transaction plan

Asbestos information can affect how a commercial property is maintained, occupied, renovated, or demolished. For buyers and sellers, documented findings help clarify what is known and what remains uncertain before transaction terms and project plans are settled. Lenders may consider available records as part of their review, while occupants and renovation teams need relevant information to plan work and avoid disturbing materials without appropriate professional direction.

Definition: Commercial asbestos due diligence is the process of documenting building materials, their condition and accessibility, and whether planned activities could disturb them. It reviews available records and identifies gaps that may need qualified professional attention.

An asbestos-specific evaluation focuses on asbestos-containing or presumed materials, their locations and condition, and the scope of the assessment. A broader environmental review may address other concerns, depending on its assignment. Don’t assume it answers every asbestos question. For background on asbestos and its historical uses in building materials, see this Asbestos overview. Check both review scopes against the property and the transaction’s needs.

What questions should the buyer answer before closing?

Establish whether materials are confirmed as asbestos-containing, presumed to contain asbestos, or unevaluated. Then check whether the assessment covers each relevant building and area, and note any limitations or inaccessible spaces. Finally, compare its findings with plans for occupancy, routine maintenance, renovation, or demolition. Commercial real estate due diligence for asbestos is most useful when the documentation reflects both the property’s current condition and the work being considered.

Does an asbestos finding automatically make a property unsafe?

No. Presence alone doesn’t establish a material’s condition, accessibility, or likelihood of disturbance, and it doesn’t automatically prevent a property from being occupied or acquired. Don’t label a building safe or unsafe based on a record alone. Depending on documented conditions and planned activities, qualified professionals may recommend management, repair, removal, or further evaluation. Site-specific conclusions require qualified professional review that considers the property’s actual use and proposed work.

Build an asbestos due diligence file from records, surveys, and site observations

A useful due diligence file brings building records, survey findings, and current site observations together so reviewers can see what is documented and what remains unresolved. Request prior asbestos surveys, operations and maintenance plans, abatement records, and relevant closeout documents. A record of past abatement should identify the work completed and the areas addressed. It doesn’t establish the status of other building areas by itself.

Review each document for its date, author, stated purpose, property coverage, methods, limitations, and any inaccessible or excluded areas. Compare the reported locations with current building plans, tenant spaces, mechanical areas, and the proposed work. For example, a survey covering common corridors but excluding tenant suites or concealed spaces may not answer questions about a planned tenant improvement. Requirements for renovation or demolition can also affect project planning. Consult the EPA requirements for building owners and have applicable requirements reviewed for the specific project.

How do buyers assess whether an existing asbestos survey is adequate?

Start by confirming that the report explains why it was prepared, which locations were inspected, what methods and assumptions were used, and what was excluded. Look for materials that remain inaccessible or concealed, and note whether the report classifies them as presumed or unevaluated rather than confirmed absent. Adequacy depends on the transaction and intended work. A qualified professional can determine whether additional assessment is appropriate for the planned scope.

What should the site review document?

An informal walkthrough is for recording observations, not testing materials. Don’t sample, handle, or disturb suspect material. Note visible damage, deterioration, or evidence of disturbance, along with locations that need professional follow-up. Photographs and marked-up plans can link each observation to a specific room or building component, such as a pipe run, ceiling area, or service space.

Keep a discrepancy log that turns open questions into assigned actions. For each item, record the location, the conflicting or missing information, the person responsible, and a due date. For example, if plans show a mechanical room that the survey lists as inaccessible, assign someone to confirm access and ask a qualified professional whether further evaluation is needed. This makes commercial real estate due diligence for asbestos traceable instead of dependent on informal assumptions.

When confirmed findings point to abatement, a contractor can help define the work scope in coordination with the assessment professional and property stakeholders. Learn about asbestos abatement services as a potential next step if the project requires that work.

Compare asbestos findings by condition, planned work, and assessment scope

A finding matters in context. Compare what the assessment says about each material with where it is, whether it can be accessed, and whether planned work could disturb it. A material documented in good condition in an area with no planned work presents a different planning question from damaged material in a renovation zone. This comparison helps buyers identify where the record supports a decision and where clarification is still needed.

Finding status Condition and location Accessibility Planned disturbance Information gap to resolve
Confirmed asbestos-containing material Record the documented condition and exact building component. Note whether the material is visible or concealed. Identify whether maintenance, renovation, or demolition affects it. Confirm whether the assessment scope and work plan address it.
Assumed or presumed material Record why it is treated as presumed and where it occurs. Check whether access or concealment limited evaluation. Flag any planned activity that may disturb it. Ask a qualified professional whether further evaluation is appropriate.
Inaccessible or unverified area Identify the location and what could not be assessed. Document the access limitation. Compare the area with design and project plans. Assign follow-up to clarify access, assessment needs, and timing.

Priorities can change as plans develop. Routine occupancy may call for a different response than work that opens a ceiling, alters a mechanical system, or removes building components. Applicable obligations depend on the project and jurisdiction, so verify requirements with qualified professionals. The EPA requirements for building owners provide federal guidance relevant to asbestos planning. They don’t replace project-specific review.

How should buyers interpret survey findings against renovation plans?

Overlay proposed work areas on survey drawings and mark components the report doesn’t address. For example, if a renovation includes a ceiling but the report excludes concealed spaces above it, ask the assessor to clarify whether further inspection or sampling is warranted before disturbance. Revisit the comparison when designs change, tenant requirements shift, or sequencing affects which areas are accessed first.

How can buyers compare consultant and abatement proposals?

Compare scope before comparing totals. Check locations, quantities, assumptions, exclusions, deliverables, and who is responsible for each task. Confirm whether documents distinguish assessment, abatement, disposal, and restoration responsibilities. If proposals use different quantities, access assumptions, or work boundaries, request clarification so the difference is understood rather than mistaken for equivalent scope.

In commercial real estate due diligence for asbestos, the goal is a traceable comparison, not a conclusion based on a single label. Keep findings, planned work, open questions, and responsible follow-up together so property and project teams can act on the same documented scope.

Commercial Real Estate Due Diligence for Asbestos: A 2026 Checklist

Pre-closing checklist for unresolved asbestos risks

Unresolved asbestos questions need an owner, a deadline, and a documented path to resolution. A checklist helps the buyer, seller, consultant, property manager, and project lead coordinate their work instead of relying on assumptions as closing approaches. It also gives transaction counsel a clear record of open items and decisions that may need to be addressed in the deal documents.

What belongs in the buyer’s asbestos due diligence checklist?

Use a simple sequence, and record the responsible party and target date for each step:

  1. Collect records. The seller or property manager provides available surveys, operations and maintenance plans, abatement records, and relevant closeout or disposal documentation. The buyer tracks what has been received.
  2. Review coverage. The buyer and consultant compare the report scope with the buildings, tenant spaces, and areas relevant to planned work.
  3. Identify gaps. List uninspected spaces, missing records, conflicting findings, and any limits on access or assessment.
  4. Obtain professional advice. The buyer arranges qualified professional input on whether additional assessment or other follow-up is appropriate. The project lead considers how findings may affect design and sequencing.
  5. Document decisions. Record the agreed action, responsible party, due date, and supporting professional recommendation for each open item.

Keep the log current as documents arrive or plans change. A complete file should make the transition from diligence to project planning clear, including which findings may require abatement and what documentation should be retained.

How should unresolved findings affect transaction planning?

Discuss unresolved findings with transaction counsel. Counsel can advise how assessment access, contingencies, responsibility allocation, and any agreed remediation should be handled in appropriate deal documents. Don’t treat a checklist as a substitute for legal or technical advice. Use it to make open questions visible and support decisions based on transaction terms and professional recommendations.

Set a written schedule that connects additional assessment, risk controls, and any agreed remediation with financing milestones, design decisions, tenant needs, and anticipated construction. If a planned work area remains unevaluated, identify whether access and professional review are needed before the design or schedule advances. This keeps asbestos diligence tied to actual transaction and project decisions.

After findings and professional recommendations are available, an abatement contractor can help define the work scope. See asbestos abatement project scope information when considering how confirmed findings and planned work may inform contractor coordination.

Plan the next step: from asbestos findings to controlled abatement work

Assessment findings don’t dictate the same response in every case. Depending on documented condition, accessibility, and planned activities, a qualified professional may recommend continued management, repair, removal, or additional evaluation. The assessment professional evaluates materials and provides findings. An abatement contractor uses confirmed information and agreed project boundaries to plan and carry out abatement work. Keep those responsibilities distinct.

In commercial real estate due diligence for asbestos, document this handoff. Give prospective contractors the relevant assessment records and work plans, then compare proposals against the same defined areas. Review the proposed containment approach, disposal documentation, schedule, coordination responsibilities, and closeout records. Clarify differences in assumptions or exclusions before selecting a scope.

What should a commercial asbestos abatement scope clarify?

Identify the materials and exact work areas using the assessment documentation, drawings, and agreed project boundaries. Confirm who is responsible for site coordination, applicable project documentation, waste handling, and closeout records. Before work is awarded, verify the contractor’s qualifications and insurance, along with requirements that apply to the specific project and jurisdiction. Don’t assume these details are identical across projects.

How can property teams prepare for work and preserve records?

Coordinate occupant communications, site access, work schedules, and interfaces with other construction trades before mobilization. Establish who communicates changes and how affected areas will be managed. After the work, retain assessment reports, project records, disposal documentation, and completion materials in the property file so future owners and project teams can understand what was addressed.

Where abatement is part of a broader interior project, sequence the work with the planned demolition and renovation scope. The commercial interior gutting guide offers additional context for planning interior work alongside other project activities.

TSIAC International provides asbestos abatement, commercial interior gutting, and selective and structural demolition. As an abatement and demolition contractor, it can be considered for implementing a defined work scope, not for providing an independent asbestos assessment. Share the relevant findings and project boundaries when seeking contractor input, and confirm project-specific qualifications and responsibilities as part of procurement.

When assessment findings and project boundaries are defined, contact TSIAC International about abatement planning to discuss the work involved.

Make asbestos findings part of a clear project plan

Sound commercial real estate due diligence for asbestos turns records and survey findings into documented decisions. Confirm that assessment coverage matches the building and planned work, distinguish verified findings from unresolved gaps, and assign each follow-up action to a responsible party with a clear timeline. Before renovation or demolition proceeds, coordinate qualified professional recommendations with the project scope and applicable requirements.

When confirmed findings call for abatement, a defined scope helps property teams align work areas, responsibilities, disposal documentation, and closeout records. TSIAC International brings over 15 years of industry experience. Its asbestos abatement services include compliance documentation and safe hazardous waste disposal.

Discuss your commercial asbestos abatement project once you have the relevant findings and project scope. A documented process and coordination with the right professionals can help your team move forward with greater clarity.

Frequently Asked Questions

Is asbestos due diligence included in a Phase I Environmental Site Assessment?

Not necessarily. A Phase I Environmental Site Assessment and an asbestos-specific building review can have different scopes, so don’t assume one includes the other. Ask the environmental professional to state whether asbestos-containing building materials were evaluated, which areas were covered, and what exclusions apply. For commercial real estate due diligence for asbestos, request a separate assessment or qualified professional guidance if the existing review doesn’t address the building materials and planned work.

Can a commercial property be purchased if asbestos-containing materials are present?

Yes, the presence of asbestos-containing materials doesn’t automatically prevent a property from being purchased or occupied. The decision depends on documented material condition, accessibility, planned activities, and the parties’ assessment of responsibilities and risk. Buyers should review findings with qualified professionals and transaction counsel, particularly if renovation or demolition is planned. The review should clarify what is known, what remains unresolved, and how the parties will address open items.

What records should a buyer request for asbestos due diligence?

Request prior asbestos surveys, operations and maintenance plans, abatement records, and relevant project closeout and disposal documentation. Check each record’s date, author, purpose, property and area coverage, limitations, and inaccessible locations. Compare the documents with current building plans and the proposed work. Record missing or conflicting information, then assign each follow-up question to a responsible party with a due date and any needed professional input.

When should asbestos materials be tested before a renovation?

Resolve questions about suspect or presumed materials before renovation work could disturb them. Compare proposed work areas with the available survey and identify materials or concealed spaces the report doesn’t address. A qualified asbestos professional should determine whether additional inspection or sampling is appropriate for the specific scope. Don’t sample, handle, or disturb suspect materials during an informal walkthrough. Revisit the assessment if design changes alter the affected areas or work sequence.

What happens if asbestos is discovered during commercial property due diligence?

First, document the finding and its location, condition, accessibility, and relationship to planned work. If work could disturb the material, coordinate with qualified professionals before proceeding in the affected area. Depending on documented conditions and plans, the appropriate next step may involve management, repair, removal, or further evaluation. Update the transaction file, assign responsibility and timing for open actions, and consult transaction counsel about how unresolved findings should be addressed in deal documents.

Does a buyer need a new asbestos survey if the seller provides one?

Not automatically. The buyer should assess whether the seller’s survey covers the relevant buildings, tenant spaces, and proposed work, and review its date, purpose, methods, assumptions, exclusions, and inaccessible areas. A report may be useful but still leave project-specific gaps. Ask a qualified professional whether it remains suitable or whether an update or additional assessment is warranted. The decision depends on the report and intended activities, not simply who commissioned it.

How do buyers compare asbestos abatement contractor proposals?

Compare proposals against the same assessment findings and defined work boundaries. Review locations and quantities, assumptions, exclusions, containment approach, disposal documentation, schedule, coordination duties, and closeout records. Confirm which party handles assessment, abatement, waste handling, and other project responsibilities. Ask contractors to explain differences in access assumptions or scope before comparing totals. Also verify project-specific qualifications, insurance, and applicable requirements rather than assuming proposal documents cover every transaction or jurisdiction.

How to Get a Demolition Project Bonded: A Practical Guide

If you’re searching for a reliable bonded demolition contractor, start by checking the bond for the specific project. A bond review can stall when…

If you’re searching for a reliable bonded demolition contractor, start by checking the bond for the specific project. A bond review can stall when the demolition scope or contract documents leave important details unclear. A general assurance that a contractor is bonded isn’t enough: the bond must match the project, contract, and parties involved.

The process can be confusing because bid, performance, and payment bonds serve different purposes, and requirements vary by contract and project owner. Incomplete plans, scope details, or contract information can also slow a surety’s review. Confirm project-specific requirements with the owner or a qualified surety professional before proceeding.

This guide from TSIAC International explains which bond types may apply, what project information to assemble for a surety or bond producer, and how to check that bond documents accurately identify the project, obligee, contractor, and contract terms. Use it to prepare a clearer submission and review the documentation before work moves forward.

Key Takeaways

  • Bond requirements depend on the owner, contract, project type, and applicable rules. Confirm them before preparing a submission.
  • Understand how bid, performance, and payment bonds differ, then identify which bond types the contract requires.
  • Assemble a clear project package with the demolition scope, schedule, site conditions, and responsibility assignments to support surety review.
  • Check that bond documents match the executed contract, including the principal, obligee, project description, required bond type, and stated amount.
  • When evaluating a demolition contractor, assess scope clarity, relevant experience, safety planning, and responsiveness to documentation requests.

How demolition project bonding works and when it may be required

Bonding requirements depend on the project owner, contract, project type, and applicable rules. A surety bond is a written agreement involving three parties: the principal required to provide the bond, the obligee receiving its protection under the bond’s terms, and the surety that issues it. The exact obligations, claim procedures, and limits depend on the bond wording and governing contract documents.

A contractor’s broad statement that it is “bonded” doesn’t establish that a specific demolition project is covered. The statement could refer to another contract or a bond required for a different purpose. Ask for the actual bond document and compare it with the project requirements. A bond’s purpose and coverage come from its written terms, not from a general claim that a contractor is bonded.

When evaluating a demolition contractor, check whether the bond identifies the project and satisfies the owner’s requirements. Confirm which bond is required, who must be named, and what work it addresses. A performance bond is one type used in construction contracts, but its effect depends on its language and the associated agreement.

Who participates in a demolition project bond?

The principal is the party required to furnish the bond, commonly the contractor named in the contract. The obligee is the party to whom the bond is issued, often the project owner, and receives the protections stated in it. The surety issues the bond and undertakes the obligations described in the document. A bond doesn’t guarantee a particular claim or payment outcome. Any response depends on its terms and the circumstances.

Which projects may require bonding?

For private work, the owner and contractor generally set project requirements in their agreement and procurement documents. Public procurement may impose bonding requirements through applicable rules and solicitation terms, but requirements aren’t necessarily identical across projects or jurisdictions. In either case, review the instructions, contract, and bond forms before bidding or signing.

Confirm requirements directly with the project owner and, where needed, legal counsel or a qualified surety professional. Check whether bonding is required, which bond types and amounts apply, who must be listed as principal and obligee, and when the documents are due. If the demolition scope changes, ask whether the existing bond documentation must also be revised. Resolving these questions before submission helps prevent mismatches between the contract and bond.

Which demolition bonds may apply: bid, performance, or payment

Bid, performance, and payment bonds address different stages and risks in a contract. The project owner’s solicitation or agreement determines which are required; a demolition project doesn’t automatically need all three. The Surety & Fidelity Association of America offers background on surety bonds, but the controlling details for a particular job are in its procurement documents and executed bond forms.

A bid bond addresses the bidder’s obligations, a performance bond addresses contract performance, and a payment bond addresses specified payment obligations. These bonds aren’t substitutes for insurance, a contractor license, or an ordinary contract warranty. Insurance responds to covered risks under an insurance policy; a license reflects applicable authorization or qualifications; and a warranty sets out contractual commitments. Each has a different purpose and its own terms.

Bond type Purpose Usual timing Party protected Key verification point
Bid Supports the bidder’s stated obligations if selected, as specified in the bond With the bid submission Usually the obligee named in the solicitation Confirm the required form, deadline, obligee, and bidder details
Performance Relates to performance of the contract obligations described in the bond After award or contract execution, as required The obligee named in the bond Match the project and contract; review covered duties and claim terms
Payment Relates to payment obligations for parties covered by the bond At the time required by the contract or procurement documents Eligible parties identified under the bond’s terms Check who may be covered, applicable procedures, and exclusions

What does a bid bond address?

A bid bond accompanies a bid when the solicitation requires one. It can provide procurement assurance tied to the bidder’s stated commitments, but it doesn’t establish that every bid-related circumstance is covered. Review the solicitation for the prescribed bond form, submission deadline, obligee’s exact legal name, and consistency between the bidder named on the bond and the bid. A mismatch can prompt questions during review.

How do performance and payment bonds differ?

A performance bond may address whether the contractor performs the obligations identified in the contract. A payment bond may address payment obligations to covered subcontractors, suppliers, or other parties, depending on the wording. Coverage, claim procedures, deadlines, and exclusions depend on the executed documents. Read the bond alongside the contract rather than relying on a certificate or a general statement that a contractor is bonded.

If you’re searching for a bonded demolition contractor charleston sc, verify the bond for the specific job and confirm which types the owner requires. If you’re still defining the demolition work, you can discuss your demolition project scope with an experienced contractor. Confirm bond requirements and documentation separately with the owner and a qualified surety professional.

How to prepare a demolition project for surety review

A well-organized submission gives a surety or bond producer a clearer picture of the contract and the contractor’s capacity to perform it. It doesn’t guarantee approval or a particular underwriting decision. First confirm what the project owner requires, then assemble documents that describe the work and responsibilities consistently.

  1. Confirm the requirement. Ask the owner which bond type, form, amount, obligee name, and submission deadline apply. Check the solicitation and contract for project-specific instructions.
  2. Collect the governing documents. Gather the solicitation, draft or executed contract, scope of work, drawings, schedule, addenda, and required bond forms. Include revisions so the review reflects the current package.
  3. Define the demolition scope. Identify the structures or areas to be removed, demolition limits, retained structures and components, and excluded work. A clear scope helps avoid uncertainty about what the contractor has agreed to perform.
  4. Describe the schedule and site conditions. Include the proposed sequence and schedule, access constraints, site conditions, and known hazardous-material information. Identify restrictions that could affect work planning.
  5. Assign project responsibilities. State who is responsible for permits, utility coordination, waste handling, and site controls. Check that the contract documents and scope don’t assign a task inconsistently or leave a key responsibility unclear.
  6. Prepare contractor and capacity information. Ask what financial statements, work history, current project commitments, or other underwriting materials may be requested. Organize relevant information about personnel, equipment, subcontractors, and project-management responsibilities.
  7. Check the package before submission. Compare company and project names, scope, schedule, and contract details across the documents. Resolve discrepancies and ask a qualified surety professional what additional information applies to the submission.

Assemble clear contract and project documents

Demolition documents should show not only what will be removed, but also what must remain undisturbed. For example, drawings and scope notes can clarify the boundary between selective removal and retained building elements. Include available information about hazardous materials without implying that an unverified condition has been assessed. The aim is a package that lets reviewers understand the work, constraints, and assigned responsibilities.

Prepare contractor and capacity information

A surety or bond producer may request financial and project-capacity information to evaluate the proposed obligation. Provide requested materials in the specified format, and explain current commitments or resource assignments clearly. Don’t assume that one contractor’s prior submission defines what’s needed for another project. A contractor’s experience planning the scope can help make the bid package more precise, but bonding decisions remain with the surety.

When comparing a bonded demolition contractor charleston sc, assess whether the contractor can explain its scope and supply project documentation that aligns with the owner’s requirements. Confirm bond status and project-specific terms directly rather than relying on a general assurance.

How to Get a Demolition Project Bonded: A Practical Guide

How to review and verify demolition bond documents

Review the executed bond against the final contract, not just a proposal, certificate, or verbal assurance. A document can look complete yet refer to a different project, name the wrong obligee, or use a bond type that doesn’t match the procurement requirements. Check each item against the controlling contract documents before treating it as project coverage.

The bond form and the contract together determine the documented obligation. Neither a contractor’s general statement that it is bonded nor an unrelated bond establishes what work, parties, or period a particular bond covers.

What should the bond document match?

Use this checklist to compare the bond with the executed contract and procurement documents:

  • Principal and obligee: Confirm the contractor’s and project owner’s legal names match the contract and required bond form.
  • Project identification: Match the project name, location or identifier, and any contract reference. Make sure the description points to the correct demolition work.
  • Bond type and amount: Verify that the document provides the bond type and stated amount required by the contract. Don’t assume a different bond satisfies the requirement.
  • Scope and contract dates: Check that the scope reference and contract date correspond to the executed agreement and its applicable revisions.
  • Execution details: Confirm required signatures are present, the effective date is clear, and any required surety authorization can be verified through appropriate channels.
  • Form and timing: Compare the submitted document with the required form and submission deadline in the solicitation or contract.

A discrepancy doesn’t automatically establish whether a bond is valid or invalid. It does mean the project team should pause and seek clarification from the obligee and qualified legal or surety advisers before relying on the document. Keep written responses with the project records.

How can a project team avoid common verification errors?

Don’t rely solely on a certificate, an email, or a contractor’s broad claim of being bonded. Those statements may not show the bond’s full terms or whether it corresponds to this contract. Read the complete executed bond, including referenced forms or conditions. Don’t assume it covers work, parties, or time periods that aren’t included in its terms.

Keep the executed bond with the signed contract, required forms, and relevant revisions in the project file. If you’re evaluating a bonded demolition contractor charleston sc, verify project-specific bond documentation separately from the contractor’s demolition qualifications. For help defining the demolition work and boundaries in a clear project scope, discuss your demolition project scope with TSIAC International.

Choose a demolition contractor with a clear, verifiable project approach

A contractor’s proposal should make the work understandable before crews arrive on site. Compare bidders on how clearly they define the demolition scope, explain relevant experience, address site safety and material handling, and respond to document requests. If you’re searching for a bonded demolition contractor, treat bond documentation as a separate item to verify, not as a substitute for assessing the contractor’s plan and qualifications.

Questions to ask before awarding demolition work

Use the project documents to guide a focused conversation. Ask each contractor:

  • Which structures, areas, or materials are included, and what is specifically excluded?
  • How will the work be sequenced, and what depends on access, site conditions, or coordination with other trades?
  • What relevant demolition experience can you describe, and how will the team address site safety and material-handling procedures?
  • How will hazardous-material concerns be identified and coordinated with the demolition scope?
  • Who is responsible for debris handling, project records, and communicating changes to scope or site conditions?
  • Who prepares and responds to project documents, including revisions, and how will the team keep records aligned with the current contract?

Look for specific, consistent answers. For example, a proposal should distinguish removal from retained building elements and clarify who handles debris, rather than relying on broad language that leaves responsibilities open to interpretation. Compare the answers with the written scope before making an award.

If the contract requires a bond, request the project-specific executed documentation and verify it against the contract and owner’s requirements through appropriate channels. A general claim of being bonded doesn’t establish that the bond applies to the work under consideration.

Discuss your demolition scope with an experienced contractor

TSIAC International has over 15 years of industry experience in demolition and abatement. Its capabilities include structural and selective demolition, interior gutting, asbestos and lead abatement, and debris recycling. This experience can inform a discussion about defining project limits, coordinating related work, and assembling a clear scope. It doesn’t establish bond status, which should be confirmed separately with the project owner or a qualified surety professional.

To discuss the demolition work involved, contact TSIAC International about your project scope.

Move forward with a clear scope and verified documents

A sound bonding process starts with confirming what the contract requires, preparing a complete project package, and checking that the executed bond matches the project and parties. Bid, performance, and payment bonds serve different purposes, so don’t assume one bond or a general claim of being bonded satisfies every requirement. Confirm project-specific terms with the owner and a qualified surety professional.

If you’re evaluating a bonded demolition contractor charleston sc, consider both the contractor’s project approach and the documentation you can verify. TSIAC International brings over 15 years of demolition and abatement industry experience, with structural and selective demolition, interior gutting, and hazardous-material abatement capabilities. Its recycling practices include wood, metal, and plastic on every project site. These capabilities can inform project-scope discussions, but bond status and bond terms should always be verified separately.

A clearly defined scope is a practical place to begin. Discuss your demolition project with TSIAC International to explore the work involved and the information needed to describe it accurately.

Frequently Asked Questions

What does it mean for a demolition project to be bonded?

A bonded demolition project has a surety bond issued for a specific contractual obligation when the owner or contract requires one. The agreement generally involves a principal, such as the contractor; an obligee, often the project owner; and a surety. The bond’s written terms define its purpose, parties, coverage, limits, and claim procedures. A contractor’s general statement that it is bonded doesn’t establish that a particular project is covered.

Which bond is typically needed for a demolition project?

There isn’t one bond type that applies to every demolition project. A solicitation or contract may require a bid bond during bidding, a performance bond for specified contract obligations, a payment bond for covered payment obligations, or a combination. Private owners and public procurement processes may set different requirements. Check the project documents for the required bond type and form, and confirm unclear or jurisdiction-specific requirements with the owner or a qualified surety professional.

How do I get a demolition project bonded?

Start by asking the project owner which bonds, forms, and submission deadlines apply. Assemble the solicitation, contract, demolition scope, drawings, schedule, site-condition information, and assigned responsibilities, then contact a surety or bond producer about the submission process. They may request contractor financial and project-capacity information. Review the issued bond against the executed contract for matching parties, project description, type, amount, and dates. Approval and timing depend on the surety’s review.

Can a demolition contractor get bonded after winning a bid?

Possibly, but whether a contractor can obtain the required bond after award depends on the solicitation, contract terms, deadlines, and surety review. Some procurement documents require a bid bond with the bid and other bonds after award; don’t assume that sequence applies to your project. Confirm the required timing before submitting a bid. If a deadline has passed or the requirement is unclear, contact the owner and a qualified surety professional promptly.

What documents may a surety request for a demolition bond?

A surety or bond producer may request the solicitation, draft or executed contract, scope of work, drawings, schedule, required bond forms, and details about site conditions and responsibilities. Contractor information may also be requested, such as financial statements, relevant work history, current project commitments, and information about personnel, equipment, subcontractors, and project management. Requirements vary by submission. Ask the surety professional what applies, and provide consistent, current documents that describe the same project and scope.

How can I verify that a demolition contractor is bonded for my project?

Request the executed, project-specific bond and compare it with the contract and procurement documents. Check the principal and obligee’s legal names, project identifier and description, required bond type and amount, contract references, signatures, and effective date. Confirm required surety authorization through appropriate channels. A certificate, verbal assurance, or general statement that you’re hiring a bonded demolition contractor charleston sc doesn’t prove that the bond covers your project. Ask the owner or a qualified adviser to resolve discrepancies.

Are demolition bonds the same as contractor insurance?

No. A surety bond is a contractual agreement involving a principal, obligee, and surety, with obligations defined in the bond document. Insurance is a separate policy that addresses covered risks under its terms. Neither document replaces the other, and a bond doesn’t automatically provide insurance coverage. Review the contract’s bonding and insurance requirements separately, and verify each document with the appropriate issuer or qualified adviser instead of treating one as evidence that the other requirement is met.

Does TSIAC International provide surety bonds?

TSIAC International provides demolition and abatement services, including structural and selective demolition, interior gutting, and hazardous-material abatement. Contact the company directly to ask about its bond status if relevant to your project, and verify any required project-specific bond with the project owner or a qualified surety professional before relying on it.

What Happens If You Ignore Black Mold? The Cost of Negligence

An estimated 47% of homes in the U.S. harbor dampness or mold, yet many property owners treat a dark patch on the drywall as a minor cosmetic issue…

An estimated 47% of homes in the U.S. harbor dampness or mold, yet many property owners treat a dark patch on the drywall as a minor cosmetic issue rather than a biological hazard. You might wonder what happens if you ignore black mold, perhaps hoping the problem will stabilize if left alone. In reality, mold causes approximately $3 billion in property damage annually across the country. Delaying action doesn’t just increase the surface area of the infestation; it initiates a progressive degradation of your building’s structural components and compromises the safety of the indoor environment.

It’s natural to feel anxious about hidden repair costs or the distinction between a nuisance growth and a toxic threat. This guide details the progressive health, structural, and financial risks of untreated mold and explains when professional intervention becomes a necessity. We’ll examine the specific timeline of mold proliferation and the health symptoms that demand immediate attention. By the end of this analysis, you’ll have the technical clarity needed to decide if your situation requires professional hazardous material abatement to protect your property’s long-term value.

Key Takeaways

  • Learn exactly what happens if you ignore black mold during the initial 24 to 48 hour germination window when spores begin bonding with high-cellulose building materials.
  • Understand the critical shift from standard allergy irritants to chronic mycotoxin exposure, which triggers escalating health risks the longer the infestation remains untreated.
  • Discover how unchecked fungal growth actively digests organic materials, leading to irreversible drywall failure and compromised structural integrity.
  • Evaluate the long-term financial liabilities of property neglect, including steep drops in resale value and the likelihood of denied insurance claims.
  • Identify the technical thresholds that dictate when surface cleaning fails, making professional hazardous material abatement or interior gutting a structural necessity.

Understanding Black Mold: Stachybotrys Chartarum and the Growth Timeline

Black mold is a toxigenic fungus that requires moisture and organic matter to colonize building materials. Scientifically classified as Stachybotrys chartarum, this specific fungus is more than a simple nuisance; it’s a slow-acting biological agent that targets the structural components of a property. Unlike common household mildews that grow on soap scum or tiles, this species thrives on high-cellulose, low-nitrogen materials. This includes the paper backing of drywall, wood subflooring, and ceiling tiles. When these materials remain damp for a window of 24 to 48 hours, dormant spores germinate and begin the colonization process.

If you choose to look the other way, the colony eventually creates its own micro-environment. Even if the primary moisture source, like a minor pipe leak, is addressed, a large colony often retains enough internal humidity within its dense fungal mass to self-sustain. This is what happens if you ignore black mold; the fungus transitions from an opportunistic growth to a permanent, self-regulating resident that continues to degrade your property’s value and safety every day it remains in place.

The Anatomy of a Spore Colony

Fungal growth isn’t merely a surface-level aesthetic issue. It utilizes hyphae, which are branching, thread-like filaments that serve as the root system of the fungus. In porous substrates like drywall or insulation, these hyphae penetrate deep into the material’s core. Standard surface cleaning with bleach or household detergents almost always fails because it only eliminates the visible fruiting bodies. The roots remain protected within the substrate, ready to regrow as soon as conditions allow. Stagnant air and consistent humidity levels above 60% act as catalysts, allowing these roots to anchor firmly into the building’s skeletal components.

The 30-Day Escalation Path

Fungal proliferation follows a predictable and aggressive trajectory when left unmanaged. Understanding this timeline is essential for determining when a simple cleanup must evolve into professional hazardous material abatement.

  • Week 1: Initial colonization happens mostly out of sight. While you won’t see dark spots yet, the distinct, musty odor of microbial volatile organic compounds (mVOCs) signals that metabolic activity has begun.
  • Week 2: Visible dark spotting appears on surfaces. The colony starts releasing spores into the air. These spores often find their way into the HVAC system, which then distributes the contamination to previously unaffected areas of the building.
  • Month 1: The fungus achieves deep penetration into wall cavities and subflooring. At this stage, what happens if you ignore black mold becomes a structural liability. The cellulose is being actively digested, often necessitating professional interior gutting services to remove contaminated studs and insulation that are no longer salvageable.

The Health Risks of Chronic Exposure to Mycotoxins

While surface growth indicates a structural problem, the primary concern for occupants is the biological payload black mold carries. Most common molds trigger simple allergic reactions; however, Stachybotrys chartarum produces mycotoxins, which are secondary metabolites capable of causing systemic health issues. This is often termed “Toxic Mold Syndrome” in clinical discussions. Unlike a seasonal allergy that dissipates, chronic exposure leads to a cumulative toxic load. This is exactly what happens if you ignore black mold; the body’s natural filtration systems become overwhelmed by the constant inhalation of these microscopic compounds.

Vulnerable populations face the highest risk. Children, the elderly, and individuals with pre-existing conditions like COPD or cystic fibrosis experience accelerated symptom onset. When spores enter a building’s ventilation system, the HVAC unit acts as a distribution hub, turning a localized problem into a facility-wide health hazard. Understanding what happens if you ignore black mold in these environments is critical, as the spores don’t remain stationary; they circulate until they are inhaled or find new surfaces to colonize.

Immediate vs. Long-Term Respiratory Impact

Short-term exposure typically manifests as irritation of the eyes, nose, and throat. You might notice persistent coughing or a scratchy sensation that doesn’t resolve with standard medication. Over months, these minor irritations can evolve into chronic bronchitis. Research into the health effects of mold exposure suggests a strong link between damp indoor environments and the development of asthma in previously healthy children. Once inhaled, mycotoxins can cross the respiratory membrane and enter the bloodstream, leading to systemic inflammation and long-term pulmonary damage.

Neurological and Systemic Symptoms

The impact isn’t limited to the lungs. Many occupants report “brain fog,” chronic fatigue, and difficulty concentrating, which are often dismissed until the mold source is identified. Direct contact with contaminated surfaces or high concentrations of airborne spores also causes dermatological issues, including persistent rashes and skin irritation. Beyond the physical, the psychological stress of living in a compromised environment shouldn’t be overlooked. The constant anxiety over air quality and hidden repair costs adds a significant mental health burden to property owners. If you suspect your facility is affected, seeking professional mold remediation is the only way to ensure the biological threat is neutralized before symptoms escalate.

Structural Degradation: How Mold Destroys Your Property

While health concerns are the most immediate priority, the physical destruction of the building envelope is the most permanent consequence. Mold species like Stachybotrys don’t simply rest on surfaces; they actively digest building materials. By secreting enzymes that break down cellulose, which is the primary organic compound in wood, paper, and drywall, the fungus converts your property’s structure into a food source. This is what happens if you ignore black mold for extended periods; the materials that provide stability and insulation are chemically dismantled at a microscopic level.

Drywall is particularly susceptible because its paper facing provides a massive surface area of high-cellulose fuel. Once the fungal hyphae penetrate the gypsum core, the board loses its tensile strength and becomes brittle. At this point, the material can’t be restored with a coat of antimicrobial paint or a surface wash. It requires professional interior gutting to ensure every contaminated layer is removed. Hidden damage behind baseboards and within wall cavities is the most insidious, as it allows the fungus to compromise the building’s skeleton without visible warning. This hidden decay often leads to crumbling wall surfaces and structural instability that goes unnoticed until a major repair is unavoidable.

The Compromise of Load-Bearing Elements

Prolonged moisture doesn’t just invite mold; it creates a gateway for wood-destroying fungi that cause structural rot. When floor joists and wall frames remain damp, the transition from surface mold to deep-seated rot happens rapidly. The EPA highlights the dangers of mold exposure not just as a health risk, but as a direct cause of material destruction. Once a load-bearing element is structurally compromised, simple cleaning is no longer a viable technical response. We’ve seen cases where ignoring a small leak for six months resulted in the need for selective demolition of entire floor sections to ensure the building remained safe.

HVAC and Systemic Contamination

Systemic contamination represents the “total loss” scenario for many facilities. Porous materials like fiberglass insulation and flexible ductwork are essentially impossible to remediate once spores have embedded themselves deep within the fibers. The cost of cross-contamination throughout a large-scale commercial facility is immense. If the air handling unit continues to cycle air through a mold-infested space, the entire building’s infrastructure becomes a vector for spores. In these cases, what happens if you ignore black mold is a shift from a localized mold remediation project to a full-scale mechanical and structural overhaul that affects every floor and every occupant.

What Happens If You Ignore Black Mold? The Cost of Negligence

Neglecting a fungal infestation quickly shifts from a maintenance oversight to a major financial liability. While the biological growth digests your property’s structure, it simultaneously erodes its market value. Industry data indicates that a history of untreated mold can decrease a home’s resale value by 20% to 37%. This is a direct consequence of what happens if you ignore black mold; the market views the property as a high-risk asset requiring significant capital expenditure to restore. Beyond the loss in equity, property owners often face a staggering cost gap when they finally address the issue. A localized cleanup that might have been manageable initially can triple in price once the mold necessitates full-scale selective demolition and hazardous material abatement.

Insurance Denials and the “Sudden” Rule

Most property insurance policies operate on the principle of “sudden and accidental” occurrence. This means coverage typically applies to a burst pipe or a flash flood, but it rarely extends to “gradual damage” caused by neglect. When an adjuster arrives, they look for signs of long-term moisture, such as deep wood rot or extensive spore colonies. If the evidence suggests the problem has existed for months, the claim will likely be denied. Many policies also cap mold-related payouts between $1,000 and $10,000, which is often insufficient for large-scale remediation. Precise documentation of all leaks and repairs is critical to proving you haven’t been negligent, but once the growth is established, the financial burden usually falls entirely on the owner.

Impact on Real Estate Transactions

Modern real estate markets are highly sensitive to environmental hazards. Mandatory disclosure laws require sellers to list any known mold issues; failing to do so can lead to litigation long after the sale is finalized. Even if a buyer is willing to proceed, their financing often falls through during the appraisal or inspection phase. Lenders are hesitant to back properties with active biological growth because it threatens the collateral’s integrity. To move forward, you’ll almost certainly need a “clearance certificate” from a professional service. This document proves the area has been remediated according to industry standards, but obtaining it after months of neglect is far more expensive than early intervention.

For commercial landlords, the legal risks are even more acute. Courts are increasingly shortening the “reasonable time” allowed to address mold complaints, with some metropolitan areas favoring a 7-day response window over the traditional 30 days. Ignoring these timelines can lead to habitability lawsuits and massive increases in insurance premiums. If you’ve identified a persistent growth, you need a partner who understands regulatory compliance and safe disposal. Contact the experts at TSIAC International for professional mold remediation to protect your assets and limit your legal exposure.

Professional Abatement: When Cleaning Isn’t Enough

Surface-level cleaning often provides a false sense of security. While household detergents might remove the visible pigmentation, they don’t address the hyphae rooted within porous materials. This technical necessity is a direct result of what happens if you ignore black mold; the fungus eventually embeds itself so deeply that topical treatments are ineffective. When the contamination reaches the structural skeleton of a building, property owners must transition from simple remediation to comprehensive hazardous material abatement protocols to ensure the safety of the indoor environment.

In cases of extensive neglect, the mold colony often compromises the integrity of wall studs and subflooring. At this stage, professional interior gutting services become mandatory. This process involves the controlled removal of all organic materials that have been structurally weakened or heavily colonized. To prevent cross-contamination, experts utilize high-efficiency particulate air (HEPA) filtration and negative air pressure machines. These systems ensure that disturbed spores are captured rather than redistributed through the facility’s ventilation system, which is a common failure point in DIY attempts.

The Professional Remediation Protocol

A disciplined approach to abatement follows a precise methodological sequence to guarantee results. We follow these steps to manage the risks associated with what happens if you ignore black mold for too long:

  • Step 1: Containment. Technicians establish physical barriers using 6-mil polyethylene sheeting. Negative air pressure is maintained within the work zone to prevent spore migration to clean areas of the property.
  • Step 2: Controlled Removal. Contaminated porous materials like drywall and fiberglass insulation are carefully removed, double-bagged, and disposed of as hazardous waste according to regulatory standards.
  • Step 3: Specialized Cleaning. Non-porous surfaces undergo HEPA vacuuming followed by antimicrobial washing. Air scrubbers run continuously to achieve the required air exchange rates and capture airborne particulates.

Choosing a Certified Abatement Contractor

The technical precision required for mold containment is identical to the standards used in asbestos removal. A contractor with experience in high-risk material abatement brings a level of discipline that standard cleaning companies don’t possess. You should verify that your chosen partner holds the necessary licensing, comprehensive liability insurance, and specialized permits for hazardous waste disposal. The final and most critical step is the post-remediation verification (PRV) test. This independent air quality analysis confirms that spore counts have returned to baseline levels, providing a technical guarantee that the facility is once again safe for occupancy. Don’t settle for a visual inspection when biological safety and property value are at stake.

Securing Your Asset Through Technical Intervention

Ignoring biological growth is a gamble with your property’s structural integrity and your occupants’ health. We’ve detailed the aggressive timeline of fungal proliferation and the systemic risks of chronic mycotoxin exposure. Understanding what happens if you ignore black mold helps you recognize the critical transition from a manageable cleaning task to a mandatory hazardous material abatement project. Once hyphae penetrate structural studs or HVAC systems, technical intervention is the only reliable way to restore safety and preserve asset value.

TSIAC International brings over 15 years of hazardous material experience to every project, specializing in complex interior gutting and structural removal. Our teams maintain strict adherence to environmental and safety regulations, ensuring every contaminant is contained and neutralized with methodological precision. You don’t have to manage these risks alone. Protect your property and health; contact TSIAC International for expert hazardous material abatement today. Taking decisive action now ensures a secure, compliant, and healthy environment for the future.

Frequently Asked Questions

Can I just bleach black mold and leave it?

Applying bleach to black mold is not an effective long-term solution. Bleach is a surface-level oxidizer that only kills visible spores on non-porous materials like tile. It cannot penetrate the hyphae, or root systems, that anchor deep into porous materials like drywall or wood. If you rely on bleach, the roots remain alive, and the colony will likely regrow as soon as moisture levels fluctuate again. Professional remediation is required for deep-seated infestations.

How long can you live in a house with black mold before getting sick?

There is no universal timeline for when symptoms appear, as individual sensitivity and the concentration of airborne mycotoxins vary significantly. Some occupants report respiratory irritation within 48 hours, while others develop systemic issues after months of chronic exposure. Understanding what happens if you ignore black mold is vital, as the biological load on your immune system increases the longer you remain in a contaminated environment without proper hazardous material containment.

Will black mold eventually die if I dry out the area?

Drying out an area will cause black mold to go dormant, but it does not kill the fungus. Spores and toxic metabolites remain present in the building materials and can still trigger health issues through inhalation. If moisture returns due to high humidity or a new leak, the dormant colony will reactivate immediately. True removal requires the physical extraction of contaminated materials through specialized abatement protocols to ensure the environment is biologically safe.

Does home insurance cover black mold removal if I waited to report it?

Most standard homeowners’ insurance policies exclude coverage for mold resulting from neglect or lack of maintenance. Insurance is designed to cover sudden and accidental water discharge, such as a burst pipe. If an inspector determines that the mold resulted from a long-term leak that you failed to address, the claim will likely be denied under the “gradual damage” clause. This highlights the financial risk of what happens if you ignore black mold for extended periods.

What is the “musty smell” and does it always mean black mold?

The distinct musty odor is caused by microbial volatile organic compounds, or mVOCs, which are gases released during the mold’s metabolic process. While this smell is a reliable indicator of active microbial growth, it doesn’t always signify the presence of Stachybotrys chartarum. Other species like Aspergillus or Penicillium also produce similar odors. Regardless of the species, a persistent musty smell indicates a moisture problem that requires a professional assessment to prevent structural decay.

When does mold remediation require a full interior gut-out?

A full interior gut-out is necessary when the fungal growth has compromised the structural integrity of porous building components. If the hyphae have penetrated deep into wall studs, floor joists, or fiberglass insulation, these materials cannot be effectively sanitized. In these scenarios, selective demolition is the only way to ensure all contaminated organic matter is removed. This prevents the mold from continuing to digest the building’s skeleton from the inside out.

Can black mold grow back after professional treatment?

Professional treatment effectively removes existing colonies, but mold can grow back if the underlying moisture source is not permanently resolved. Fungal spores are omnipresent in the environment and will colonize any high-cellulose material that remains damp for more than 48 hours. Successful remediation must be paired with moisture control strategies, such as repairing leaks and maintaining indoor humidity levels between 30% and 50% to prevent a recurrence of the infestation.

Is it safe to stay in the house during a mold abatement project?

Safety during an abatement project depends on the scale of the contamination and the effectiveness of the containment barriers. For localized projects, technicians use negative air pressure and physical barriers to isolate the work zone, making it possible to remain in other parts of the building. However, for large-scale commercial gut-outs or extensive hazardous material removal, we typically recommend vacating the premises to avoid any risk of accidental exposure during the demolition process.

Interior Demolition Mistakes to Avoid: The Definitive 2026 Checklist

A sledgehammer might seem like the fastest route to a clean slate, but interior demolition is an exercise in surgical deconstruction rather than…

A sledgehammer might seem like the fastest route to a clean slate, but interior demolition is an exercise in surgical deconstruction rather than brute force. Overlooking hidden hazards concealed behind drywall quickly leads to severed utility lines, compromised load-bearing assemblies, or catastrophic project shutdowns. Recognizing the critical interior demolition mistakes to avoid is the only reliable way to protect your jobsite, your crew, and your investment before physical work begins.

You already know the pressure of managing demanding renovation schedules while balancing structural safety and rigid compliance mandates. A single unaddressed hazardous material like asbestos or lead, or an accidental cut into live electrical conduit, can instantly halt operations and trigger severe enforcement penalties. Master our essential checklist to protect your building structure, eliminate regulatory liability, and keep your schedule on track. Here is your comprehensive guide to executing an incident-free interior gut-out with complete technical control.

Key Takeaways

  • Identify environmental hazards like asbestos and lead through certified testing prior to disturbance to avoid immediate regulatory shutdowns and severe liabilities.
  • Discover the critical interior demolition mistakes to avoid when mapping load-bearing framing and live MEP utilities concealed behind wall assemblies.
  • Understand why precision selective demolition protects foundational building assets and site safety far better than aggressive blunt-force methods.
  • Implement a structured six-step pre-demolition protocol to guarantee engineering clearance, complete utility isolation, and strict code compliance.
  • Eliminate hefty disposal surcharges and landfill waste by establishing rigorous on-site material separation for metals, concrete, wood, and drywall.

Critical Pre-Demolition Oversight: Skipping Environmental and Structural Surveys

Pre-demolition surveys serve as mandatory regulatory and engineering baselines that validate environmental safety and structural load paths before a single tool touches a substrate. Rushing into an interior gut-out without thorough site investigations ranks among the most severe interior demolition mistakes to avoid. Ignoring original blueprints or failing to conduct exploratory openings blinds field crews to structural modifications made over decades. Without baseline documentation, routine strip-outs quickly trigger worker exposure, structural destabilization, and costly stop-work orders.

Neglecting Asbestos, Lead, and Hazardous Material Testing

Tearing into acoustic ceiling plaster, multi-layered vinyl floor tiles, or thermal pipe lagging without accredited laboratory sampling exposes personnel to airborne toxins. Federal safety regulations demand certified testing for hazardous contaminants prior to physical disruption. Disturbing friable asbestos or aged lead paint without verified negative air containment, HEPA filtration, and sealed airlocks immediately contaminates entire HVAC plenums. Once hazardous particulate escapes into adjacent occupied areas, regulatory fines and emergency remediation costs escalate exponentially.

Failing to Verify Load-Bearing Walls and Framing

Differentiating non-structural acoustic partitions from critical load-bearing assemblies requires rigorous engineering analysis rather than visual assumptions. Non-descript light-gauge metal studs or secondary timber posts often stabilize upper floor joists, structural lintels, or heavy mechanical equipment suspended above. Removing even a seemingly minor partition stud without engineered temporary shoring induces severe ceiling deflection and threatens catastrophic collapse. An engineer-of-record must review the existing structural framing and approve a sequenced load-support plan before crews dismantle interior walls.

Bypassing Building Permits and Regulatory Clearances

Federal standards require a documented engineering survey under OSHA 29 CFR 1926.850 before demolition starts, alongside approved municipal building permits. Bypassing statutory filings creates unacceptable liabilities because unpermitted interior gutting routinely invalidates commercial property insurance policies during an unforeseen structural failure. Permitting frameworks also establish legal accountability for waste handling. Integrating systematic deconstruction methodologies ensures your documentation provides auditable waste disposal manifests, compliant chain-of-custody tracking, and full legal authorization from start to finish.

Utility and Structural Disasters: Technical Execution Blunders to Prevent

Blunt-force impact methods inside commercial and residential buildings generate immediate safety hazards and catastrophic property damage. Striking structural assemblies without mapping mechanical, electrical, and plumbing (MEP) pathways remains one of the most perilous interior demolition mistakes to avoid. Surgical deconstruction requires absolute control over energy sources, load redistribution, and airborne particulate migration before interior finishes are stripped.

Inadequate MEP Utility Isolation and Lockout-Tagout Failures

Concealed electrical conduits, pressurized water loops, and gas distribution pipes frequently run through shared wall cavities without visual markers. Demolition crews must verify zero-energy states using non-contact voltage testers, inductive tracing tools, and line capping before stripping framing. Standardized Lockout/Tagout (LOTO) procedures serve as vital, federally mandated protocols that physically isolate power supplies and release residual line pressure to protect technicians from fatal electrical arc flashes or gas ignitions. Active plumbing networks must be completely isolated, drained, and capped to prevent high-volume water loss across occupied multi-story spaces.

Improper Temporary Shoring and Structural Support

Removing partition elements without evaluating ceiling joist transfers can compromise the integrity of multi-story structures. Engineered temporary shoring posts must be precisely positioned directly beneath joists and secured to load-rated timber sills before cutting existing structural framing. Premature removal of these temporary supports causes noticeable ceiling deflection, cracked peripheral masonry, and potential sudden collapse. Experienced crews utilize laser distance meters and optical deflection indicators to track micro-movements across ceiling planes throughout every phase of the gut-out. Engaging specialized teams for selective demolition prevents destabilization while keeping work sequenced safely.

Poor Dust Containment and Negative Air Failures

Demolishing interior assemblies produces high concentrations of respirable crystalline silica and gypsum particulate. Without heavy-duty polyethylene barriers, magnetic zipper access points, and continuous negative air pressure, airborne dust infiltrates active HVAC ductwork and spreads to adjacent tenant zones. Industrial air scrubbers equipped with certified HEPA filtration systems maintain continuous air exchanges, while field technicians require tight-fitting elastomeric respirators. Incorporating EPA standards for sustainable debris management ensures dust barriers isolate salvageable materials from cross-contamination, keeping recycling streams viable throughout the tear-out.

DIY Demolition vs. Professional Selective Demolition: Evaluating the Real Risks

Untrained crews frequently mistake an interior strip-out for simple sledgehammer work. In reality, blunt demolition inflicts severe collateral damage on building assemblies meant to stay intact. Understanding the operational divide between uncontrolled destruction and precision deconstruction highlights the most expensive interior demolition mistakes to avoid before assigning labor to an interior remodel.

Surgical Precision vs. Uncontrolled Destruction

Selective demolition relies on systematic peel-back methodologies and calibrated diamond-blade saw-cutting rather than blunt force. Instead of striking blindly through partition assemblies, certified technicians score perimeter margins to isolate finishes cleanly. This approach protects adjacent load-bearing posts, retained subfloors, and delicate mechanical chases from dynamic impact shocks. Preserving finished architectural elements and structural boundaries saves significant capital, keeping subsequent trades on schedule.

  • Structural Preservation: Blunt impacts introduce microscopic fractures into peripheral plaster and concrete slabs, while precision cuts isolate the work zone cleanly.
  • Site Safety: Ad-hoc labor often ignores overhead load shifts and airborne dust hazards, whereas selective gutting follows engineered disassembly sequences.
  • Schedule Reliability: Remedying broken pipes or patching damaged perimeter framing derails timelines, but planned strip-outs deliver clean, ready-to-frame spaces.

Liability Exposure, Insurance, and Workers’ Compensation

Assigning general labor to gut interior spaces exposes property owners to massive civil and regulatory liability. Demolition carries high operational risk; when uninsured workers sustain crushing injuries or fall through hidden floor openings, the financial fallout lands directly on the building owner. Licensed industrial contractors maintain comprehensive general liability, dedicated pollution liability for airborne contaminants, and complete workers’ compensation coverage. This robust commercial insurance structure shields property owners from costly OSHA citations, civil torts, and uninsurable structural repairs.

Interior Demolition Mistakes to Avoid: The Definitive 2026 Checklist

The Comprehensive Pre-Demolition Checklist: 6 Steps Before Gutting Interiors

Systematic pre-planning eliminates the catastrophic oversights that derail commercial and residential strip-outs. Unorganized site handovers remain primary interior demolition mistakes to avoid, as operational ambiguities cause costly job-site injuries, permit delays, and structural failures. Deploying a structured, chronological six-step checklist ensures technical teams verify regulatory, mechanical, and safety clearances before gutting operations commence.

  1. Conduct Hazardous Material Clearance: Complete licensed third-party testing for friable asbestos, lead coatings, and biological hazards before specifying scopes.
  2. Secure Structural Engineering Sign-Off: Obtain stamped calculations and an approved sequence plan from an engineer-of-record.
  3. Acquire Municipal Clearances: Secure all designated selective interior demolition permits and post regulatory filings on-site.
  4. Implement MEP Utility Isolation: Execute physical disconnects, verify zero-energy states, and tag locked circuit panels.
  5. Establish Containment and Critical Barriers: Seal off adjacent zones using negative air equipment and heavy flame-retardant poly sheeting.
  6. Deploy Logistics and Waste Infrastructure: Map debris transport paths, position sorting dumpsters, and deliver mandatory daily safety briefings.

Phase 1: Engineering Discovery, Permits, and Hazardous Clearance

Pre-construction starts with comprehensive environmental testing. Industrial hygienists must pull bulk samples of questionable adhesives, ceiling coatings, and pipe wrap. Simultaneously, a licensed structural engineer must examine structural load paths, verifying whether targeted walls stabilize floor spans above. Once engineered shoring plans are finalized, project teams must submit documentation to secure municipal interior permits and notify neighboring tenants of pending noise and vibration profiles.

Phase 2: Job Site Isolation, Safety Engineering, and Logistics

Field supervisors must verify that active power grids, domestic water lines, and natural gas lines are bled and locked out before crews tear into wall cavities. Flame-retardant polyethylene barriers and negative air filtration machines isolate active work zones from surrounding corridors. Finally, superintendent teams establish dedicated debris corridors, chutes, and material-specific containers to streamline waste removal. Daily task hazard analyses ensure every laborer understands structural shoring limits and assigned egress routes. To safeguard your property assets through every planning phase, partner with TSIAC International for comprehensive turnkey demolition execution.

Sustainable Debris Management: Avoiding Waste Disposal and Recycling Failures

Throwing unsorted building components into a single container creates an operational failure that triggers steep landfill surcharges. Modern commercial and residential gutting requires aggressive, methodical source separation directly at the point of removal. Treating clean recyclables and regulated building materials as general mixed refuse represents one of the most financially draining interior demolition mistakes to avoid. Establishing distinct disposal workflows protects project capital and maintains rigorous environmental compliance across every stage of deconstruction.

Eliminating Waste Cross-Contamination and Hazardous Spills

Co-mingling toxic substrates with standard construction debris instantly contaminates an entire roll-off container, converting cheap bulk waste into hazardous material. Lead-treated trim and asbestos-containing floor tiles must be segregated into certified, puncture-resistant containment packaging before transport. Technicians must enforce water-containment barriers to stop particulate runoff from washing into adjacent storm drains or porous soil. Maintaining clear chain-of-custody manifests protects commercial property owners under federal disposal statutes by documenting every ton from point of origin to its licensed disposal facility.

Maximizing Scrap Recovery and Landfill Diversion

Dumping valuable architectural scrap forfeits salvage credits that offset overall project costs. Professional selective demolition deploys segregated collection bins for heavy structural steel, galvanized conduit, metal framing, and clean copper piping. Stripped timber studs and unpainted drywall move to specialized regional processing facilities for repurposing. Clean concrete removal and masonry processing allow heavy brick and foundation rubble to be crushed into certified road base aggregates, diverting substantial volume away from municipal landfills.

Why Professional Demolition Contractors Protect Your Project

Handling complex strip-outs demands specialized low-vibration saw equipment, mechanical handling machinery, and disciplined execution. Managing an interior gut-out with disparate subcontractors creates scheduling friction and safety oversights. A single qualified partner coordinates hazardous abatement, structural deconstruction, and sustainable recycling into one streamlined operation. This integrated methodology protects your timeline, structural integrity, and crew safety. Consult with the proven specialists at TSIAC International to coordinate your next interior demolition project with surgical precision.

Secure Your Renovation Schedule with Disciplined Deconstruction

A successful renovation begins long before physical tear-out begins. Recognizing the critical interior demolition mistakes to avoid ensures that environmental surveys, utility lockouts, and load-bearing verifications protect both structural integrity and operational schedules. Shifting from indiscriminate destruction to methodical selective deconstruction prevents regulatory shutdowns, eliminates unexpected worker exposures, and keeps waste handling fully compliant with environmental standards.

With over 15 years of industry-tested demolition and abatement expertise, our licensed and certified specialists deliver turnkey environmental containment alongside rigorous material recycling practices. You don’t have to navigate structural complexities or hazardous materials alone. Schedule a professional demolition and environmental assessment with TSIAC International to execute your next project safely, cleanly, and with complete technical confidence.

Frequently Asked Questions

Can you safely demolish an interior wall without checking for load-bearing weight?

No, you cannot safely remove any interior wall without a verified structural evaluation. Even non-bearing partition walls can carry point loads from mechanical installations or settle into secondary load-bearing roles over time. Removing framing without an engineer-of-record inspection risks sagging floor joists, cracked drywall on upper levels, or severe structural deflection. Verifying structural pathways first prevents catastrophic collapse and ranks among the primary interior demolition mistakes to avoid.

What happens if asbestos or lead paint is discovered during an interior gut renovation?

Work must immediately halt in the affected zone while technicians establish isolated containment. Disturbing identified hazardous materials without containment breaches federal environmental regulations and spreads dangerous fibers throughout the building. A certified abatement contractor must seal off the zone with negative air pressure, remove the toxic materials under HEPA filtration protocols, and conduct air clearance testing before standard demolition resumes. Prompt containment protects workers and avoids compounding regulatory liabilities.

Is a municipal building permit always required for interior non-structural demolition?

Most municipal building departments require a dedicated demolition or alteration permit even for non-structural interior gutting. While cosmetic removals like surface carpeting or minor trim might be exempt, removing full drywall sheets, ceiling grids, or partition assemblies alters fire ratings and access routes. Operating without a valid permit leads to immediate stop-work orders, steep administrative fines, and the potential nullification of your commercial or residential property insurance coverage.

How much dust containment is required during commercial interior strip-outs?

Commercial strip-outs require full physical isolation using flame-retardant polyethylene barriers and certified negative air machines. Sealing all HVAC supply and return diffusers prevents respirable crystalline silica and gypsum particles from contaminating occupied spaces. Contractors must continuously exhaust air through HEPA filtration scrubbers to maintain negative pressure relative to adjacent corridors. These measures maintain OSHA compliance, protect sensitive building electronics, and preserve air quality across neighboring tenant suites.

Can interior demolition waste be thrown into standard municipal trash dumpsters?

Standard municipal trash dumpsters cannot accept mixed interior demolition debris. Landfills and municipal haulers strictly prohibit mixing heavy masonry, treated wood, metals, and potentially hazardous dust with domestic refuse. Dropping unseparated debris into municipal bins triggers refusal penalties and massive contamination surcharges. Compliant operations require dedicated construction roll-off containers, source-separated sorting for metal and concrete recycling, and certified hazardous waste manifests for regulated materials.

How do professional contractors verify that hidden electrical conduits are completely dead?

Technicians verify zero-energy states through a multi-step diagnostic protocol before cutting into wall cavities. Crews employ inductive voltage sensors, digital multi-meters, and specialized wall scanners to locate hidden conduits behind finishes. Once upstream breakers are opened, crews apply standardized Lockout/Tagout (LOTO) padlocks and physically probe conductors to confirm the complete absence of electrical current. Skipping this systematic verification remains one of the most hazardous interior demolition mistakes to avoid.

What is the difference between total interior gutting and selective interior demolition?

Total interior gutting strips an entire interior down to bare exterior framing, concrete slabs, and perimeter load-bearing columns. Selective demolition, by contrast, surgically targets specific non-structural elements, partitions, or floor coverings while preserving architectural finishes, active MEP infrastructure, and structural frameworks slated to remain. Selective demolition demands tighter mechanical cut-lines, specialized tooling, and active shoring to protect adjacent architectural assets from collateral vibration damage.