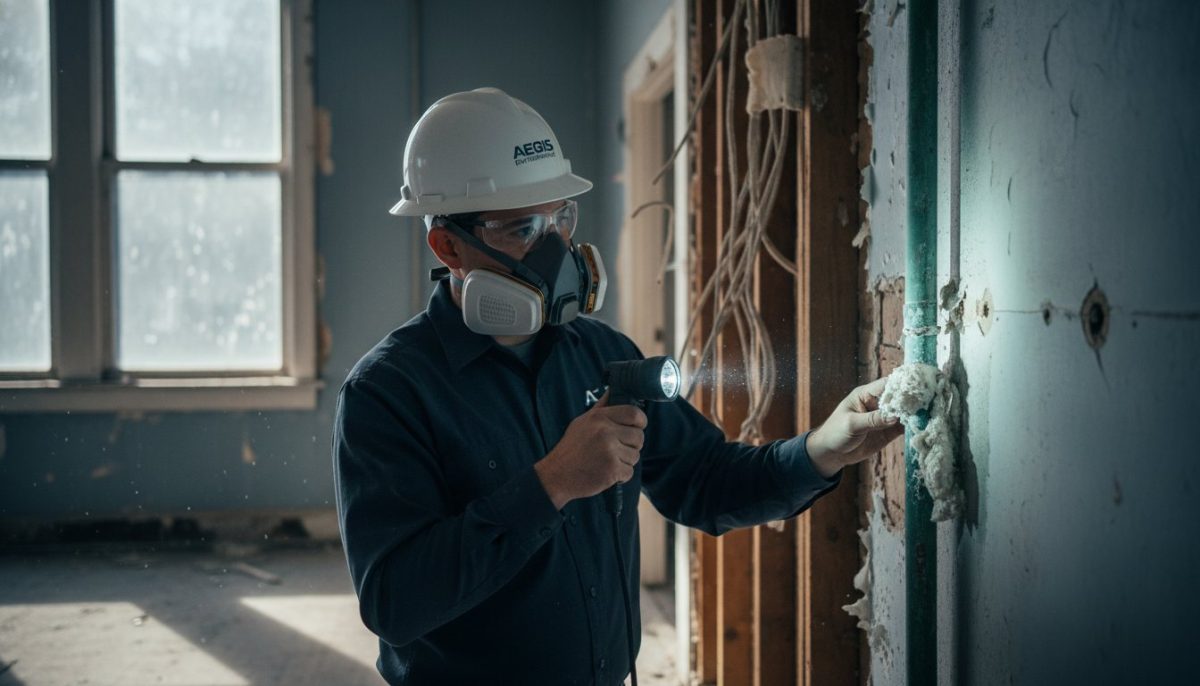
Gutting a Kitchen for Remodel: The 2026 Professional Guide to Safe Demolition

A successful kitchen renovation is won or lost during the first 48 hours of demolition, where a single misplaced sledgehammer swing can turn an $800…

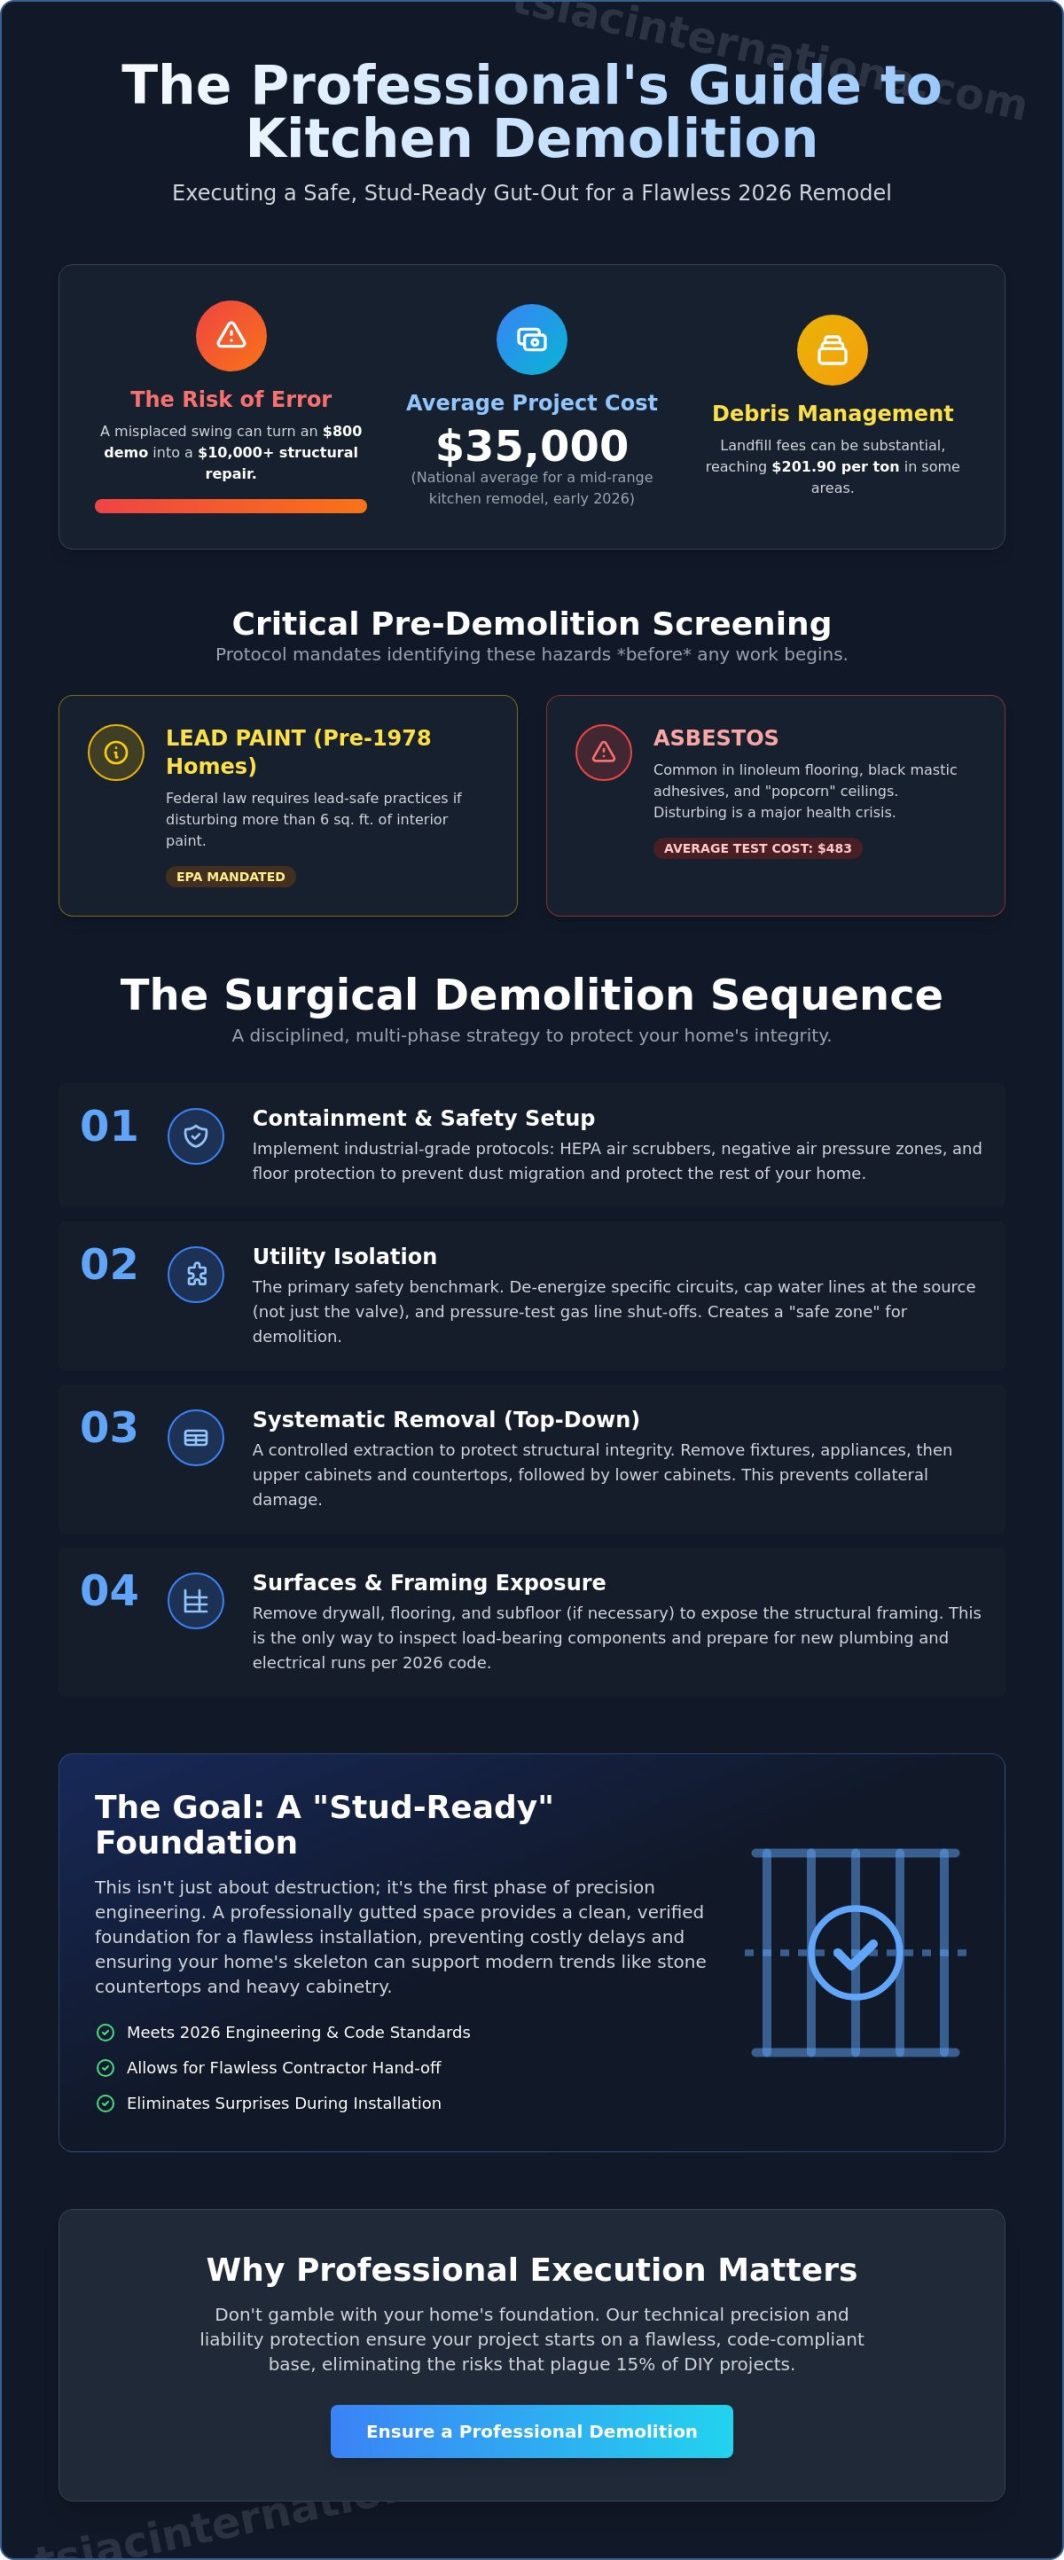
A successful kitchen renovation is won or lost during the first 48 hours of demolition, where a single misplaced sledgehammer swing can turn an $800 demo into a $10,000 structural repair. You likely feel the mounting pressure of these hidden risks, especially when considering that the national average for a mid-range kitchen remodel has reached $35,000 as of early 2026. Whether it’s the fear of uncovering asbestos, which costs an average of $483 to test, or the anxiety of accidentally severing a live gas line, the stakes of gutting a kitchen for remodel extend far beyond simple destruction.

It’s natural to feel overwhelmed by the logistics of debris management, particularly with landfill fees in places like Richmond, California, hitting $201.90 per ton this year. This guide provides the technical roadmap you need to execute a safe, professional-grade demolition that prioritizes structural health and environmental compliance. You’ll learn how to follow EPA lead-safe regulations for pre-1978 homes, manage hazardous materials with engineering precision, and prepare a clean, stud-ready environment that guarantees a flawless transition to your construction team.

Key Takeaways

  • Distinguish between cosmetic updates and a full structural gut to ensure your project begins with a clean, frame-ready foundation that meets 2026 engineering standards.
  • Master the surgical sequence of demolition, prioritizing utility isolation and a top-down removal strategy to prevent collateral damage to your home’s structural integrity.
  • Identify the critical criteria for selective demolition when gutting a kitchen for remodel, allowing you to evaluate when to preserve subfloors and when total framing exposure is necessary.
  • Implement industrial-grade containment protocols, including HEPA filtration and negative air pressure, to manage hazardous dust and maintain environmental safety throughout the interior.
  • Understand the liability and precision advantages of professional execution, ensuring a “stud-ready” space that allows contractors to proceed with a flawless installation.

Understanding the Scope of Gutting a Kitchen for Remodel

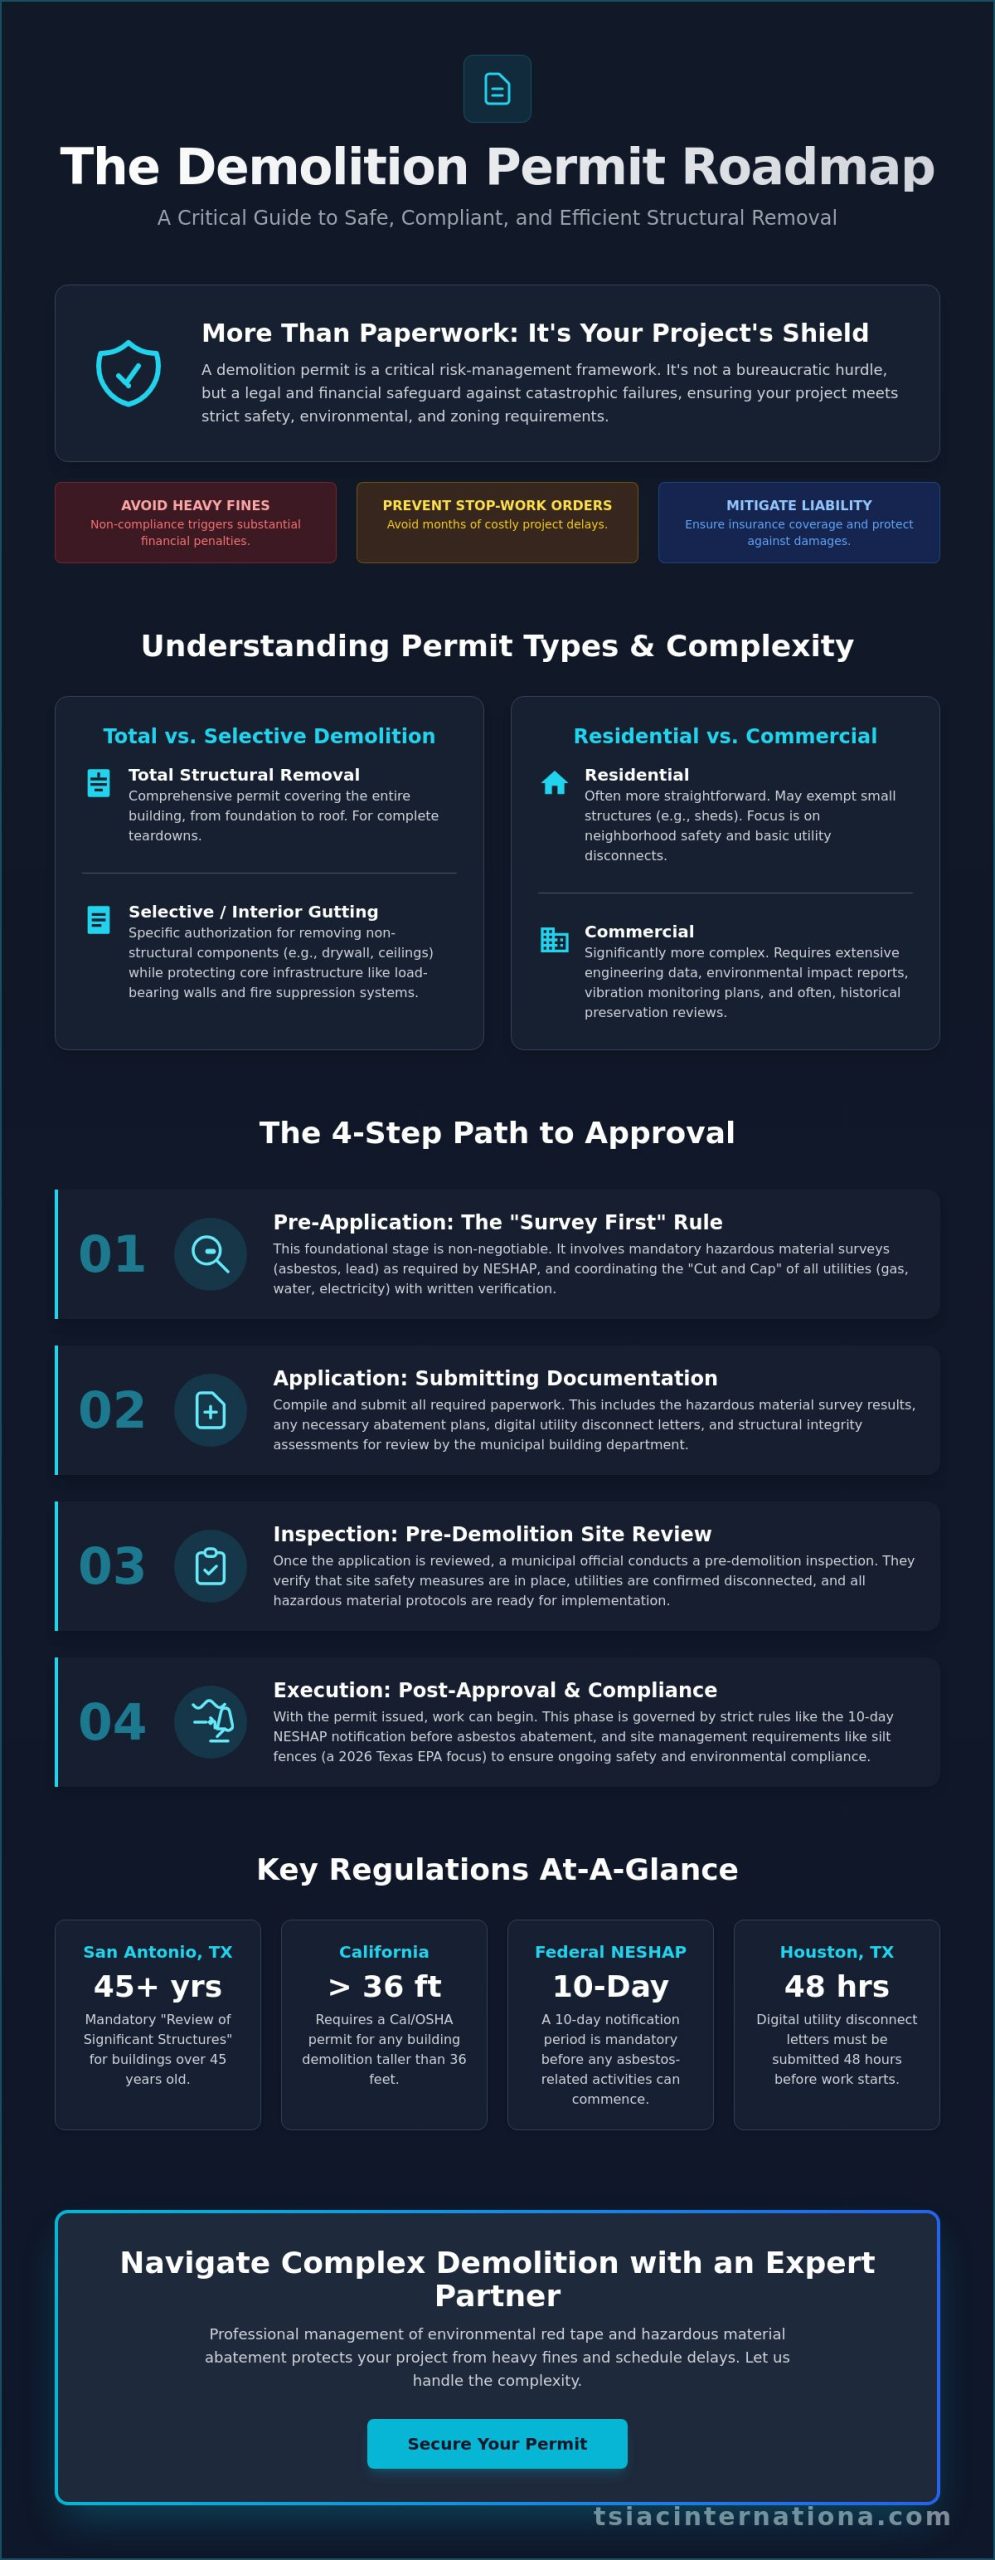
Gutting a kitchen for remodel is a surgical operation, not a sledgehammer-first free-for-all. In professional terms, a full gut involves the systematic removal of every surface material until the structural framing is completely exposed. This “stud-ready” state is the mandatory baseline for modern kitchen infrastructure, allowing your team to inspect load-bearing components and update electrical systems to 2026 standards. While homeowners often view demolition as a way to vent frustration, the industry defines it as the first phase of precision engineering. For a comprehensive overview of demolition and its technical complexities, it’s clear that residential gutting requires the same level of sequence planning as commercial tear-downs.

Cosmetic vs. Full Interior Gutting

Selective demolition allows you to keep existing drywall if the layout remains identical and the substrate is in pristine condition. However, if you’re relocating a sink or adding a 2026-style multi-functional island with integrated charging stations, stripping to the studs is non-negotiable. This level of access ensures that new plumbing and electrical runs are installed without the “fishing” techniques that often lead to code violations. Choosing professional interior gutting eliminates the risk of discovering structural rot or outdated wiring halfway through the installation phase, which prevents the costly delays that plague 15% of DIY projects.

Identifying Hidden Hazards: Asbestos and Lead

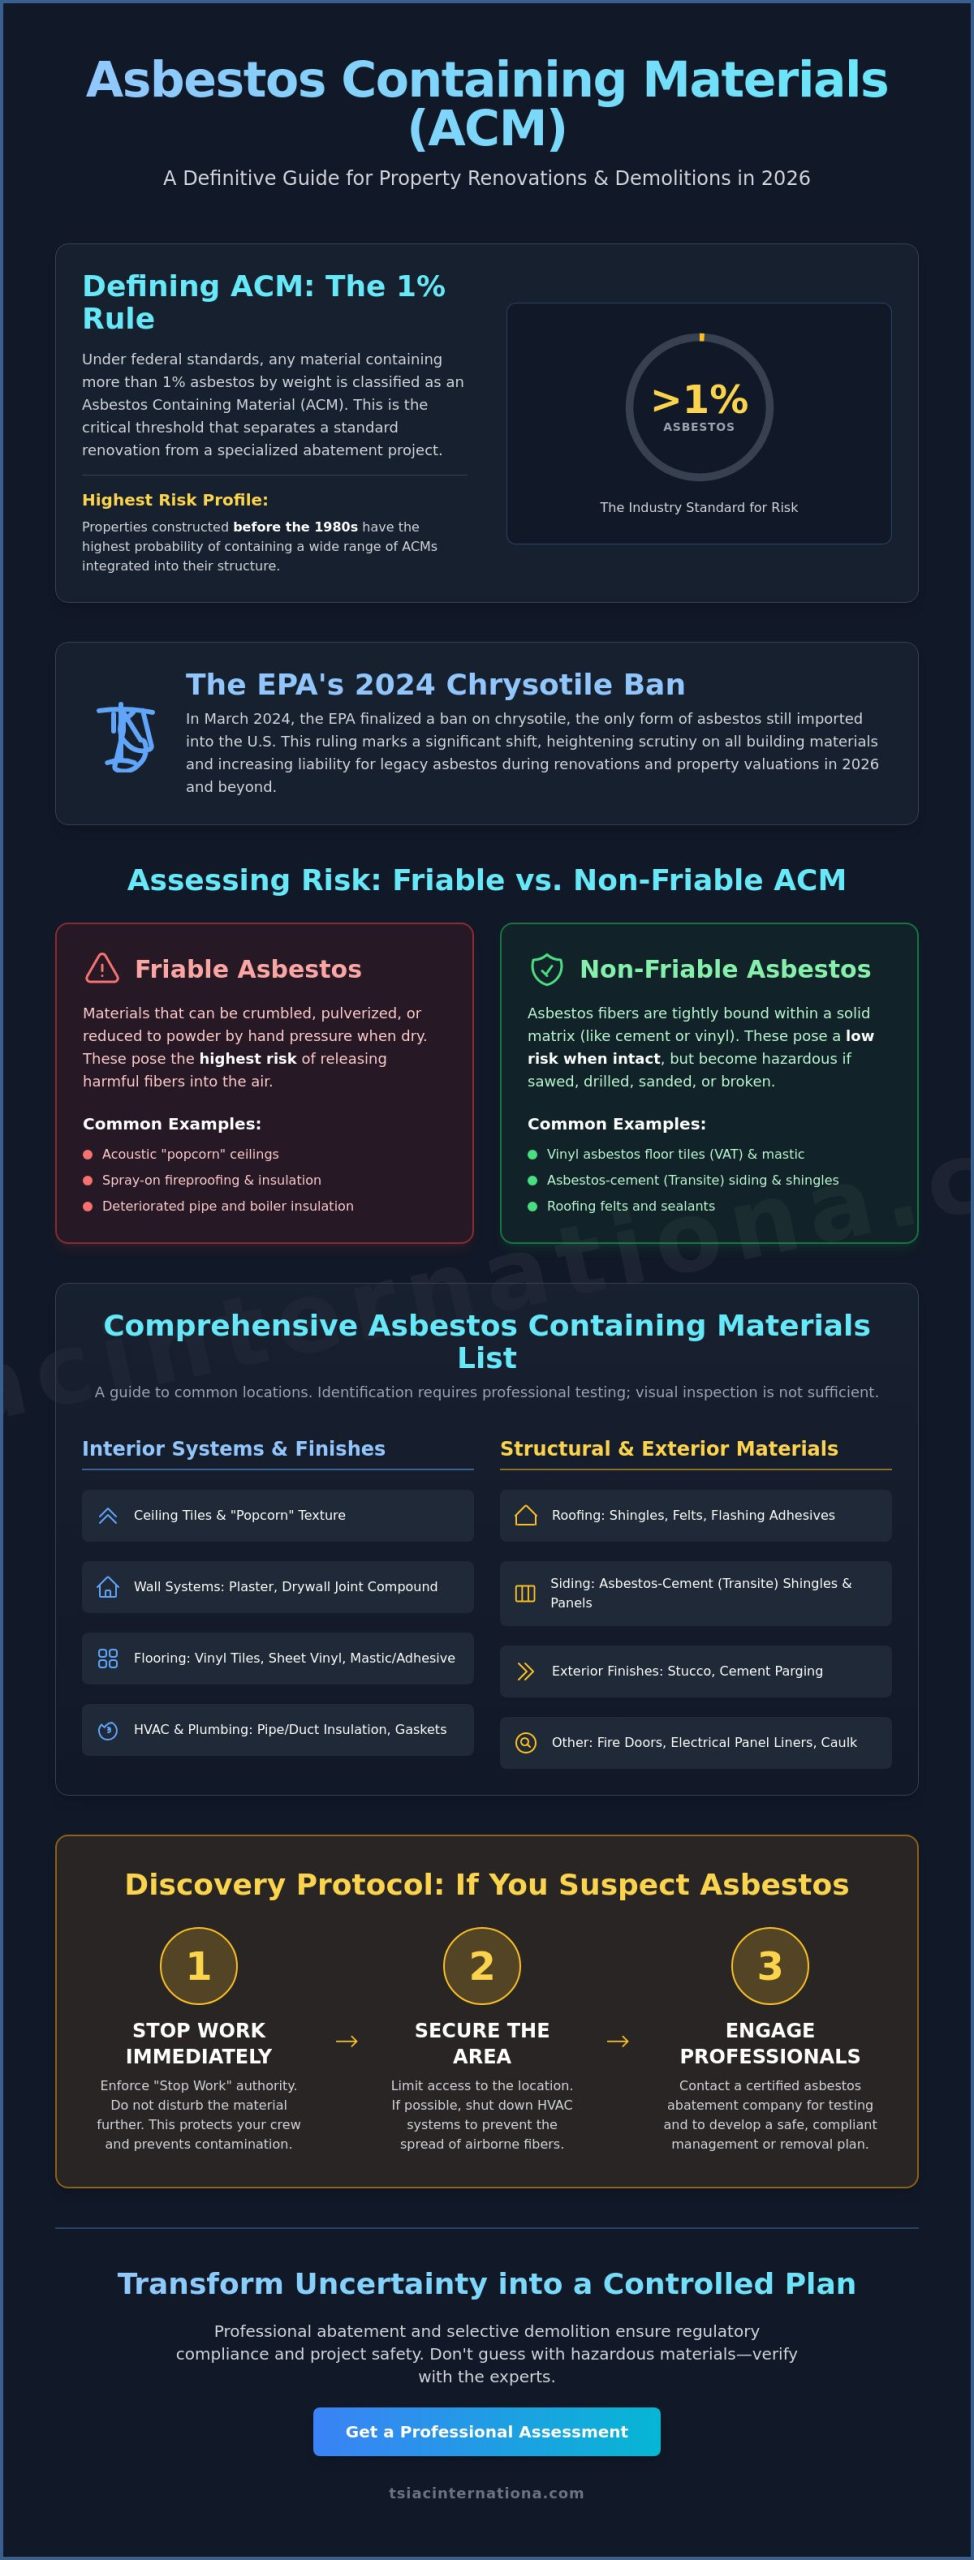
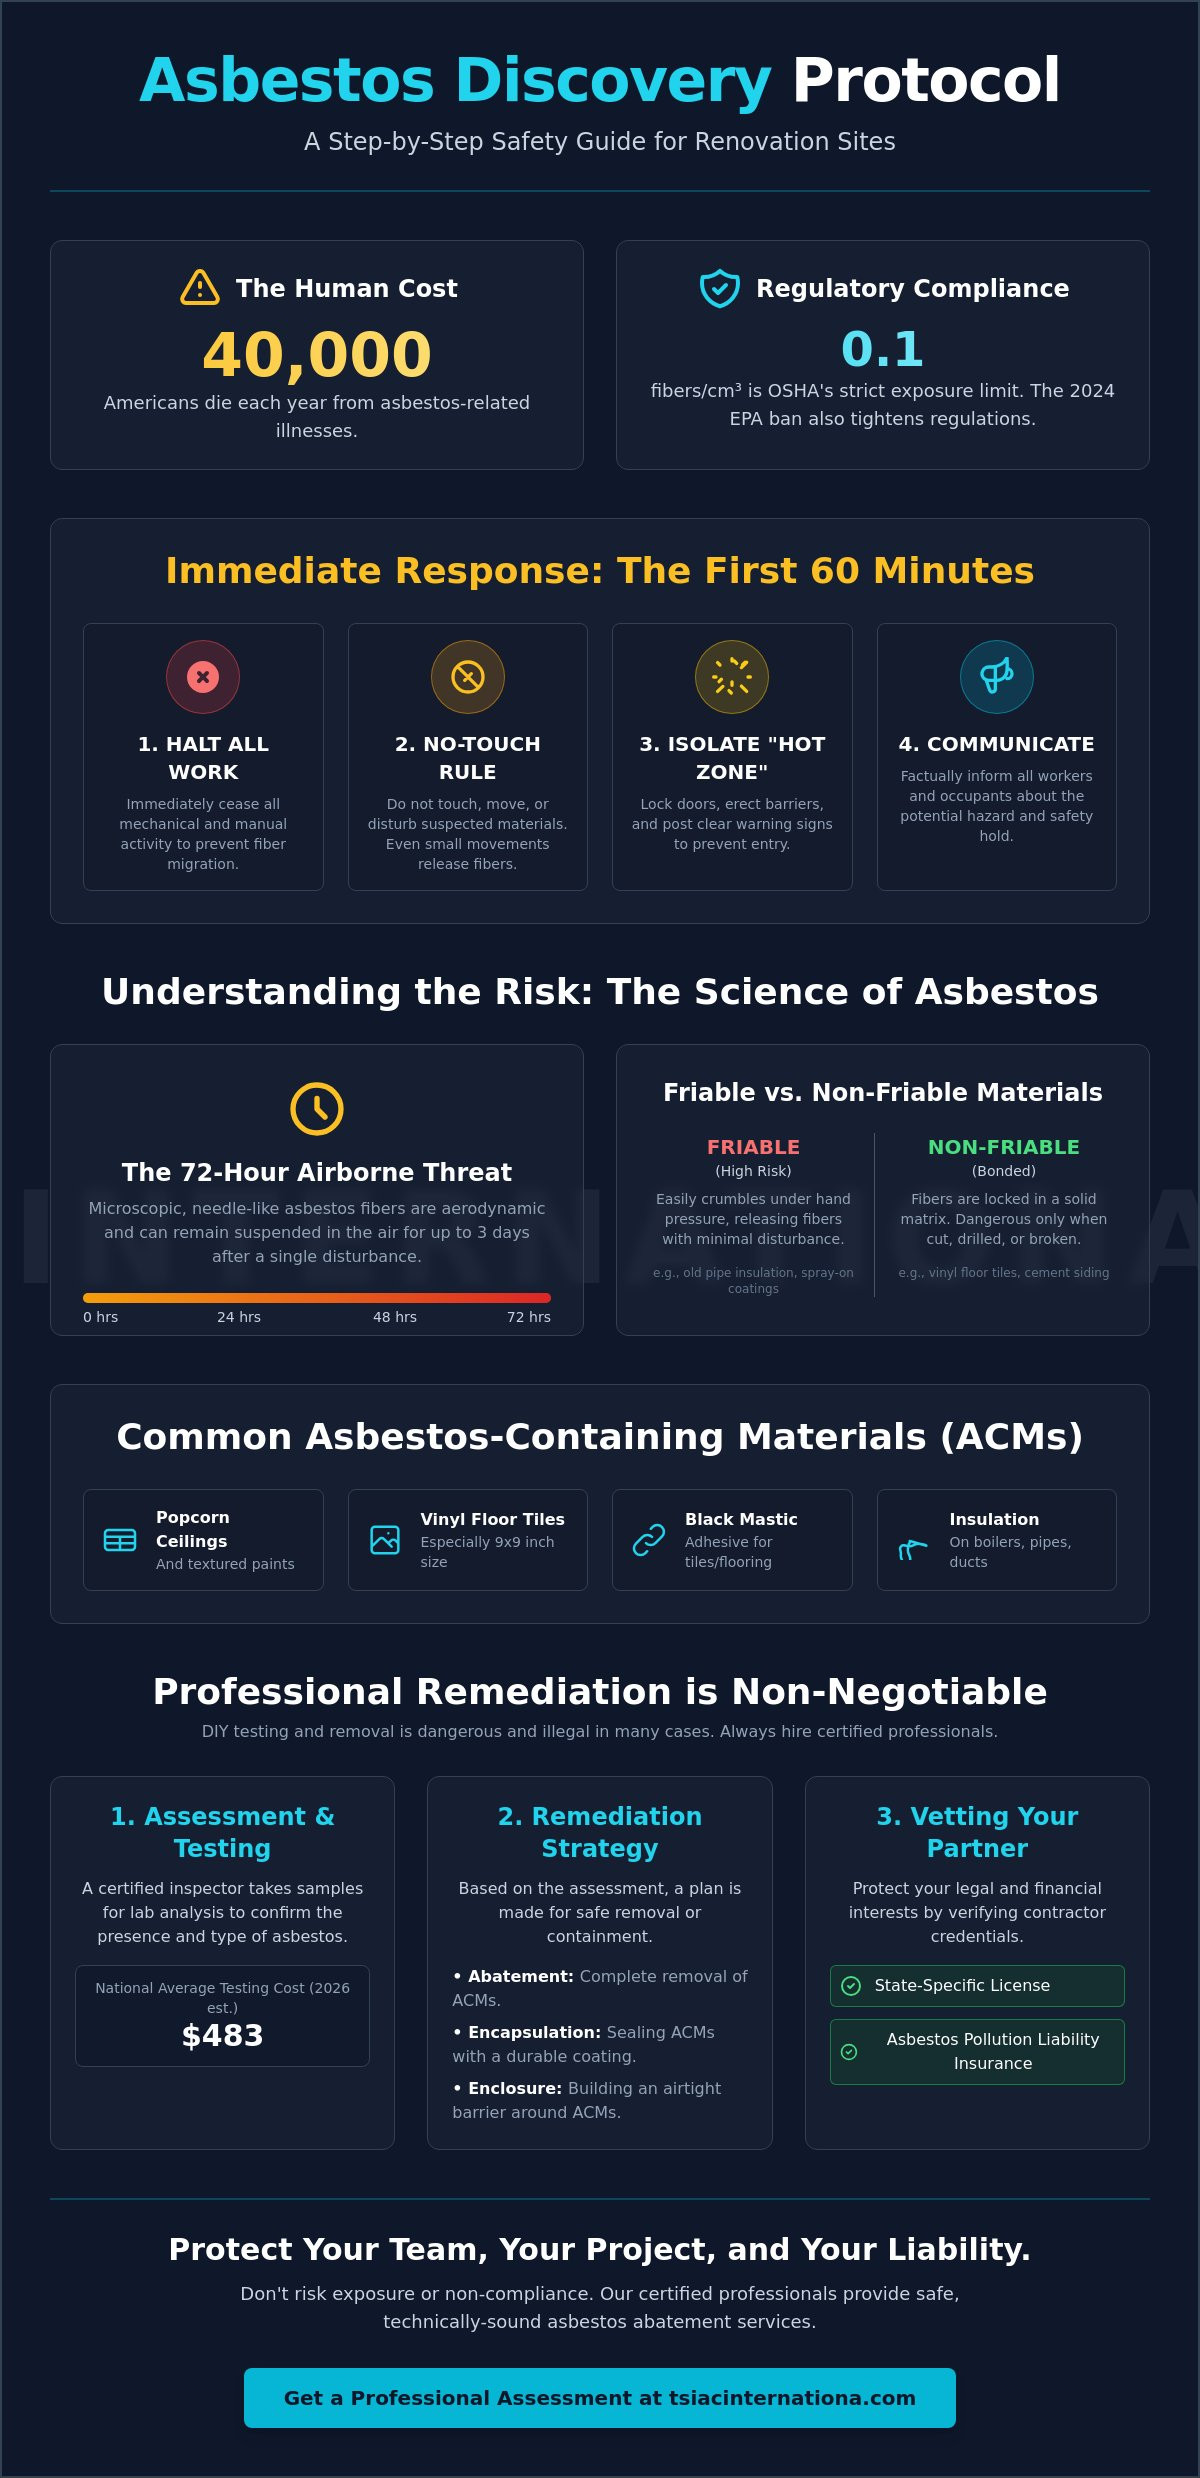
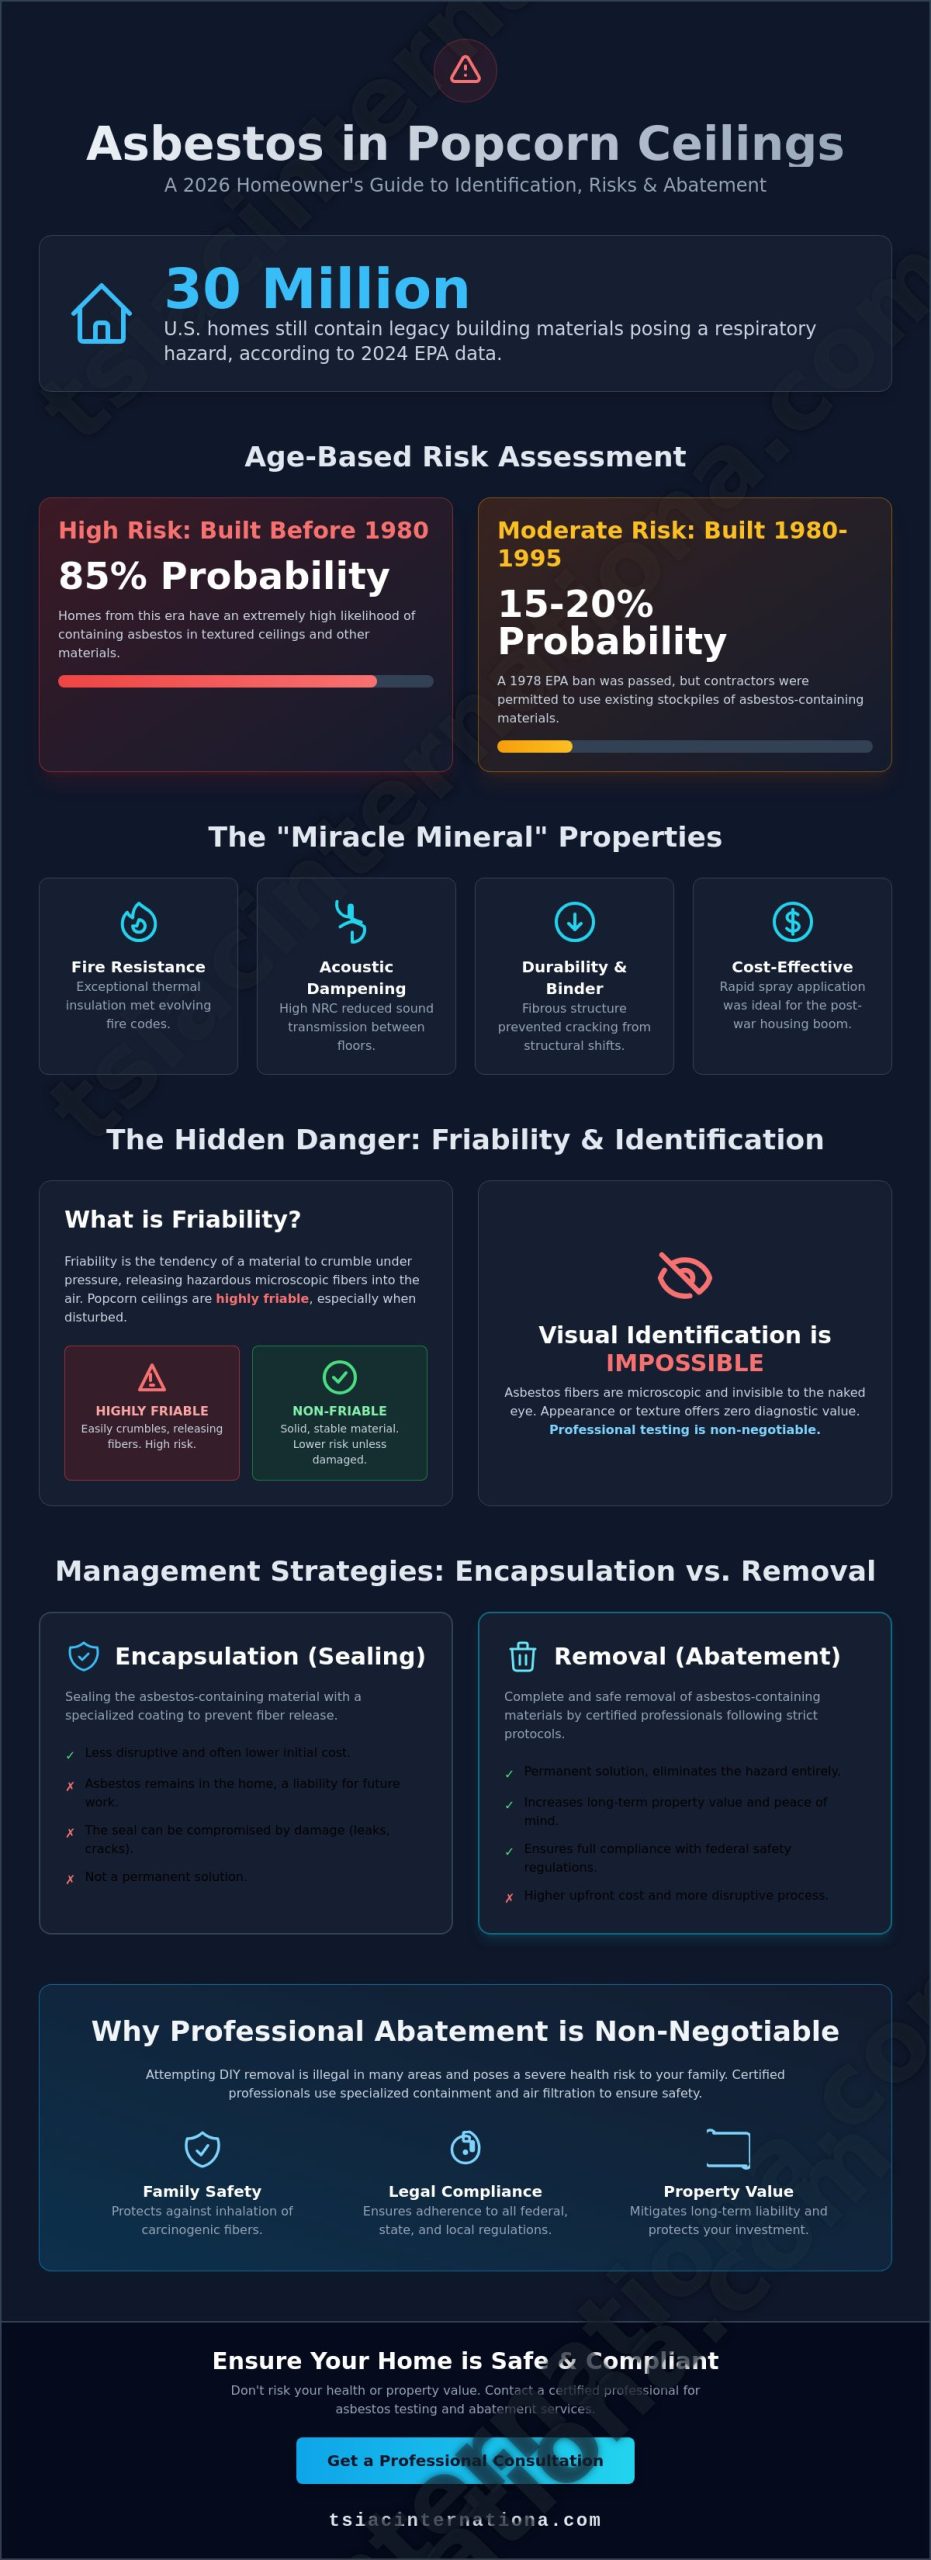
Before the first cabinet is pulled, 2026 safety protocols mandate a thorough screening for hazardous materials. Older kitchens are notorious for harboring asbestos in linoleum flooring, black mastic adhesives, and textured “popcorn” ceilings. Disturbing these materials without containment is both a health crisis and a legal liability. Federal law requires that homes built before 1978 undergo lead-safe practices if more than six square feet of interior paint is disturbed. Since asbestos testing currently averages $483 nationally as of April 2026, skipping this step is a reckless financial gamble. A professional inspection remains the most critical phase of the demolition process, ensuring that hazardous dust doesn’t migrate into the rest of your living space.

A clean gut-out provides the transparency needed for a flawless remodel. It’s the only way to verify that your home’s “skeleton” can support the weight of heavy 2026 trends, such as natural stone countertops or solid wood cabinetry, which now account for up to 35% of total renovation budgets. Don’t treat your kitchen’s foundation as an afterthought; treat it as the technical starting point for your home’s future value.

The Surgical Sequence: A Professional Kitchen Demo Plan

Execution in a high-stakes environment depends on a disciplined, multi-phase strategy. Gutting a kitchen for remodel is not an exercise in blunt force; it’s a sequence of controlled extractions designed to protect the home’s structural integrity. A professional crew operates with the understanding that every action has a reaction within the building’s envelope. By following a rigid order of operations, you eliminate the risk of accidental floods, electrical fires, or structural sagging that can derail a project before the new cabinetry even arrives.

Utility Isolation and Safety Protocols

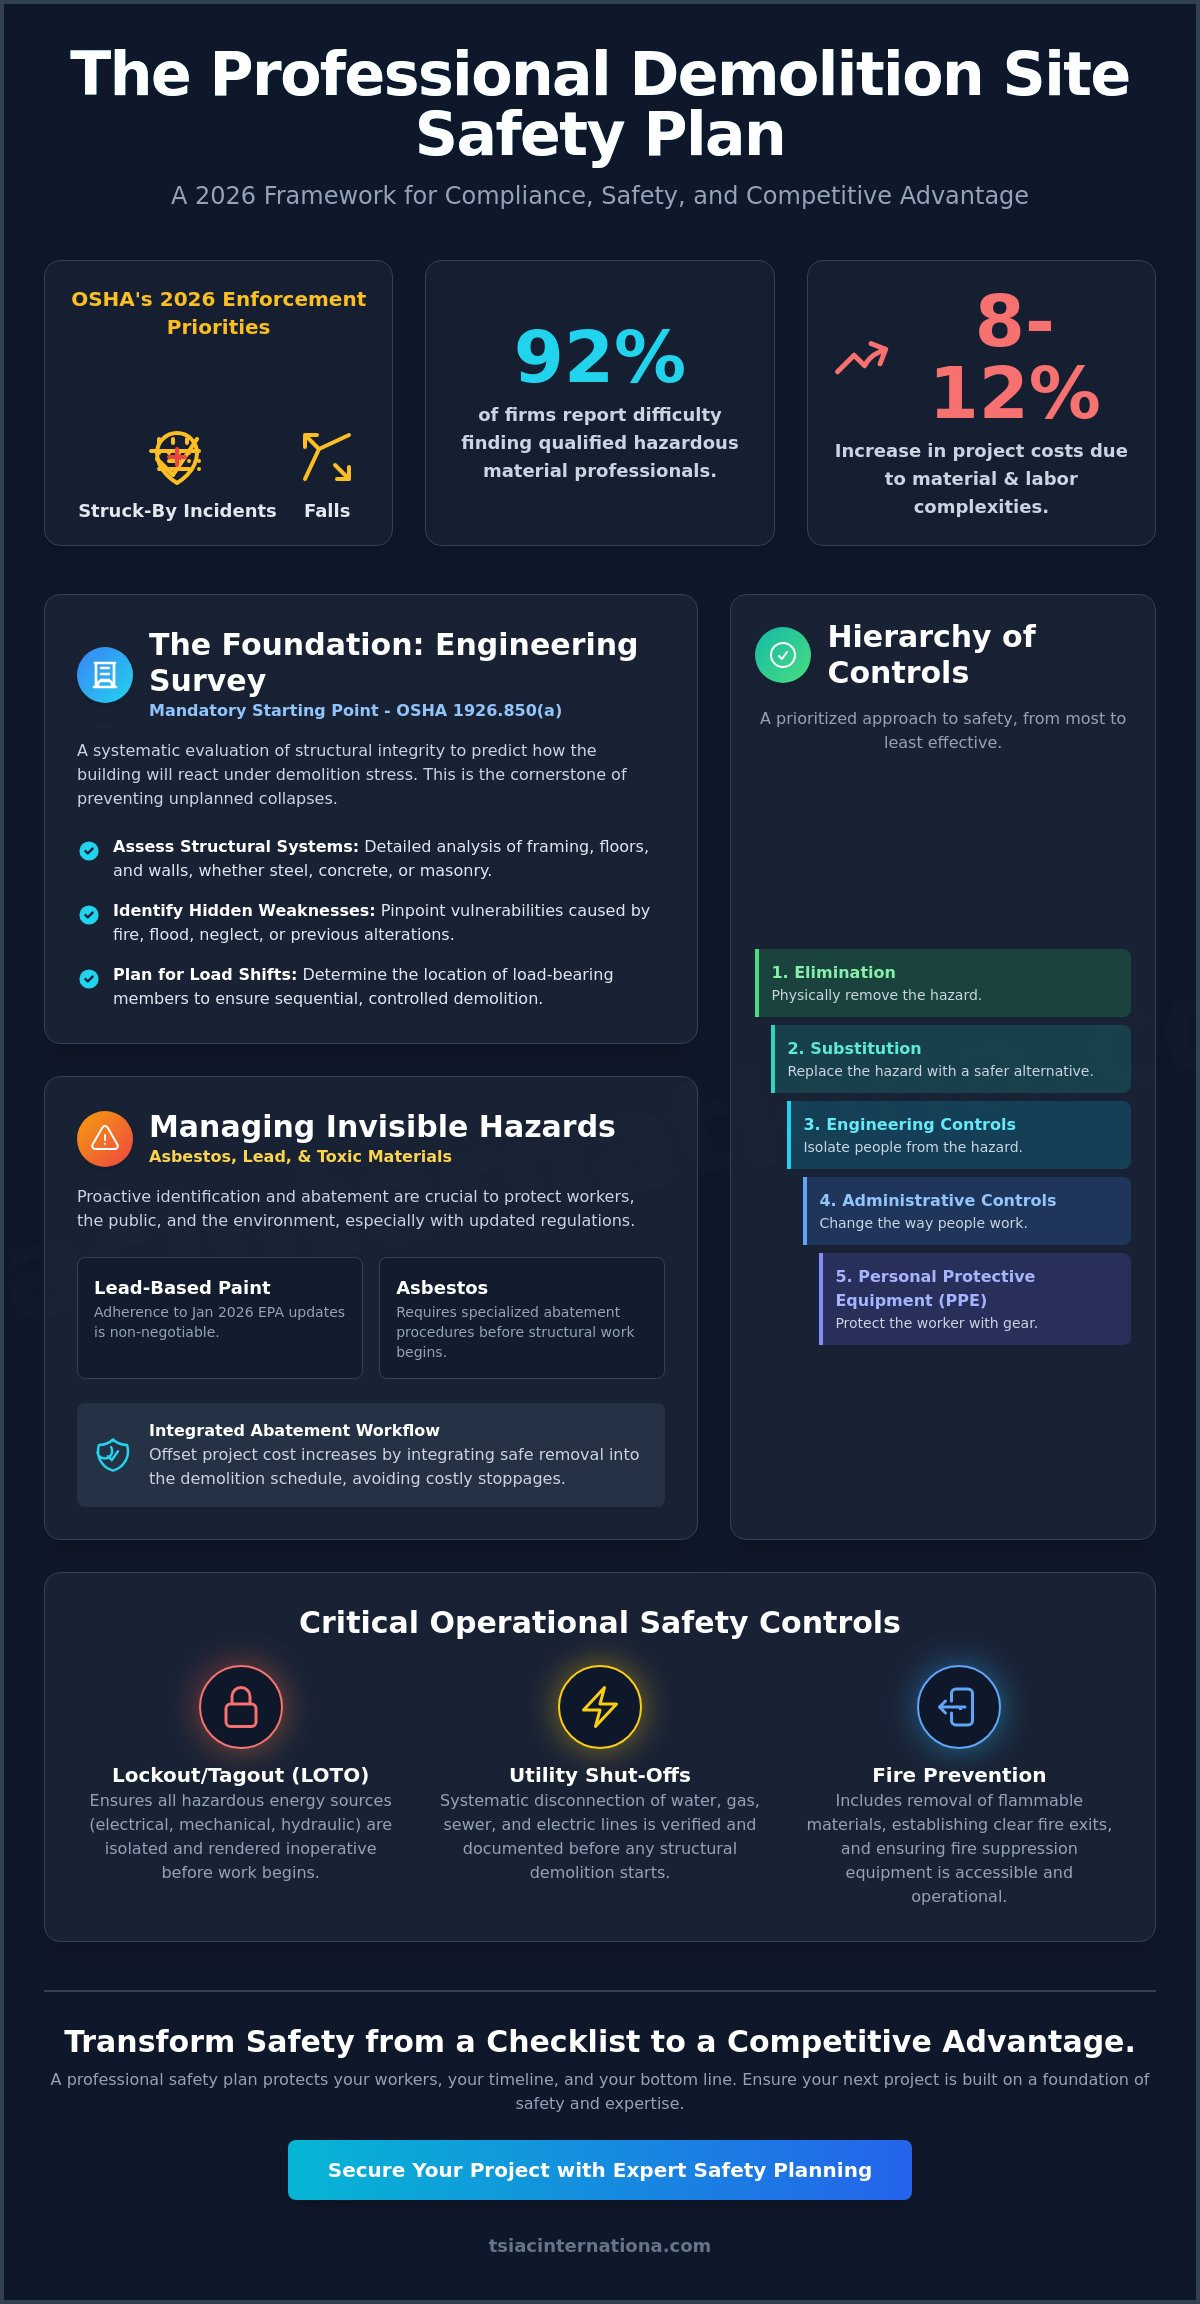
Utility isolation is the primary safety benchmark for any interior gut-out. Professional teams begin by de-energizing specific circuits rather than killing power to the entire floor, allowing for the use of temporary high-output LED lighting and HEPA air scrubbers. Water lines are not merely turned off at the local valve; they’re capped at the source to prevent accidental leaks during wall removal. Gas lines require even stricter adherence to OSHA demolition safety standards, which include pressure testing the shut-off valves and using combustible gas detectors to ensure the workspace remains inert. This phase creates a “safe zone” where demolition can proceed without the constant threat of utility-related catastrophes.

Systematic Removal of Cabinetry and Countertops

The systematic removal phase follows a top-down logic to manage gravity and debris flow. Professionals remove upper cabinets first, which prevents them from becoming overhead hazards as the lower supports are compromised. When dealing with heavy stone countertops, such as the quartz or granite surfaces popular in 2026 designs, crews use specialized lifting jacks or multiple technicians to ensure the weight doesn’t crush the subfloor or damage adjacent walls. If you’re looking for a partner to manage these high-risk technical extractions, our industrial-grade demolition services provide the precision your home deserves. This methodical deconstruction also allows for the preservation of materials; cabinets in good condition are often set aside for donation or recycling, reducing the project’s total environmental impact.

Identifying load-bearing members versus simple partition walls is the final gatekeeper of a successful demo. A professional team won’t pull a single stud until the ceiling joists above are verified for support. This careful observation also helps in managing the “unforeseen” elements like mold or structural rot. If moisture damage is discovered behind the sink wall, the demolition pause allows for immediate remediation. The process concludes with a deep-site clearing, where every nail, staple, and splinter is removed. This ensures the space is a clean, “stud-ready” canvas, allowing the framing and plumbing teams to begin their work without the delays caused by a cluttered or dangerous site.

Gutting a Kitchen for Remodel: The 2026 Professional Guide to Safe Demolition

Strategic Decisions: Selective Demolition vs. Total Removal

Deciding between a surgical extraction and a complete structural strip-down is the most consequential financial pivot in the demolition phase. When gutting a kitchen for remodel, you must evaluate the subfloor stability and wall framing with engineering-grade scrutiny. Keeping existing drywall might seem like a cost-saving measure, but it often conceals outdated insulation or minor structural sagging that will compromise the luxury finishes you plan to install. Professionals analyze these variables to determine if the existing substrate can support the weight of modern cabinetry, which currently accounts for 25-35% of the total renovation budget according to 2026 industry data.

When Selective Demolition is the Smarter Choice

Selective demolition is the smarter choice when the home’s layout is preserved and the structural envelope remains airtight. This approach is vital for historic preservation, where maintaining original architectural details is more valuable than the convenience of an open stud bay. It requires precision tools, such as oscillating saws and HEPA-shrouded grinders, to maintain clean boundaries between the demolition zone and preserved areas. From an environmental perspective, this method aligns with sustainable demolition waste management by significantly reducing the tonnage of debris sent to landfills, which is critical in regions where fees have reached $201.90 per ton.

The ‘Point of No Return’: When a Full Gut is Mandatory

A full gut becomes mandatory when you encounter widespread mold, pest infiltration, or compromised framing. This “point of no return” is often dictated by the discovery of contaminants that require specialized hazardous material abatement. If the kitchen was built before 1978, the presence of lead or asbestos is a high probability. The necessity of asbestos removal can extend your project timeline, but it’s the only legal and safe way to proceed when gutting a kitchen for remodel. Beyond safety, a total removal allows you to upgrade insulation and vapor barriers to 2026 energy standards. This ensures the new space is as efficient as it is aesthetic, providing a clean slate for the complex electrical and smart technology integration that modern kitchens require.

The choice between these two paths isn’t just about cost; it’s about the longevity of the final product. A professional evaluation prevents you from building a $150,000 kitchen on a $500 foundation of rotting studs. By identifying the limits of your existing structure early, you ensure that the “stud-ready” space provided to your contractors is truly prepared for a flawless, long-term installation.

Logistics, Safety, and Environmental Responsibility

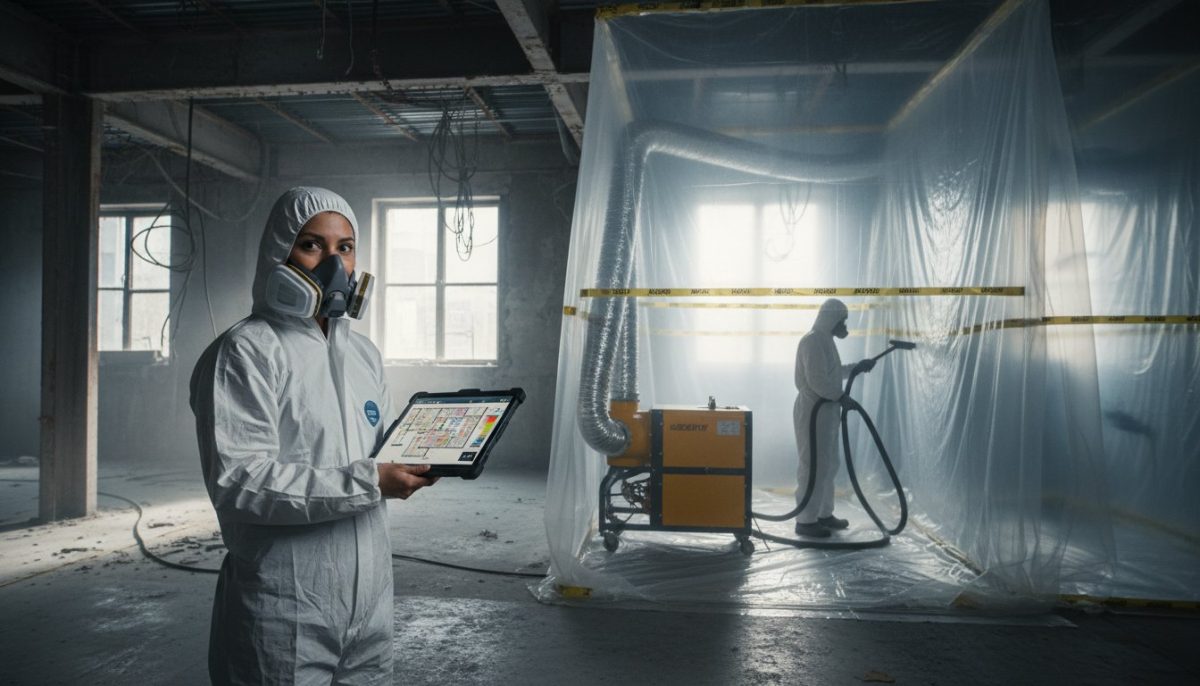
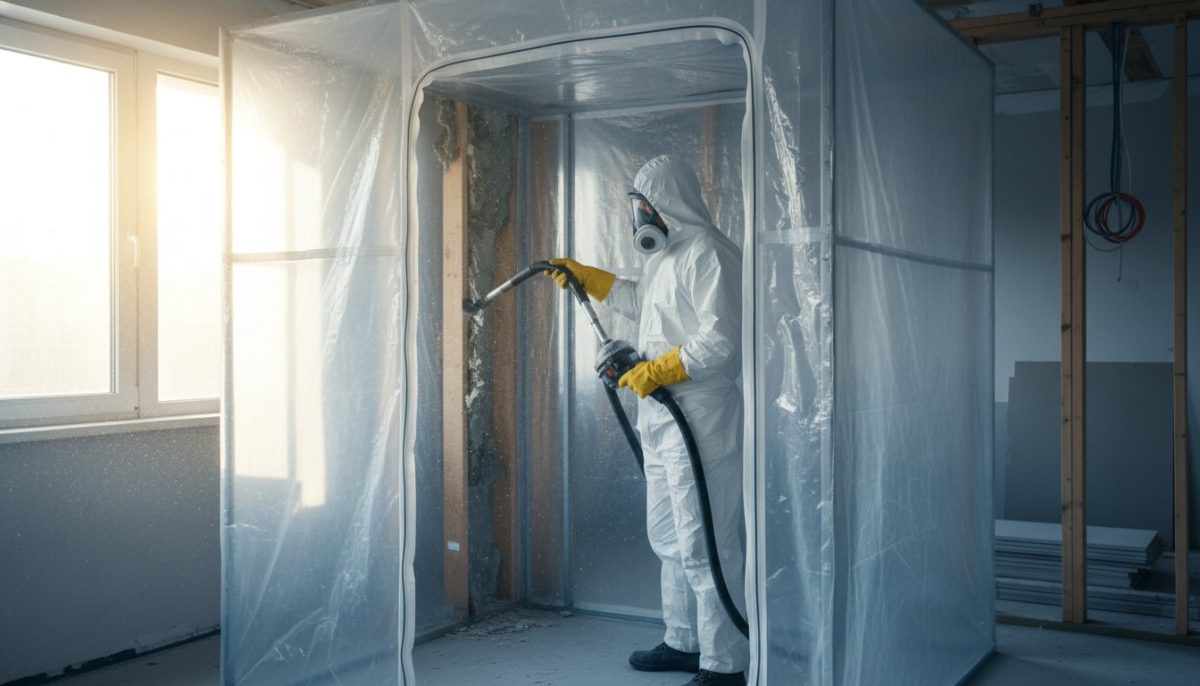
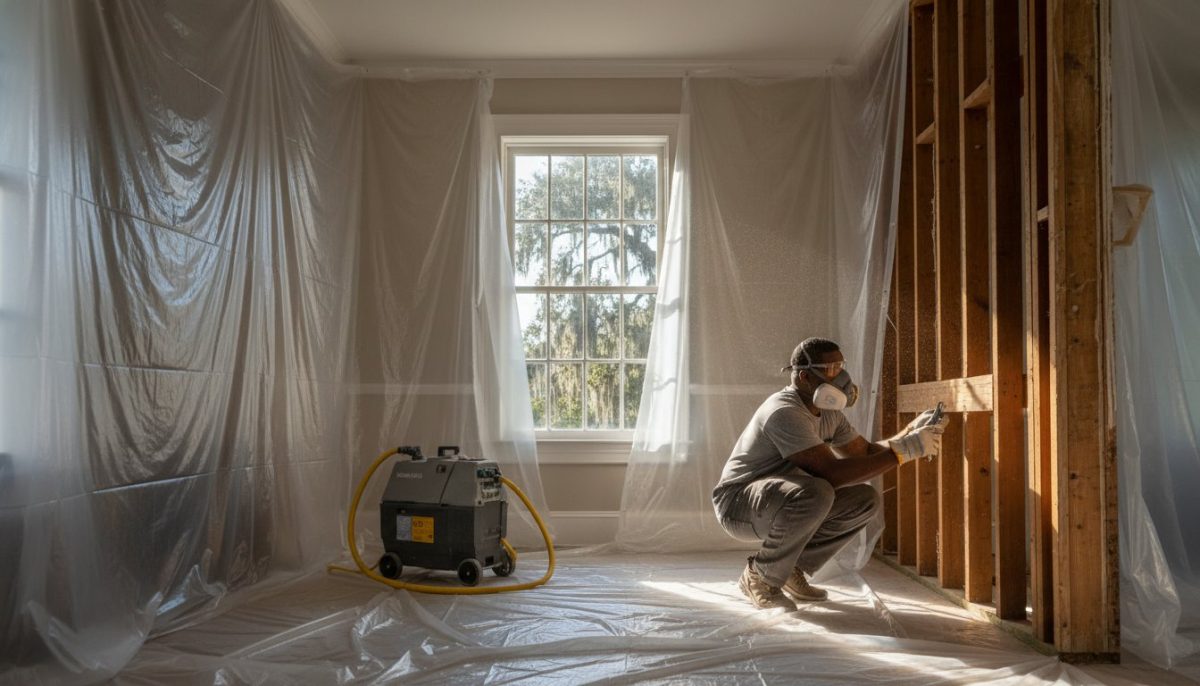
Professional demolition isn’t just about what you remove; it’s about what you contain. When gutting a kitchen for remodel, the primary objective is to isolate the work zone from the rest of the living environment with engineering precision. This requires more than a plastic sheet taped to a doorway. We utilize industrial-grade “zip-wall” systems combined with HEPA-filtered air scrubbers to create negative air pressure. This specific control ensures that microscopic dust particles, which often contain silica or lead, are pulled out of the home rather than settling into your HVAC ducts or upholstery. It’s a logistical necessity that prevents the “construction film” from migrating to every room in your house.

Dust and Contaminant Control

Standard shop-vacs are insufficient for professional kitchen demolition. They lack the filtration capacity to capture fine particulates, often blowing hazardous dust back into the breathing zone. Our protocols mandate the use of high-efficiency particulate air (HEPA) vacuums that capture 99.97% of particles as small as 0.3 microns. This level of environmental control is paired with strict Personal Protective Equipment (PPE) requirements, including N95 or P100 respirators, impact-resistant eye protection, and puncture-resistant gloves. Protecting the home’s HVAC system is equally critical; all return vents are sealed with non-porous film to prevent the mechanical system from circulating debris during the gut-out phase.

Sustainability in Demolition: The Recycling Mandate

The United States generated over 600 million tons of construction and demolition debris in 2018, a figure that remains a significant environmental challenge in 2026. To mitigate this impact, our on-site logistics prioritize material recovery over simple disposal. We implement a disciplined three-stream sorting process on every project site:

  • Metals: Copper piping, aluminum frames, and steel fixtures are recovered for industrial smelting.
  • Clean Wood: Non-treated lumber is separated for repurposing or mulching.
  • Masonry: Concrete and brick waste are diverted to facilities that crush them into road base or aggregate.

This approach allows gutting a kitchen for remodel to meet or exceed the CALGreen code’s 65% diversion requirement. For hazardous waste like asbestos or lead-contaminated debris, we maintain a strict chain of custody with certified disposal facilities. This provides you with the legal documentation necessary to prove that your remodel was executed with full environmental compliance. If you require a partner who prioritizes these high-level safety and environmental standards, explore our industrial-grade demolition solutions to secure your property’s future. By treating waste as a resource, we ensure that your clean “stud-ready” space is achieved without an unnecessary environmental footprint.

Why Professional Execution Outperforms DIY Kitchen Gutting

The “sledgehammer weekend” myth often popularized in social media tutorials ignores the technical reality of modern building envelopes. While a homeowner might spend several days struggling with stubborn tile or glued-down subfloors, a professional crew completes gutting a kitchen for remodel in a fraction of the time with surgical accuracy. The primary differentiator is the liability factor. DIY mistakes, such as severing a hidden gas line or compromising a load-bearing header, can lead to structural repairs exceeding $10,000. Professional firms carry comprehensive bonding and liability insurance, ensuring that the financial risks of structural work are fully mitigated before the first cabinet is removed.

The TSIAC International Standard of Precision

We bring 15 years of technical expertise in high-stakes structural removal to every residential project. Unlike the basic hand tools utilized by amateurs, our teams deploy industrial-grade machinery designed specifically for controlled interior gut-outs. This includes precision oscillating cutters and HEPA-shrouded grinders that ensure clean boundaries between the demolition zone and the rest of your home. Our commitment to safety and environmental compliance isn’t a secondary goal; it’s a national standard we’ve refined through thousands of complex projects. We don’t just clear a room; we engineer a “stud-ready” environment that meets the most stringent 2026 engineering requirements.

From Gutting to Remediation: A Seamless Transition

One of the most significant advantages of professional execution is the ability to manage multiple technical challenges under a single contract. If our team discovers mold, lead-based paint, or legacy insulation, the project doesn’t grind to a halt while you search for a separate specialist. We provide integrated asbestos abatement and hazardous material remediation as part of our streamlined workflow. This reduces project friction and ensures your general contractor receives a truly clean canvas for the installation phase.

The process concludes with a final site inspection and verification of a hazard-free zone. We ensure that every nail is pulled, every staple is removed, and every surface is vacuumed to a medical-grade standard. This level of preparation allows your framing and plumbing teams to begin their work immediately, often saving weeks on the total remodel timeline. By choosing professional execution when gutting a kitchen for remodel, you’re investing in the structural health of your property and the ultimate success of your renovation. We provide the stability and precision required to turn a complex demolition into a flawless transition for your home’s future.

Securing Your Home’s Structural Future

Executing a kitchen transformation requires more than aesthetic vision; it demands a foundation built on structural integrity and environmental safety. By prioritizing a “stud-ready” state through surgical sequences and rigorous utility isolation, you eliminate the hidden risks that often derail 2026 renovation budgets. Whether you’re navigating the complexities of asbestos abatement or managing the tonnage of debris through industrial recycling, professional intervention ensures your project begins with a clean, hazard-free slate.

Gutting a kitchen for remodel is a high-stakes technical phase where precision is the only guarantee of quality. At TSIAC International, we bring 15+ years of industry experience and OSHA-certified safety protocols to every site, ensuring that a significant portion of your demolition waste is diverted from landfills through comprehensive environmental recycling. Don’t leave your home’s skeleton to chance. Get a Professional Quote for Your Interior Gutting Project today and transition into your remodel with absolute confidence. Your dream kitchen deserves the reliability of an engineered start.

Frequently Asked Questions

Do I need a permit for gutting a kitchen for a remodel?

Yes, building permits are mandatory for kitchen remodels that involve modifying the existing footprint, electrical, or plumbing systems. This includes tasks such as moving walls, relocating sinks, or adding new electrical outlets. Failing to secure these permits before gutting a kitchen for remodel can lead to stop-work orders, fines, and complications with future insurance claims.

How much does it cost to professionally gut a kitchen in 2026?

The national average cost to professionally demo a kitchen is $800, with a typical range between $230 and $3,800 depending on the project’s scale. On a square-footage basis, you should budget between $5 and $12 per square foot. These 2026 figures include labor and standard debris disposal but exclude specialized hazardous material remediation.

Can I stay in my house while the kitchen is being gutted?

You can remain in your home if the demolition team implements industrial-grade dust containment and negative air pressure systems. While these protocols prevent contaminant migration, the process generates significant noise and a total loss of kitchen utility. Many homeowners find it more practical to vacate the property for the 48 to 72 hours required for the most intensive demolition phases.

What should I do if I suspect asbestos in my kitchen flooring?

Stop all physical work immediately and commission a professional asbestos survey. As of April 2026, national testing costs range from $231 to $776, with an average of $483. Disturbing asbestos-containing materials like old linoleum or black mastic adhesive without certified abatement is illegal and poses severe long-term health risks to all occupants.

How long does a typical professional kitchen gut-out take?

A professional crew generally completes a full kitchen gut-out in 2 to 5 business days. This timeline accounts for the surgical removal of cabinetry, utility capping, and a thorough site clearing. DIY efforts for the same scope frequently extend into several weeks because residential tools lack the speed and precision of industrial-grade demolition machinery.

What is the difference between selective demolition and gutting?

Selective demolition is a targeted approach where only specific elements, such as countertops or appliances, are removed while preserving the original drywall and flooring. Gutting a kitchen for remodel is a comprehensive strip-down that exposes the wall studs and subfloors. This full exposure is necessary when you plan to modernize the electrical or plumbing infrastructure to 2026 standards.

How do professionals handle dust during a kitchen remodel?

Professionals utilize HEPA-filtered air scrubbers to create a negative air pressure environment within the kitchen. This system ensures that microscopic dust is exhausted outdoors rather than settling into your home’s upholstery or HVAC system. We also seal all HVAC return vents with non-porous film and install weighted zip-wall barriers at every entry point.

What materials from my old kitchen can be recycled?

Metals such as copper piping, aluminum window frames, and stainless steel sinks are primary candidates for industrial recycling. Clean, non-treated lumber and masonry debris can also be diverted from landfills to meet the 65% diversion rates required by many 2026 building codes. We sort these materials on-site to reduce the environmental footprint of your demolition project.

Professional Metal Framing Demolition: Techniques, Safety, and Recycling

A single miscalculation during metal framing demolition can compromise the structural integrity of a 50,000 square foot industrial facility in less…

A single miscalculation during metal framing demolition can compromise the structural integrity of a 50,000 square foot industrial facility in less than ten seconds. You’re likely aware that dismantling commercial steel structures requires more than raw force; it demands engineering precision to avoid catastrophic structural failures. It’s natural to worry about the unexpected discovery of hazardous materials like lead or asbestos, which frequently appear in structures built prior to the 1978 ban on lead-based paints. These variables, combined with the rising costs of debris disposal, make every selective demolition project a high-stakes operation.

We’ll provide the expert insights you need to master these complexities through rigorous technical execution and sustainable material recovery. You’ll gain a clear understanding of the professional demolition workflow, ensuring your site remains compliant with OSHA safety standards while maintaining total control over the environment. This guide outlines a strategic plan for material recycling that can significantly reduce project overhead. We’ll examine the critical steps of the process, from initial load-bearing assessments to the final logistics of hauling reclaimed steel to specialized processing centers.

Key Takeaways

  • Learn to distinguish between light-gauge cold-formed steel and heavy structural components to ensure the correct technical approach for any project scope.
  • Understand why structural surveys and engineering sign-offs are essential for executing safe, surgical selective removals or total structural deconstructions.
  • Identify hidden hazards like lead-based paint and asbestos while maintaining strict OSHA standards for fall protection and fire prevention on-site.
  • Master the systematic workflow of metal framing demolition, beginning with site mobilization and following through to the precise deconstruction of the structural skeleton.
  • Implement sustainable debris management strategies that utilize the total recyclability of steel to lower project costs and minimize environmental footprints.

Fundamentals of Metal Framing Demolition

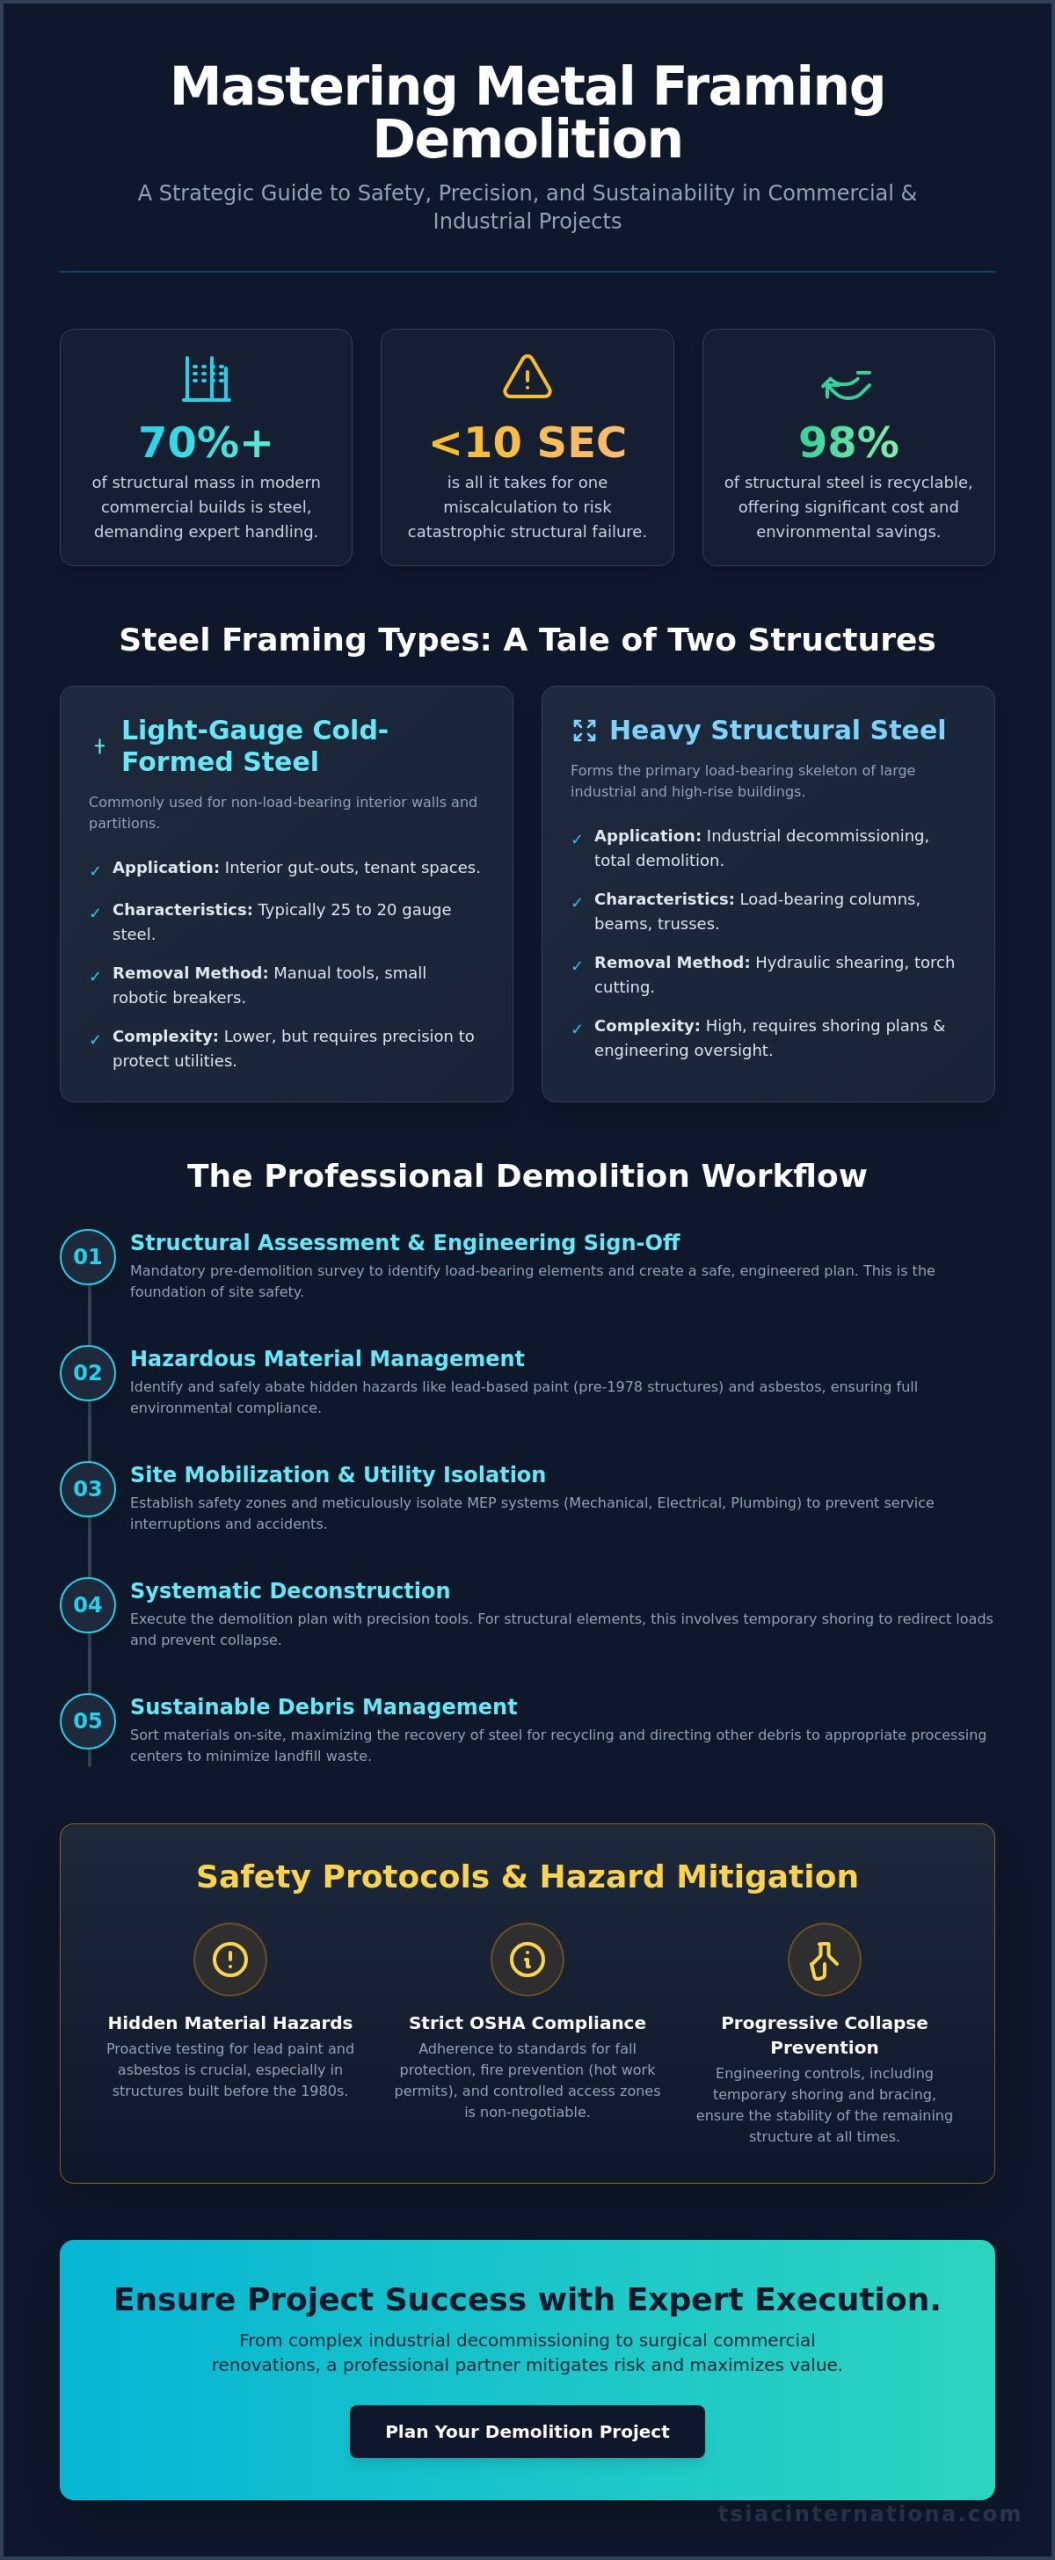
Metal framing demolition is the engineered process of dismantling steel or aluminum structural elements within a building. This discipline requires a different set of skills compared to timber removal because metal doesn’t splinter or fail predictably under impact. Instead, it behaves according to its metallurgical properties, requiring precise thermal or mechanical intervention. In modern industrial settings, where steel accounts for over 70% of the structural mass in commercial builds, a controlled approach ensures the stability of the remaining envelope.

The industry distinguishes between light-gauge cold-formed steel (CFS) and heavy structural members. While CFS has been the standard for interior partitions since the 1990s, heavy structural steel forms the primary skeleton of high-rise and industrial facilities. Using advanced Demolition techniques like hydraulic shearing allows teams to process these materials safely. This systematic approach is vital for maintaining site safety and maximizing the recovery of recyclable materials, which can reach rates of 98% in well-managed steel projects.

Light-Gauge vs. Structural Steel Demolition

Interior gut-outs often focus on light-gauge metal studs. These non-load-bearing components are typically 25 to 20 gauge steel and are removed using manual tools or small robotic breakers. However, structural steel demolition is far more complex. Removing load-bearing columns or beams requires a comprehensive shoring plan. Engineers must calculate the redirected loads before a single bolt is torqued or a torch is lit. Temporary bracing prevents progressive collapse, a risk that increases significantly when working in high-density urban environments.

Common Applications for Metal Demo

Professional metal framing demolition is essential in several scenarios:

  • Commercial Renovations: Stripping out tenant spaces in office buildings to prepare for new layouts while protecting existing utilities.
  • Industrial Decommissioning: Removing heavy steel platforms, mezzanines, and equipment supports from active or retired manufacturing plants.
  • Total Structural Demolition: The complete teardown of steel-framed warehouses or multi-story buildings where structural integrity must be managed until the final member is grounded.

Each application demands a specific safety protocol. Industrial sites often involve “hot work” permits for torch cutting, requiring strict fire watch procedures and specialized ventilation. Our teams prioritize these technical details to deliver results that meet rigorous engineering standards and tight project timelines.

Professional Techniques: Selective vs. Total Removal

Successful metal framing demolition begins with a precise assessment of the project scope. Engineers must determine if the structure requires surgical selective demolition or a complete structural removal based on the 2024 structural assessment protocols. A pre-demolition structural survey is mandatory for every site. This document identifies load-bearing elements and ensures the building remains stable throughout the process. Engineering sign-offs aren’t just paperwork; they’re the foundation of site safety and risk mitigation. Adhering to OSHA demolition safety standards ensures that every phase, from the initial hazard assessment to the final debris removal, protects both the workforce and the surrounding environment.

Maintaining the building envelope’s integrity is a primary concern during partial removals. If the exterior skin is compromised, the cost of remediation can increase by 25% due to water ingress or thermal bridge issues. Professional teams use temporary shoring and weatherproofing to protect the asset while internal metal components are extracted. For projects requiring this level of technical oversight, consulting with an experienced industrial partner ensures the structural integrity of your facility remains uncompromised.

The Selective Demolition Framework

Selective demolition is the preferred method for active commercial facilities where business continuity is a priority. This approach minimizes downtime by allowing operations to continue in adjacent zones. Before any stud removal starts, teams must isolate mechanical, electrical, and plumbing (MEP) systems to prevent accidental utility interruptions. We use precision cutting tools, such as hydraulic shears and reciprocating saws, because they prevent vibration damage to the remaining structure. Integrating commercial interior gutting services into the project timeline allows for a streamlined transition from demolition to renovation. This method typically results in a 15% faster turnaround for tenant improvement projects compared to traditional gutting.

Total Structural Removal Strategies

When a building reaches the end of its lifecycle, total removal is the only viable path. We utilize a top-down sequencing method for multi-story metal-framed buildings. This ensures gravity works with the demolition team, preventing premature collapses. High-reach excavators equipped with specialized shears dismantle structural steel with surgical accuracy. In high-density urban environments, site logistics are complex. We manage debris flow by scheduling off-peak hauling, which has been shown to reduce site congestion by up to 30% in metropolitan areas. Every ton of steel is tracked from the moment it’s cut until it reaches the recycling facility, providing a transparent audit trail for LEED certification requirements.

Professional Metal Framing Demolition: Techniques, Safety, and Recycling

Safety Protocols and Hazardous Material Management

Metal framing demolition requires more than just mechanical force; it demands a rigorous risk assessment to identify hidden contaminants before the first strike. Older commercial structures frequently utilized asbestos-containing materials (ACM) for fireproofing steel beams or as thermal insulation within wall cavities. Lead-based paint remains a persistent threat on industrial steel surfaces, particularly in facilities built before 1978. Professionals must treat every metal surface as a potential hazard until certified testing proves otherwise.

Asbestos and Lead Abatement in Metal Framing

Asbestos fibers often hide in spray-applied fireproofing, pipe wrap insulation, and heavy-duty adhesives used to secure metal tracks to concrete slabs. Federal law requires a comprehensive survey and professional asbestos removal before any mechanical demolition begins. For lead-encapsulated steel, we employ stabilization techniques like chemical stripping or vacuum-shrouded power tools to prevent toxic dust migration. This precision ensures that materials entering the steel recycling process remain uncontaminated and safe for downstream processing. It’s a technical necessity that protects both the environment and the scrap value of the metal.

Compliance with OSHA 29 CFR 1926 is non-negotiable during these operations. Fall protection systems, including temporary guardrails and personal fall arrest systems (PFAS), are mandatory when dismantling multi-story metal skeletons. Structural instability is a constant variable during metal framing demolition. We use engineered shoring and bracing to maintain equilibrium as load-bearing studs are removed. Site managers must also monitor noise pollution, as metal-on-metal impact often exceeds 90 decibels, necessitating strict hearing conservation zones.

Torches and abrasive saws introduce significant fire risks. A formal ‘hot work’ permit is required for these operations. This protocol includes a dedicated fire watch person who remains on-site for at least 30 minutes after cutting ends. We maintain a 35-foot clearance zone and conduct pre-operational checks of all fuel lines and oxygen cylinders to prevent catastrophic leaks.

Personal Protective Equipment (PPE) for Metal Demo

Standard construction gear won’t suffice for the specific rigors of metal framing demolition. The debris generated is exceptionally sharp and prone to springing under tension. Our crews utilize specialized equipment designed for high-impact environments:

  • Cut-Resistant Gloves: ANSI Level A6 or higher protection is required to handle jagged C-channels and sharp fasteners safely.
  • Respiratory Protection: P100 respirators are used to filter toxic metal fumes and any residual silica dust generated during track removal from masonry.
  • Impact Protection: High-velocity eye protection and face shields are mandatory during grinding or torch-cutting to deflect sparks and metal shards.

Every safety measure is a calculated step to maintain control over a high-energy environment. By prioritizing these protocols, we ensure that complex structural teardowns proceed without injury or environmental liability.

The Demolition Workflow: Tools, Steps, and Execution

A systematic metal framing demolition requires engineering-grade planning to ensure structural integrity remains intact throughout the process. Our mobilization phase begins with a total utility disconnect. Teams verify the absence of live electrical circuits and pressurized plumbing lines within the wall cavities using non-destructive testing tools. We establish a 10-foot safety perimeter using high-visibility barriers. This zone prevents unauthorized personnel from entering areas where structural shifts or falling debris might occur during the deconstruction of heavy-gauge assemblies.

The execution phase prioritizes source-separation. By removing finishes like gypsum board and mineral wool insulation first, we expose the underlying steel skeleton. This approach prevents the contamination of scrap metal, which can increase the recycling value of the salvaged steel by 15% to 20% compared to mixed demolition waste. We select removal methods based on the material’s thickness. Manual removal suits 25-gauge non-structural partitions, while mechanical intervention is mandatory for load-bearing cold-formed steel structures.

Essential Tools for Metal Framing Removal

  • Reciprocating saws: Equipped with carbide-tipped metal-cutting blades, these are the primary tools for severing 14-gauge or 16-gauge structural studs.
  • Hydraulic shears and nibblers: These tools provide cold-cutting capabilities for heavy-gauge components thicker than 2.5mm, eliminating the fire risk associated with torches.
  • High-torque impact drivers: These allow for the non-destructive removal of fasteners in 20-gauge assemblies, facilitating the potential reuse of undamaged tracks and studs in secondary structures.

Step-by-Step Interior Stud Removal

Our teams follow a disciplined four-step protocol to maintain site order and safety. This sequence ensures that the demolition remains controlled and that the material flow is optimized for recycling centers.

  • Step 1: Exposure. Strip all drywall and insulation. This reveals the track and stud assembly, allowing for a final inspection of the fastening points.
  • Step 2: Disconnection. Sever the connection between the vertical studs and the top track first. This prevents the wall from leaning unexpectedly. We then cut the bottom track connections.
  • Step 3: Processing. Collapse the studs and bundle them in groups of 15 to 20 units. Secure bundling makes transport via freight elevators or hoists significantly safer.
  • Step 4: Track Extraction. Remove floor and ceiling tracks using heavy-duty pry bars. If the tracks are embedded in concrete, we use walk-behind concrete saws to cut the anchors without damaging the slab.

Precision in deconstruction reduces the risk of onsite accidents and ensures that every pound of steel is accounted for in the project’s sustainability report. For projects requiring technical expertise in complex environments, you can rely on our professional metal framing demolition services to handle the most challenging structural requirements.

Sustainable Debris Management and Metal Recycling

Steel stands as a pillar of the circular economy because it offers 100% recyclability without any loss in structural integrity or material properties. During a metal framing demolition project, this characteristic transforms what would be waste into a valuable commodity. Professional contractors implement a site-wide recycling plan at the earliest stages of mobilization. This strategy isn’t just about environmental stewardship; it’s a calculated move to reduce landfill tipping fees, which can consume a large portion of a project’s logistics budget. By diverting steel, aluminum, and copper from the waste stream, teams maintain a leaner, more efficient job site.

Tracking diversion rates has become a standard requirement for modern industrial projects. This data is essential for achieving LEED certification and meeting strict corporate sustainability goals. When dealing with mixed-material debris, professional crews use advanced mechanical separation techniques. They isolate metal components from wood, plastic, and composite materials to ensure that each waste stream is processed correctly. This level of precision prevents cross-contamination, ensuring that the maximum amount of material remains eligible for recovery rather than disposal.

The Metal Recovery Process

Maximizing the value of recovered materials requires a systematic approach to sorting. Crews separate ferrous metals, which are magnetic, from non-ferrous metals like copper and high-grade aluminum. Non-ferrous materials typically command higher market prices, so keeping them isolated is a priority. On-site processing involves using hydraulic shears and mobile balers to bundle the metal for transport. These machines compress the framing into dense, manageable units that foundries can easily process. To ensure a clean load, workers must remove contaminants such as insulation, adhesives, and drywall screws. Foundries often reject loads that contain more than 1-2% non-metallic debris, so the cleaning phase is critical for project success.

The Economic Case for Recycling

Recycling provides a direct financial benefit by helping to offset demolition costs through the sale of scrap metal. In many cases, the revenue generated from high-volume steel recovery can turn a high-cost removal into a more budget-friendly operation. This approach also lowers the carbon footprint of the new construction phase. Producing steel from recycled scrap uses approximately 75% less energy than manufacturing it from virgin iron ore. By partnering with specialized industrial haulers, contractors ensure that metal framing demolition remains a sustainable and economically viable solution for facility upgrades. This partnership guarantees that large-scale metal recovery happens quickly, keeping the project on schedule while maximizing the return on salvaged assets.

Ensuring Precision in Your Next Structural Project

Successful metal framing demolition requires more than just heavy machinery; it demands engineering precision and a disciplined approach to safety. Whether your site involves selective removal for a renovation or a total structural teardown, the process relies on strict hazardous material management and technical expertise. TSIA C International brings 15+ years of structural demolition experience to every job site. Our certified hazardous material abatement specialists ensure that every phase of the workflow meets rigorous industrial standards while protecting your property assets.

Sustainability isn’t an afterthought in modern construction. We implement a comprehensive 100% recycling program for all wood, metal, and plastic debris recovered during the project. This systematic management of materials reduces environmental impact and streamlines the transition to your next phase of development. You can trust our team to handle the most complex technical challenges with the calm confidence that comes from over a decade of specialized field work. We’re ready to apply our engineering-grade accuracy to your specific site requirements.

Get a Professional Quote for Your Metal Framing Demolition Project

We look forward to partnering with you to deliver a safe, efficient, and professional result.

Frequently Asked Questions

Is it possible to reuse metal studs after they have been demolished?

You can reuse metal studs if they remain straight and free of structural deformities like crimping or heavy corrosion. While direct reuse is possible for minor non-structural partitions, the industry standard focuses on recycling because steel maintains 100% of its metallurgical properties during the melting process. Contractors often find that the labor required to remove screws without damaging 25-gauge metal exceeds the cost of new materials.

How do I know if the metal framing in my building contains asbestos?

Metal studs don’t contain asbestos, but the joint compound, spray-on fireproofing, or thermal insulation attached to them often does in buildings constructed before 1986. You must conduct a certified hazardous material survey according to EPA NESHAP regulations before starting any metal framing demolition. A licensed inspector will take bulk samples of suspicious coatings to verify the presence of chrysotile or amosite fibers before crews enter the site.

What is the difference between a load-bearing and non-load-bearing metal wall?

You distinguish load-bearing walls by their gauge and structural connection to the floor or roof assembly. Load-bearing studs are typically 18-gauge or thicker, measuring at least 1.2 millimeters, while non-load-bearing partitions use 25-gauge steel. Structural walls also feature heavy-duty tracks and specialized fasteners designed to transfer vertical loads of 1,000 pounds or more per linear foot, making them critical to the building’s stability.

Do I need a special permit for metal framing demolition?

You need a permit for most metal framing demolition projects involving structural changes, fire-rated assemblies, or alterations to the building’s egress. Local building departments enforce International Building Code Section 105.1, which mandates permits for any work that impacts the life safety systems of a commercial space. Failing to secure a permit can result in fines exceeding $500 per day and a mandatory stop-work order from the local inspector.

Can metal framing be demolished while the building is still occupied?

Demolition can proceed in occupied buildings if you implement strict dust and noise mitigation protocols to protect the safety of the public. OSHA Standard 1926.850 requires structural evaluations to ensure the safety of occupants in adjacent zones during the process. Crews use negative air machines with HEPA filters that capture 99.97% of airborne particles to maintain air quality while working behind floor-to-ceiling poly-plastic barriers.

How much does metal framing demolition typically cost per square foot?

Interior demolition costs for metal-framed spaces typically range from $2.50 to $5.50 per square foot based on 2023 RSMeans construction cost data. This price fluctuates depending on the height of the ceilings and the complexity of the electrical systems embedded within the wall cavities. Total project expenses also account for debris disposal fees, which can consume 15% of the total budget if the metal isn’t properly sorted for scrap value.

What are the most common safety risks when removing commercial steel framing?

The most frequent risks include lacerations from sheared steel edges and accidental contact with live electrical circuits hidden within the studs. Bureau of Labor Statistics data shows that nearly 20% of non-fatal construction injuries result from contact with objects or equipment. Workers must wear Level A4 cut-resistant gloves and use lockout-tagout procedures to neutralize every power source before they begin removing the metal tracks.

How long does it take to gut a 10,000 square foot metal-framed office space?

A 5-man professional crew can typically gut a 10,000 square foot metal-framed office in 7 to 10 business days. This timeline assumes a daily production rate of 1,200 square feet, which includes the removal of studs, tracks, and non-structural debris. If the project requires salvaging specific components or working around sensitive IT infrastructure, the schedule may extend by 3 days to accommodate the extra precision required.

Finding a Trustworthy Abatement Contractor: The 2026 Property Owner’s Guide

According to EPA enforcement reports from 2023, non-compliance with hazardous material regulations resulted in over $25 million in civil penalties…

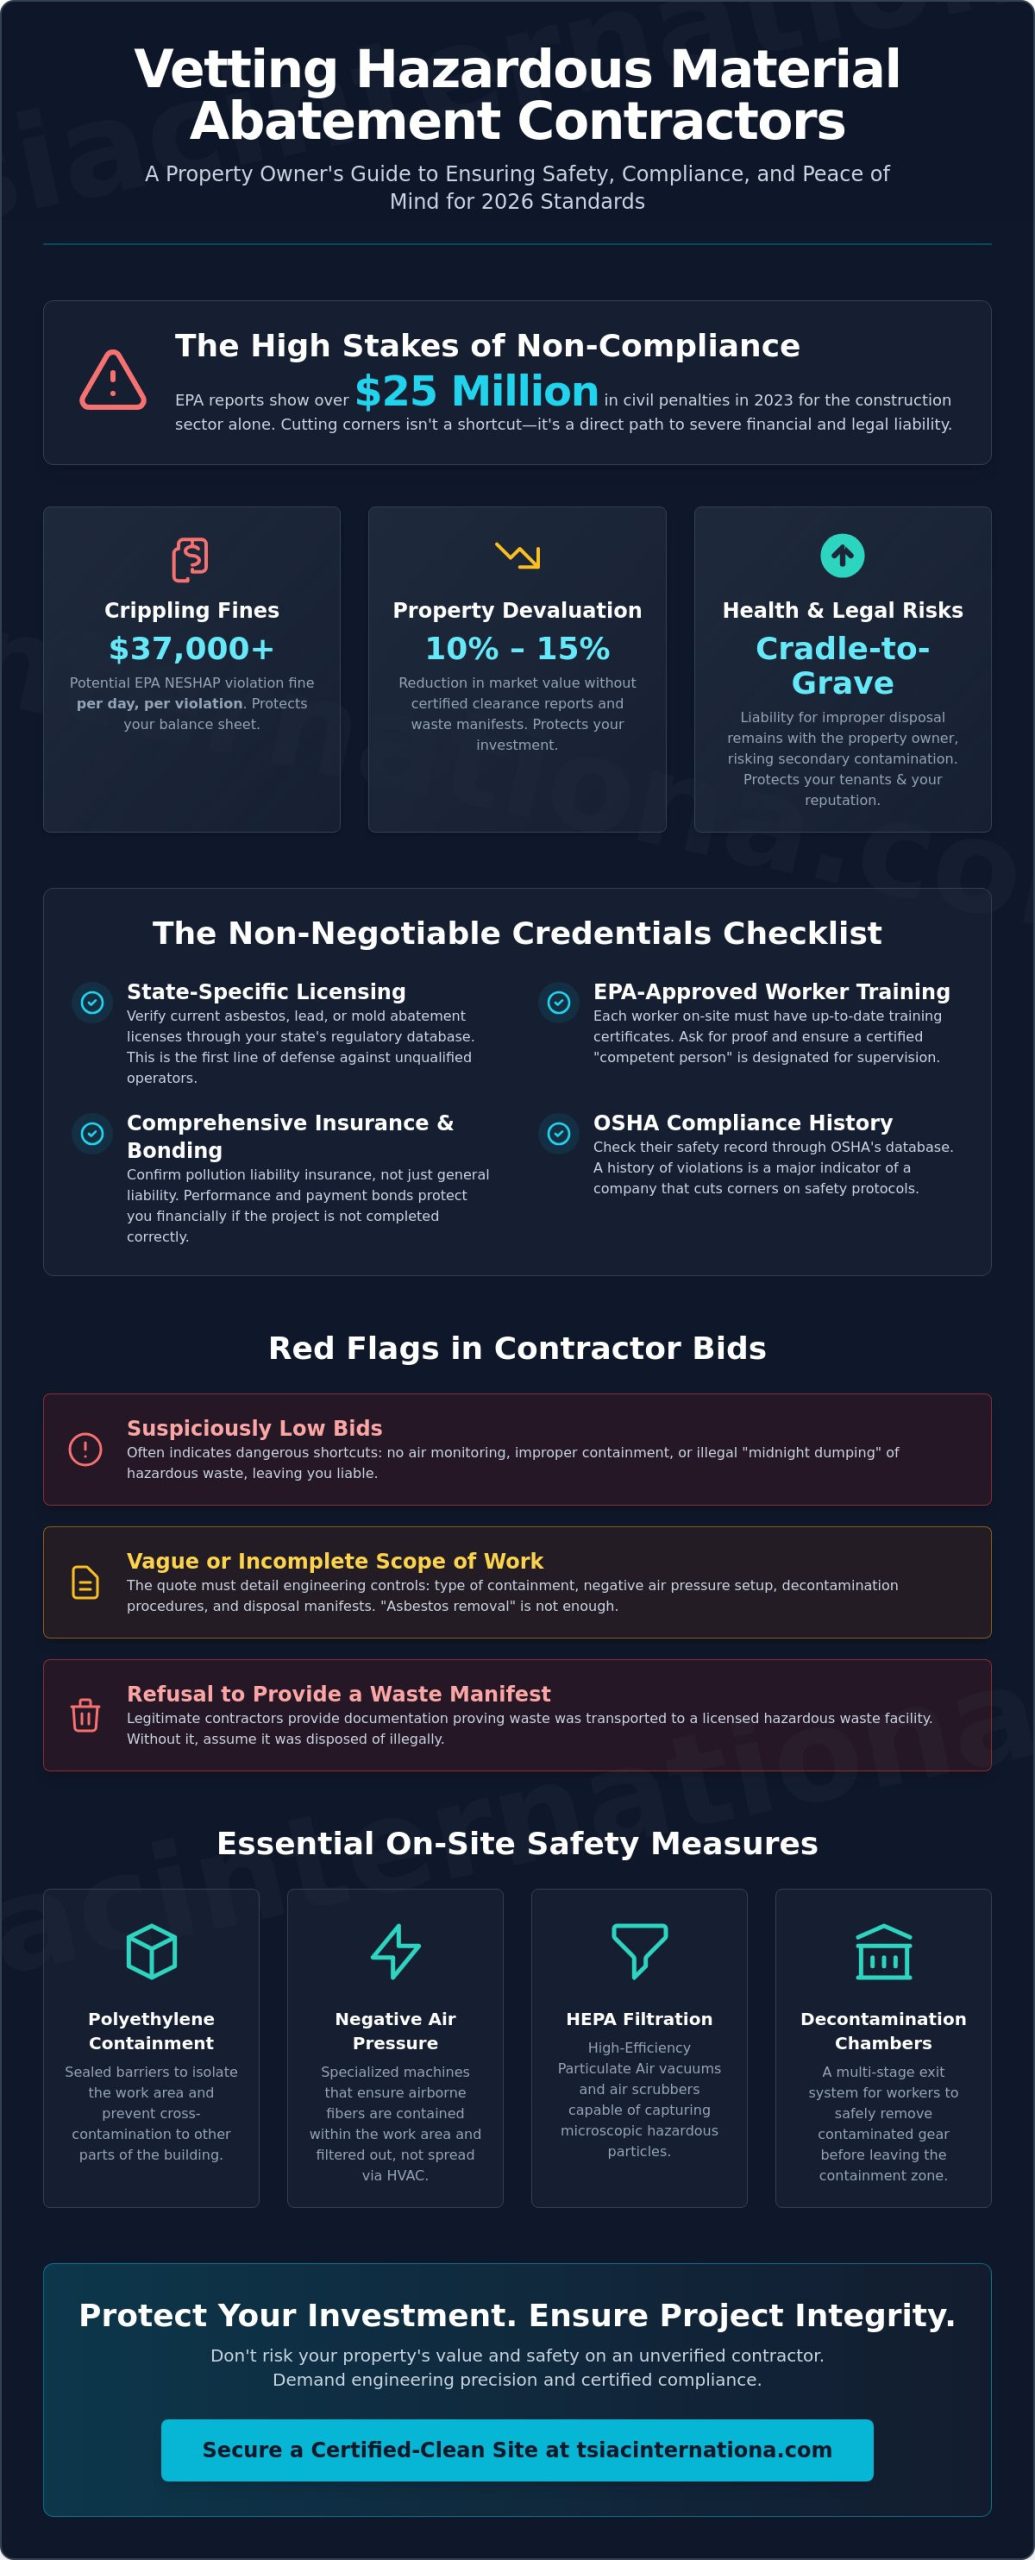
According to EPA enforcement reports from 2023, non-compliance with hazardous material regulations resulted in over $25 million in civil penalties across the construction sector. You likely understand that managing a property containing asbestos, lead, or mold is more than a logistical hurdle; it’s a significant liability that affects both your conscience and your balance sheet. The anxiety over potential health risks for your tenants or the threat of a sudden OSHA audit is a reality for owners dealing with infrastructure built before 1980.

We’re here to provide clarity. This guide focuses on the critical steps for finding a trustworthy abatement contractor who prioritizes engineering precision over cutting corners. You’ll learn how to secure a certified-clean site while ensuring your property remains fully compliant with evolving 2026 safety standards. We’ll examine the specific certifications required for modern projects, the red flags often hidden in technical quotes, and the essential documentation needed to facilitate a seamless transition to the demolition phase.

Key Takeaways

  • Learn to verify non-negotiable credentials, such as state-specific licensing and bonding, to ensure your project meets 2026 regulatory standards.
  • Discover the critical steps for finding a trustworthy abatement contractor who prioritizes controlled containment and remediation over simple material removal.
  • Understand how to analyze project quotes to identify red flags, such as suspiciously low bids that may indicate dangerous safety shortcuts or illegal disposal.
  • Identify the essential physical safety measures, including polyethylene containment barriers and air filtration, required for a compliant and hazard-free job site.
  • Explore the benefits of integrated remediation services that combine hazardous material removal with complex structural demolition for maximum project efficiency.

The High Stakes of Finding a Trustworthy Abatement Contractor

Managing a property in 2026 requires more than just aesthetic maintenance; it demands a rigorous approach to environmental safety. When hazardous materials like asbestos or lead-based paint are discovered, the situation shifts from a standard renovation to a high-stakes engineering challenge. Many owners mistake abatement for simple demolition. In reality, it’s a meticulously controlled containment and remediation process. Finding a trustworthy abatement contractor is the only way to ensure these toxins don’t migrate from a localized area into the building’s entire HVAC system.

General contractors often possess broad construction knowledge, but they’re legally and technically insufficient for hazardous material handling. They lack the specialized HEPA-filtered vacuum systems, negative air pressure machines, and decontamination chambers required by OSHA Part 1926.1101. Relying on an uncertified team creates a legal liability shift. Under federal “cradle-to-grave” statutes, the property owner remains responsible for improper hazardous waste disposal, even if a third party performed the work. If a contractor dumps asbestos-containing material in a standard landfill, the EPA can hold the owner liable for the entire cleanup cost. Physical risks are equally daunting. Improper handling leads to secondary contamination, where microscopic particles settle in carpets and ductwork, creating long-term health hazards for every future occupant.

Abatement vs. Remediation: Understanding the Difference

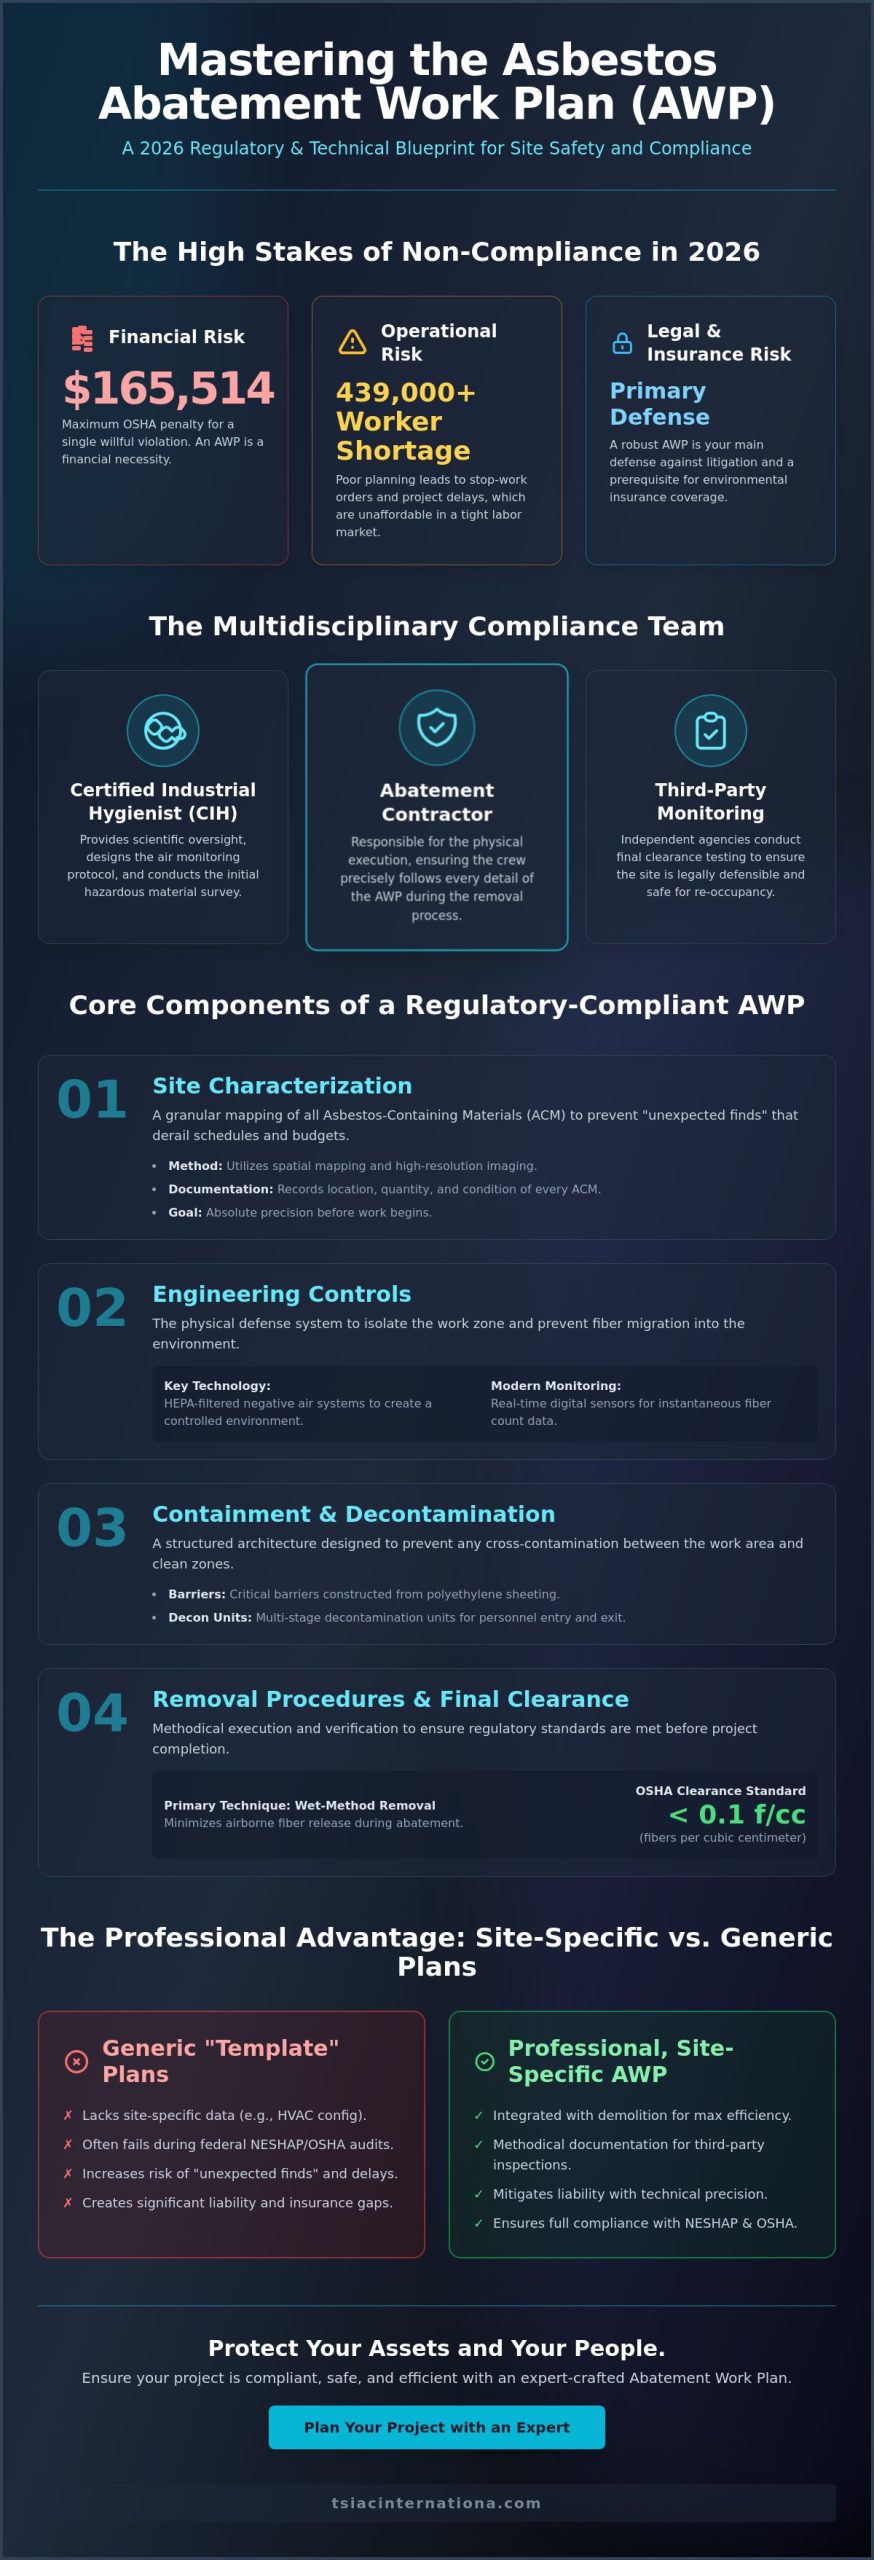
While people use the terms interchangeably, they represent distinct technical protocols. Asbestos abatement focuses on the total removal or permanent encapsulation of fibers. Lead remediation involves stabilizing or removing lead-based paint to prevent dust inhalation. Mold mitigation centers on structural drying and spore removal. The scope of work changes based on the specific hazardous material identified because each substance reacts differently to disturbance. Abatement is a highly regulated engineering control process designed to isolate and eliminate hazardous materials while preventing environmental cross-contamination. Following established Asbestos abatement procedures ensures that microscopic fibers don’t become airborne during the removal phase.

The Consequences of Cutting Corners

The financial impact of hiring an unqualified crew is often immediate and severe. EPA civil penalties for National Emission Standards for Hazardous Air Pollutants (NESHAP) violations can exceed $37,000 per day. Beyond fines, a failed air clearance test can halt a multi-million dollar renovation for weeks. If a Post-Abatement Air Clearance (PAAC) doesn’t meet the 0.01 fibers per cubic centimeter threshold, the contractor must re-clean the entire site at the owner’s expense. Long-term property value also suffers. Without a certified waste manifest and a final clearance report, prospective buyers or lenders will likely view the asset as a “distressed” property, often leading to a 10% to 15% reduction in market valuation. Finding a trustworthy abatement contractor protects the physical structure and the financial equity of the investment.

The Credentials Checklist: Non-Negotiables for 2026

Success in hazardous material removal depends on technical precision and legal adherence. When you’re finding a trustworthy abatement contractor, your first task involves auditing their professional credentials. State-specific licensing is the foundation of this process. Every legitimate firm must hold a current license specifically for asbestos or lead abatement, which you can verify through state regulatory databases. These licenses confirm the contractor understands the 2026 protocols for containment and disposal. Identifying these specific documents is the most reliable way of finding a trustworthy abatement contractor who respects both your budget and your health.

Worker safety and site supervision are equally critical. Each person on your property must possess up-to-date, EPA-approved training certificates. This ensures they follow OSHA’s Asbestos Standard for the Construction Industry, which mandates specific work practices and the presence of a “competent person” to oversee high-risk tasks. Without these certifications, you risk both legal liability and environmental contamination. Bonding requirements also provide a financial safety net. A performance bond ensures the project reaches completion, while a payment bond guarantees that all subcontractors and material suppliers receive their dues, preventing mechanics’ liens on your property.

Verifying Insurance and Bonding

Don’t accept a verbal confirmation of insurance. You need a Certificate of Insurance (COI) that specifically lists “Pollution Liability.” Standard general liability policies often contain “Total Pollution Exclusions,” meaning they won’t cover a spill or fiber release. It’s better to choose an “Occurrence-Based” policy over a “Claims-Made” policy. Occurrence-based coverage protects you even if a claim is filed years after the work ends, provided the incident happened during the policy period. Always request direct verification from the insurance carrier to confirm the policy is active and paid in full.

Modern Compliance Documentation

A project’s paper trail is as important as the physical removal. For commercial renovations, NESHAP (National Emission Standards for Hazardous Air Pollutants) requires a 10-day notification to the EPA before work begins. Once the project concludes, you must receive a Waste Shipment Record (WSR) or disposal manifest. This document proves the hazardous waste reached a licensed landfill. Finally, never accept a project as “complete” without a clearance letter from an independent, third-party laboratory. This lab should perform aggressive air sampling to confirm the area is safe for re-occupancy. If you need a partner who prioritizes these complex technical requirements, focus on firms with a proven track record in high-stakes environments.

Finding a Trustworthy Abatement Contractor: The 2026 Property Owner’s Guide

Vetting the Bid: Comparing Quotes Beyond the Bottom Line

Selecting a partner based solely on the lowest price often leads to catastrophic failure. In the abatement industry, an unusually low bid usually indicates that a contractor is cutting corners on labor protection or bypassing legal disposal fees. Finding a trustworthy abatement contractor requires a forensic look at the line items within a proposal. If a quote lacks specific costs for 6-mil polyethylene sheeting, HEPA-filtered negative air machines, or specialized decontamination units, the contractor likely intends to skip these critical safety layers.

A professional Scope of Work must be granular. It should specify a minimum of four air changes per hour within the containment zone to maintain negative pressure. This isn’t just a suggestion; it’s a technical requirement to prevent hazardous fibers or particles from migrating to clean areas of the property. You should also demand an equipment list that includes HEPA vacuums certified to capture 99.97% of particles down to 0.3 microns. Without these tools, the contractor is simply moving dust around your building rather than removing it.

Questions to Ask During the Site Walk-Through

During the initial inspection, watch how the contractor evaluates the structural layout. Ask these specific questions to gauge their technical competence:

  • How will you establish negative pressure and contain the work area? Look for mentions of manometer monitoring and physical barriers.
  • What is your specific plan for the safe transport of hazardous materials? They must describe a path that avoids high-traffic zones.
  • Who is the independent lab performing the final air clearance testing? A trustworthy firm never tests their own work; they use a third-party laboratory to ensure total transparency.

Analyzing the Disposal Plan

The liability for hazardous waste remains with the property owner until it reaches its final destination. You must confirm the contractor uses certified hazardous waste landfills and provides a waste shipment record for every load. All debris must be double-bagged in 6-mil bags, goose-neck sealed with duct tape, and labeled according to federal EPA and OSHA standards. For projects involving Hazardous Material Abatement in South Carolina, contractors must also adhere to specific DHEC regulations regarding transport manifests.

Finally, evaluate the proposed timeline. Professional abatement requires meticulous setup and mandatory settling periods for airborne dust. A contractor promising to finish a 1,000-square-foot lead or asbestos project in a single day is likely ignoring the 24-hour waiting period often required before final air clearance testing can begin. Precision takes time, and speed shouldn’t come at the expense of your structural integrity or health.

Red Flags and Industry Warning Signs

Finding a trustworthy abatement contractor requires a critical eye for technical compliance and safety protocols. Professional hazardous material removal is a highly regulated field where shortcuts lead to legal liability and health crises. If a contractor suggests skipping the permitting process to expedite the timeline or reduce costs, they’re signaling a disregard for state and federal law. In South Carolina, for example, DHEC regulations mandate specific notification periods before any regulated asbestos-containing material is disturbed. Bypassing these steps can result in five-figure fines for the property owner. For residents in the region who value this same level of regulatory adherence and professional integrity in other essential services, the Cremation Society of South Carolina – Westville Funerals provides dependable support for families during difficult times.

Visual inspections of active job sites often reveal a contractor’s true standards. You should look for specific engineering controls and safety measures, including:

  • Containment Barriers: Professional sites utilize 6-mil polyethylene sheeting to create airtight seals. If you see thin, household-grade plastic or gaps in the taping, the containment is compromised.
  • Negative Air Pressure Monitors: These digital devices are mandatory. They ensure that air flows into the work zone and through HEPA filters, preventing contaminated dust from escaping into clean areas of the building.
  • PPE Compliance: Workers must wear appropriate Personal Protective Equipment, including N100 or P100 respirators and disposable suits. Seeing workers in standard dust masks or street clothes is a definitive sign of an amateur operation.

Identifying the “Solar Cowboy” Equivalent in Abatement

The abatement industry has its share of “Solar Cowboys,” contractors who lack a permanent physical office or a verifiable track record in complex industrial environments. These operators often apply high-pressure sales tactics, demanding the full project amount upfront. A legitimate firm will tie final payment to a successful third-party air clearance test. Furthermore, look closely at the contract. If it doesn’t specify the exact EPA-approved landfill for disposal, you risk being held responsible for illegal dumping. Transparency in the waste manifest process is the hallmark of a professional partner.

The Danger of DIY or Unlicensed Labor

Attempting to save money through DIY methods or unlicensed labor is a high-risk gamble. Improper removal techniques aerosolize microscopic fibers, which stay suspended in the air for up to 72 hours. Once these fibers enter an HVAC system or settle into porous furniture, the site becomes effectively uninhabitable. Cleaning a cross-contaminated site is significantly more expensive than a standard removal, often increasing remediation costs by 400% or more. Before starting any structural changes, it’s vital to understand The Demolition Process in South Carolina to ensure every safety hurdle is cleared.

Ensure your property meets the highest safety standards by choosing a partner with proven technical expertise. Contact TSIA C International for a professional site assessment today.

The TSIAC International Standard: Integrity in Remediation

TSIAC International brings over 15 years of specialized experience to complex structural and selective demolition projects. Since 2009, our team has refined a methodology that prioritizes technical precision over marketing slogans. Finding a trustworthy abatement contractor requires looking past surface-level promises to examine a firm’s operational history and regulatory compliance record. We provide transparent reporting for every client. This ensures that every milligram of hazardous material is documented from the moment of removal to its final disposal. Our crews are trained to manage difficult locations where standard equipment fails, often utilizing industrial rope access or custom-engineered scaffolding to reach contaminated areas safely.

Why an Integrated Approach Saves Time and Money

Most property owners hire separate crews for abatement and demolition. This often leads to a cycle of delays and finger-pointing where one team stalls the other. These inefficiencies can increase project costs by 15% or more. TSIAC eliminates this friction by handling hazardous material removal and structural gutting simultaneously. We streamline the permitting process for total structural removals, which reduces the administrative burden on the property owner. For those managing assets in the Southeast, understanding Asbestos Removal in South Carolina is critical for staying within the 2026 legal frameworks. Our integrated model ensures that safety protocols and structural integrity move in lockstep, preventing the “blame game” that plagues traditional construction sites.

Environmental Stewardship and Recycling

Environmental responsibility is a logistical requirement in modern remediation, not just a preference. We implement debris recycling programs that sort metal, wood, and plastic directly on-site. This systematic approach reduces landfill impact by up to 70% on major industrial demolition projects. To prevent cross-contamination, we use rigid safety protocols that isolate non-hazardous materials from contaminated zones before they leave the site. This level of control protects the environment and the client’s legal standing. Finding a trustworthy abatement contractor means choosing a partner who values long-term safety over short-term shortcuts. Partnering with TSIAC means choosing a safer, cleaner, and more efficient project completion. We don’t just clear a site; we engineer a solution that meets the highest industrial standards for safety and sustainability.

Securing Your Property’s Future with Precision Remediation

Protecting your investment requires more than a casual search. It demands a technical audit of every potential partner. You’ve seen that finding a trustworthy abatement contractor in 2026 hinges on verifying full compliance with EPA and OSHA regulations. A low bid often masks a lack of comprehensive pollution liability insurance, which leaves your assets exposed to unnecessary risk. By prioritizing a credentials-first approach, you ensure that remediation is a controlled engineering process rather than a liability.

TSIAC International leverages 15+ years of industry experience to handle complex remediation in high-stakes environments. We don’t offer empty promises; we deliver documented safety and structural integrity. Our team maintains strict adherence to federal protocols to ensure your project remains on schedule and within regulatory bounds. When the stakes involve hazardous materials, professional precision is the only acceptable metric for success. You deserve a partner who navigates these technical challenges with calm authority and proven expertise.

Contact TSIAC International for a Professional Abatement Quote

Taking the right steps today prevents costly structural and legal failures tomorrow. Your property deserves the highest standard of technical excellence and a partner who delivers on every commitment.

Frequently Asked Questions

How do I check if an abatement contractor is licensed?

You verify an abatement contractor’s license by searching the official state environmental agency database or the EPA’s Lead-Safe firm registry. Every certified professional holds a unique credential number that’s verifiable online. You should request a copy of the firm’s current 2026 certification and cross-reference it with the Department of Labor’s active list to ensure compliance and safety.

Is it safe to stay in the building during asbestos or lead abatement?

It’s not safe to remain in the immediate work zone during active asbestos or lead abatement processes. EPA guidelines require occupants to vacate the area until third-party air clearance testing proves fiber levels are below 0.01 per cubic centimeter. Professionals establish sealed containment zones using 6-mil polyethylene sheeting to protect the remaining 95 percent of the building from cross-contamination.

What is the difference between a standard demolition and abatement?

Standard demolition involves the mechanical destruction of structures, but abatement is the precise process of isolating and removing hazardous pollutants. Abatement uses negative air machines and HEPA filtration to capture microscopic particles that traditional demolition would release into the environment. This technical approach protects both the structural integrity and the health of future occupants through engineering controls.

How much does professional abatement cost compared to DIY?

Professional abatement involves higher upfront costs than DIY, but it eliminates the risk of legal penalties that reach $37,500 per day for environmental violations. Industry reports from 2024 indicate that professional asbestos removal typically ranges from $1,500 to $3,000 for small residential projects. DIY attempts often lead to 100 percent contamination of the HVAC system, causing much higher long-term remediation expenses.

What documents should I receive after the abatement is finished?

You must receive a comprehensive close-out binder containing the waste disposal manifest, daily work logs, and independent air clearance certificates. The waste manifest is a critical legal document signed by the licensed landfill, proving the hazardous material reached its destination. Finding a trustworthy abatement contractor guarantees you get these records to protect your property’s resale value and legal standing.

Can a general contractor handle lead paint removal?

A general contractor can only handle lead paint removal if they hold a valid EPA RRP certification and employ workers trained in lead-safe practices. Without this specific 2026 accreditation, they lack the technical equipment to manage toxic dust. Finding a trustworthy abatement contractor is vital because they follow the 40-hour HAZWOPER standards required for high-risk environmental work and hazardous waste operations.

What happens if a contractor is caught improperly disposing of hazardous waste?

Contractors caught improperly disposing of hazardous waste face heavy civil fines, license revocation, and potential jail time under the Resource Conservation and Recovery Act. The EPA can levy penalties up to $70,117 per violation for each day the non-compliance continues. Property owners might also be held liable for cleanup costs if the contractor’s disposal chain isn’t documented and verified.

How long does the average abatement project take?

The average residential abatement project takes between 3 and 5 days to complete from initial containment to final clearance. Industrial sites or complex structural projects often require 15 to 20 days due to the scale of the containment systems. Each phase is strictly timed, including a mandatory 24-hour settling period before the final air quality samples are collected for laboratory analysis.

Health Risks of Lead Paint: A 2026 Comprehensive Safety & Abatement Guide

A single gram of dust from a deteriorating lead-painted surface contains enough toxin to contaminate an entire residential floor, yet 34 million…

A single gram of dust from a deteriorating lead-painted surface contains enough toxin to contaminate an entire residential floor, yet 34 million American homes still contain these legacy hazards according to 2023 EPA data. You likely understand that managing an older property involves more than just structural maintenance; it requires a rigorous commitment to occupant safety. The health risks of lead paint are a legitimate concern for any responsible stakeholder, especially when facing the potential for irreversible neurological damage or the complex web of modern regulatory compliance. It’s natural to feel overwhelmed by the perceived cost and technical difficulty of professional abatement.

This comprehensive 2026 guide removes the uncertainty by providing a precise, engineering-focused roadmap for identifying and neutralizing these biological dangers. You’ll gain a clear understanding of how lead interacts with human physiology and learn the exact industry standards required for safe, permanent mitigation. We’ll examine the latest testing technologies, the mandatory safety protocols for hazardous material handling, and the specific steps necessary to achieve full compliance with current environmental health standards.

Key Takeaways

  • Determine if your property requires intervention by understanding the 1978 ban and how lead-based additives once used for durability now pose modern structural liabilities.
  • Gain insight into the biological mechanism of toxicity, specifically how lead mimics calcium to bypass the blood-brain barrier and the long-term health risks of lead paint.
  • Identify critical hazard zones by learning to differentiate between intact surfaces and high-risk friction points where daily use generates hazardous dust.
  • Evaluate professional diagnostic tools, such as XRF (X-Ray Fluorescence) testing, to ensure accurate, non-destructive identification of hidden lead layers.
  • Implement engineering-grade abatement strategies, utilizing containment zones and negative air pressure to ensure permanent structural safety and compliance.

The Legacy of Lead-Based Paint in Modern Structures

Lead-based paint represents a significant historical chapter in industrial coatings and residential finishes. For decades, manufacturers added lead, primarily lead(II) carbonate or lead(II) chromate, to accelerate drying times, increase durability, and provide superior moisture resistance. These chemical properties made it the gold standard for high-wear surfaces before its long-term biological risks were fully quantified. The Legacy of Lead-Based Paint persists today because of these very strengths; the material was engineered to last for generations, often outliving the original structural components it was intended to protect.

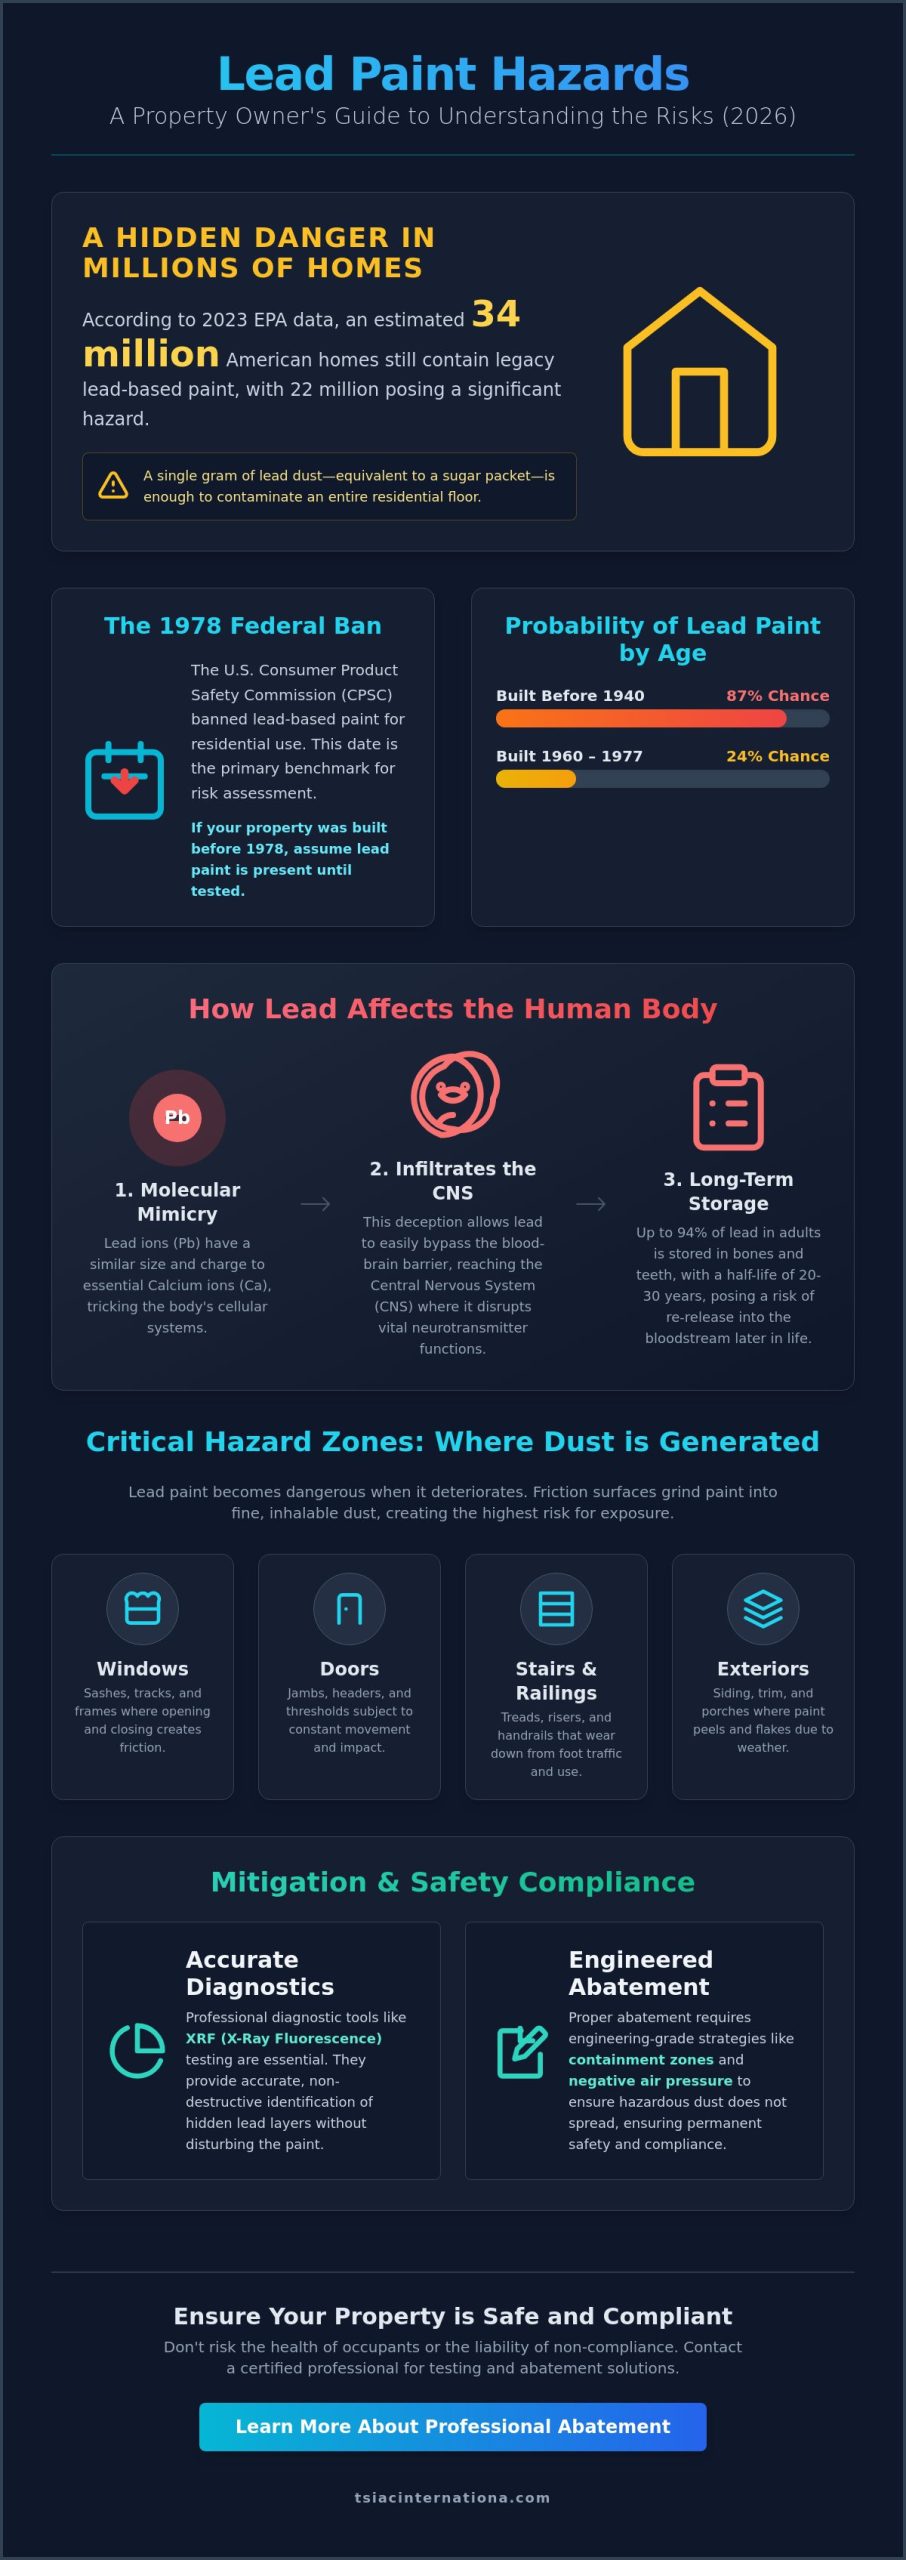
The U.S. Consumer Product Safety Commission (CPSC) effectively banned lead-based paint for residential use in 1978. This date serves as the primary benchmark for property risk assessments. If your facility or home was constructed before 1978, there’s a statistically high probability that lead remains present within the building’s envelope. The scale of this issue is massive. Data from the Department of Housing and Urban Development (HUD) indicates that approximately 34 million American housing units still contain lead-based paint, with 22 million of those considered to have significant lead-based paint hazards.

Why Lead Was the Industry Standard

Lead-based pigments provided exceptional opacity and vibrant colors that resisted fading under intense UV exposure. In both industrial and residential applications, leaded oil-based paints formed a rigid, washable film that didn’t crack easily during seasonal temperature fluctuations. As the industry eventually transitioned to modern latex alternatives, these older coatings weren’t typically stripped away. Instead, they were covered with newer layers. This created a dangerous “sandwich” effect where multiple layers of modern, non-toxic paint hide “hot” lead layers beneath seemingly safe surfaces. When these surfaces are sanded, scraped, or begin to peel, the health risks of lead paint become an immediate concern as toxic dust is released into the environment.

Identifying High-Risk Properties

The age of the structure is the most reliable indicator of risk. Properties built before 1940 have an 87% chance of containing lead, while those built between 1960 and 1977 have a 24% chance. You’ll find these hazardous coatings most frequently on friction surfaces where constant movement can grind the paint into fine, inhalable dust. Key areas include:

  • Window sashes, tracks, and frames
  • Door jambs and headers
  • Exterior siding and decorative trim
  • Stair treads and handrails

Lead rarely exists in isolation in older structures. It’s common to find lead-painted surfaces in the same vicinity as other legacy toxins, such as asbestos-containing materials (ACM) used in pipe insulation or floor tiles. Managing these overlapping hazards requires a technical, site-specific strategy. For professionals overseeing these environments, reviewing the guide on Hazardous Material Abatement in South Carolina provides the necessary context for modern compliance. Effectively mitigating the health risks of lead paint requires recognizing that these materials are structural legacies that demand precise, engineered removal solutions.

The Biological Impact: How Lead Affects the Human Body

Lead operates as a sophisticated molecular mimic. It tricks the human body by imitating calcium, a mineral essential for cellular signaling and bone health. Because lead ions possess a similar size and charge to calcium, they easily bypass the blood-brain barrier and interfere with neurotransmitter release. This physiological deception allows the toxin to infiltrate the central nervous system, where it disrupts the electrical impulses that govern thought and movement.

Long-term storage of this heavy metal presents a unique challenge for medical professionals. Lead undergoes bioaccumulation, migrating from the blood into mineralized tissues. In adults, approximately 94% of the total body burden of lead is sequestered in the bones and teeth. These deposits don’t remain static; they have a half-life of 20 to 30 years. During periods of physiological stress, such as pregnancy or advanced age, the body may remobilize this stored lead back into the bloodstream, causing secondary exposure decades after the initial contact.

Medical standards for safety have shifted dramatically as diagnostic technology has improved. The consensus among global health authorities is that there’s no safe blood lead level. While the CDC lowered the blood lead reference value to 3.5 µg/dL in 2021, even trace amounts contribute to long-term health deficits. Understanding the health risks of lead paint requires recognizing that damage occurs well before clinical symptoms of poisoning appear.

Two primary routes of entry dominate lead exposure in residential and industrial environments. Ingestion often occurs when children swallow paint chips, which can contain up to 50% lead by weight. Inhalation is more insidious. Sanding, heat-stripping, or even the simple friction of a sliding window sash generates microscopic dust particles. These particles, often smaller than 10 microns, stay suspended in the air and are easily absorbed through the lungs into the systemic circulation.

Neurotoxicity in Children and Developing Brains

Young children represent the highest risk demographic due to their rapid metabolic rates and frequent hand-to-mouth behavior. Exposure during these formative years leads to permanent reductions in IQ and significant deficits in executive function. Research indicates that children under six absorb up to 50% of the lead they ingest, compared to just 10% in adults. Lead-induced neuroplasticity disruption occurs when lead ions replace calcium at synaptic junctions, effectively hijacking the signaling pathways required for healthy brain development. This disruption often manifests as behavioral regulation issues that persist into adulthood.

Adult Health Risks: Cardiovascular and Reproductive Effects

Chronic exposure in adults triggers a cascade of systemic failures. The health effects of lead exposure are particularly devastating to the cardiovascular system, where it’s linked to a 40% increase in hypertension risk. The kidneys also suffer as they attempt to filter the heavy metal, often leading to chronic renal insufficiency over time.

Reproductive health is another critical concern. For women, lead crosses the placental barrier, increasing the likelihood of miscarriage or premature birth. In men, it reduces sperm count and motility, impacting overall fertility. Occupational hazards remain high for those in demolition or renovation sectors. Workers who don’t utilize high-efficiency particulate air (HEPA) filtration or specialized PPE risk bringing toxic dust into their homes. Implementing a strategy for complex kivitelezés (complex execution) is the only reliable way to ensure these health risks of lead paint are managed with engineering precision.

Health Risks of Lead Paint: A 2026 Comprehensive Safety & Abatement Guide

Identifying Lead Hazards: When Does Paint Become Dangerous?

Lead paint doesn’t always present an immediate threat to occupants. If the coating remains intact and firmly bonded to the substrate, the health risks of lead paint stay contained within the material. The danger begins once the physical integrity of the film fails. This transition occurs through mechanical wear, environmental degradation, or improper maintenance. Identifying this tipping point is essential for maintaining a safe environment in structures built before 1978.

High-traffic areas like window sashes, door frames, and stair treads represent constant hazards. These are known as friction surfaces. Every time a window slides or a door closes, the surfaces act as a mechanical grinder. This process generates microscopic lead dust that’s often invisible to the naked eye. This dust settles on sills, floors, and nearby furniture where it’s easily disturbed. Data from the EPA indicates that even a tiny amount of lead dust, equivalent to a few grains of sugar, is enough to contaminate a standard-sized room.

Many property owners fall for the myth of the “clean” renovation. They believe that standard power sanding or heat stripping is the best way to prep a surface. This is a technical disaster. Dry sanding generates millions of lead particles small enough to remain airborne for hours. These particles bypass standard shop-vac filters and enter the building’s HVAC system. Once in the ducts, the lead migrates to every corner of the property, turning a localized repair into a facility-wide contamination event. Standard cleaning methods won’t remove this fine particulate matter from carpets or porous surfaces.

Signs of Deteriorating Lead Paint

Technicians must look for “alligatoring,” which appears as a grid of rectangular cracks resembling reptile skin. This pattern indicates the paint has lost its elasticity and is ready to flake. “Checking” refers to finer, shallower surface cracks. If you notice chalking on exterior siding, the binder has failed, leaving loose lead pigment on the surface that can wash into the soil. Moisture is the primary driver of this breakdown. Water penetration behind the paint film causes the coating to bubble and peel, exposing toxic layers that were previously buried.

The Hidden Threat of Lead Dust

Dust is significantly more dangerous than paint chips because it’s easily inhaled and ingested through hand-to-mouth contact. It migrates through a building during even minor selective demolition. A 2021 study confirmed that lead dust can travel through air ducts to rooms far from the work zone. Effective control requires specialized HEPA-filtered vacuums and wet-wiping techniques. Standard household vacuums often exhaust the finest lead particles back into the air, which significantly increases the health risks of lead paint for everyone in the building.

Mitigating Risk: Testing, Inspection, and Remediation Strategies

Effective risk mitigation begins with technical precision. You can’t manage what you haven’t accurately measured. A standard lead-based paint inspection utilizes X-Ray Fluorescence (XRF) technology to identify the presence of lead on every surface, regardless of its condition. It’s a surface-by-surface investigation that provides a clear inventory of lead-containing materials. Conversely, a full risk assessment evaluates the severity of the hazard. It identifies deteriorated paint and lead-contaminated dust that pose immediate health risks of lead paint to occupants. According to EPA standards, paint is considered lead-based if it contains 1.0 milligram per square centimeter or 0.5% lead by weight.

Professional Testing Protocols

Testing requires a multi-layered approach. While XRF provides non-destructive results on-site, laboratory paint chip analysis offers higher precision for complex substrates where XRF might be inconclusive. On-site dust wipe sampling measures the actual risk of ingestion or inhalation, which is critical for post-remediation clearance. In industrial or older residential settings, testing must extend to soil and water. Lead particles often migrate from exterior siding into the surrounding 12 inches of soil, creating long-term exposure risks. For projects involving older structures, it’s common to encounter multiple hazardous materials simultaneously. You can learn more about managing these complexities in our guide on Asbestos Removal in South Carolina.

Interim Controls and Management

Property owners often choose between interim controls and permanent abatement based on structural longevity and budget. Interim controls don’t remove the lead; they manage it.

  • Encapsulation: This involves applying a liquid-applied coating that creates a long-lasting, impact-resistant bond. It’s not standard paint; it’s a specialized polymer that prevents lead dust from escaping.
  • Enclosure: This method uses a permanent barrier, such as drywall or aluminum coil stock, to mechanically separate the lead paint from the living environment.

Interim controls require a written management plan and re-evaluation every two years. If the barrier fails, the health risks of lead paint return immediately.

Attempting DIY removal is a high-risk error. Sanding or scraping lead paint without HEPA-filtered vacuum attachments aerosolizes lead dust, making it easier to inhale. Studies show that improper DIY renovation can increase an occupant’s blood lead levels (BLL) by 5 to 10 micrograms per deciliter within days. Professional abatement ensures that lead is either permanently removed or safely contained using specialized engineering controls and negative air pressure environments.

To ensure your project meets 2026 safety standards, consult with the experts at TSIA C International for professional remediation services.

Professional Lead Abatement: Ensuring Long-Term Structural Safety

Mitigation of the health risks of lead paint requires a shift from temporary maintenance to permanent structural solutions. Abatement is a rigorous engineering process designed to eliminate lead hazards through three primary methods: complete mechanical removal, total component replacement, or permanent enclosure using specialized encasements. Unlike simple repainting, these methods provide a 30-year lifecycle of safety for industrial and residential assets by addressing the root cause of contamination.

Effective containment is the foundation of site safety. Crews establish a sealed environment using 6-mil polyethylene sheeting and maintain negative air pressure through industrial HEPA filtration units. This prevents microscopic lead particles from migrating to clean zones during the demolition or stripping phases. Once the physical work is complete, a third-party professional must conduct dust wipe sampling. Clearance is only granted when lead levels fall below the 2026 threshold of 5 micrograms per square foot (µg/ft²) on floors, ensuring the space is truly decontaminated.

Containment and Safety Standards

Workers must utilize specialized Personal Protective Equipment (PPE), including disposable Tyvek suits and P100-rated respirators, to prevent inhalation and dermal contact. To keep dust levels at a minimum, teams employ wet-scraping techniques and high-efficiency heat-stripping tools that operate below 1,100 degrees Fahrenheit. Under the 2026 EPA updated Resource Conservation and Recovery Act (RCRA) guidelines, all lead-contaminated debris exceeding 5.0 mg/L via Toxicity Characteristic Leaching Procedure (TCLP) testing must be treated as hazardous waste and transported to Subtitle C landfills.

Why Expertise Matters in Hazardous Abatement

Hiring uncertified contractors for structural gutting often results in catastrophic cross-contamination. Inexperienced crews may inadvertently spread lead dust into HVAC systems, turning a localized problem into a building-wide crisis. TSIAC International manages complex hazardous material projects by applying engineering-grade precision to every site, ensuring that structural integrity and human health remain protected. Our teams handle the logistics of containment, removal, and legal disposal so you don’t have to worry about long-term liability.

Protecting your facility and its occupants from the health risks of lead paint is a technical challenge that demands a proven partner. Schedule a professional lead risk assessment today.

Securing Structural Integrity and Public Health for 2026 and Beyond

Managing the health risks of lead paint requires a shift from passive observation to proactive engineering. Although the 1978 federal ban restricted lead use in residential settings, thousands of industrial and commercial structures still harbor legacy coatings that degrade into toxic dust. This degradation poses a persistent threat to the nervous system and overall biological health. Effective mitigation demands more than superficial fixes; it requires rigorous EPA-compliant containment and specialized disposal protocols to prevent environmental cross-contamination during the removal process.

TSIA C International brings over 15 years of hazardous material expertise to every project, ensuring that complex environmental challenges are met with technical precision. Our capabilities extend to comprehensive structural demolition and abatement, providing a permanent solution for aging infrastructure. We don’t just remove hazards; we restore the long-term safety of your assets through disciplined execution and engineering mastery. Taking decisive action today prevents irreversible neurological damage and ensures your facility remains compliant with evolving safety standards. Protect your property and health with professional lead abatement services.

Your commitment to safety today builds a foundation for a secure and healthy operational future.

Frequently Asked Questions

What are the first signs of lead poisoning in adults?

High blood pressure, joint pain, and cognitive difficulties represent the primary clinical indicators of adult exposure. The CDC identifies blood lead levels above 5 micrograms per deciliter as a threshold for medical concern. Adults frequently experience persistent headaches, muscle weakness, or reproductive complications before more severe neurological symptoms become evident. These physiological changes often occur gradually, making regular screening essential for those in high-risk industrial environments.

Can I just paint over lead-based paint to make it safe?

Encapsulation serves as a temporary control measure, but standard latex paint won’t neutralize the hazard. Lead-based paint remains a threat if the underlying layers chip or peel due to moisture or friction. To manage the health risks of lead paint, you must apply specialized EPA-approved encapsulants. These industrial coatings create a long-term chemical bond that prevents dust release, unlike decorative paints that lack the necessary durability for hazardous material containment.

How much lead exposure is required to cause health problems?

There’s no safe level of lead exposure according to the World Health Organization. Even a concentration of 3.5 micrograms per deciliter in a child’s blood can cause permanent neurological damage and IQ loss. In industrial construction environments, OSHA enforces a permissible exposure limit of 50 micrograms per cubic meter of air over an 8-hour shift. Maintaining levels below these specific thresholds is critical for long-term physiological safety and regulatory compliance.

What is the difference between lead abatement and lead renovation?

Lead abatement is a permanent hazard elimination process designed to last at least 20 years and must be performed by certified professionals. Renovation involves smaller repairs that may disturb lead surfaces but don’t aim for permanent removal. The EPA’s RRP Rule dictates that any renovation disturbing more than 6 square feet of interior lead paint requires specific containment and cleaning protocols. Abatements are more rigorous, involving specialized techniques like component replacement or enclosure.

How do I know if my house built before 1978 has lead paint?

Professional X-ray fluorescence (XRF) testing is the only definitive method to identify lead presence without damaging the structure. Data shows that 87 percent of homes built before 1940 contain lead paint, while 24 percent of homes built between 1960 and 1977 remain affected. You shouldn’t rely on retail DIY kits because they often fail to detect lead in lower paint layers. A certified inspector provides a comprehensive report detailing every lead-positive surface.

Is lead paint dust dangerous if I can’t see it?

Lead dust is microscopic and remains the primary cause of poisoning in residential and industrial environments. A single lead particle the size of a grain of salt is sufficient to contaminate a 10-foot by 10-foot room. Because these particles are heavy, they settle on floors and horizontal surfaces where they’re easily ingested through hand-to-mouth contact. You can’t see, smell, or taste these particles, making professional air monitoring vital during any structural work.

What should I do if my child tests high for lead?

Contact your local health department immediately to initiate a professional environmental investigation of your home. When a child’s blood lead level exceeds 3.5 micrograms per deciliter, the CDC recommends immediate nutritional interventions and source identification. You’ll need to hire a certified risk assessor to inspect the property for deteriorating paint, contaminated soil, or lead in water pipes. Swift action is necessary to prevent further absorption and mitigate long-term developmental damage.

How long does lead stay in the human body after exposure?

Lead stays in the bloodstream for approximately 30 days before migrating to bones and teeth where it remains for 20 to 30 years. The human body mistakenly treats lead like calcium, storing it within the skeletal structure for decades. During periods of physiological stress or pregnancy, this stored lead can re-enter the blood, causing delayed health risks of lead paint exposure. This long-term retention makes historical exposure a relevant factor for adult health assessments.

Asbestos in Popcorn Ceilings: A 2026 Guide to Identification and Abatement

According to Environmental Protection Agency (EPA) data updated for 2024, approximately 30 million homes in the United States still contain legacy…

According to Environmental Protection Agency (EPA) data updated for 2024, approximately 30 million homes in the United States still contain legacy building materials that pose a documented respiratory hazard during renovation. You likely suspect that the textured finish on your overhead surfaces is more than just an outdated design choice from the 1970s. It’s natural to feel a sense of hesitation before starting a remodel, especially when conflicting online advice ignores the rigorous safety protocols required for handling asbestos in popcorn ceilings safely.

This 2026 guide provides the technical framework you need to identify hazardous materials, execute precise testing protocols, and manage the abatement process without compromising your family’s health or your property’s long term value. We’ll examine current regulatory standards, the specific steps for professional grade containment, and how to transition your renovation project from a safety liability into a successful asset upgrade. By following a structured, engineering based approach, you can eliminate the anxiety of hidden contaminants and move forward with a clear, compliant plan for your property.

Key Takeaways

  • Identify the specific visual indicators and structural age factors that signal a high probability of hazardous material presence in acoustic finishes.
  • Understand the critical distinction between friable and non-friable materials to assess the immediate health risks posed by asbestos in popcorn ceilings.
  • Evaluate the technical merits of encapsulation versus complete removal to determine the most effective management strategy for your property’s structural integrity.
  • Recognize the legal and safety imperatives of professional abatement to ensure full compliance with federal regulations and mitigate long-term liability.

Understanding Asbestos in Popcorn Ceilings

Popcorn ceilings, technically referred to as acoustic or cottage cheese ceilings, represent a significant era in 20th-century construction. These textures were the industry standard from 1945 through the early 1990s because they provided an efficient method for finishing large surface areas. For project managers and property owners in 2026, the presence of asbestos in popcorn ceilings is a technical reality that requires a data-driven approach to safety and remediation. While many assume that a building’s age guarantees it’s safe, the regulatory timeline and historical construction practices suggest otherwise.

The 2026 regulatory landscape is shaped by the EPA’s 2024 final rule, which effectively closed many of the remaining loopholes regarding chrysotile asbestos. Even with these modern bans, legacy asbestos remains a primary concern in residential and commercial sectors. Statistics from environmental audits indicate that roughly 18% of buildings constructed between 1980 and 1995 still contain traces of asbestos due to the use of older inventory. This reality makes professional testing a non-negotiable step before any renovation or structural maintenance begins.

The History of Acoustic Textures

The widespread adoption of spray-on textures began in the post-war housing boom. Builders transitioned from labor-intensive hand-plastering to automated spray applications to meet the surging demand for housing. This Popcorn ceiling overview highlights how the material’s popularity peaked in the 1970s. Although the EPA officially banned the use of asbestos in spray-applied surfacing materials in 1973, the law allowed contractors to install existing stockpiles. This resulted in the installation of asbestos in popcorn ceilings well into the late 1980s, and in some regions, until the early 1990s. Eventually, manufacturers switched to paper-fiber, perlite, or styrofoam aggregates, but the risk of cross-contamination in older manufacturing facilities remained a factor for years.

Why Asbestos Was the “Miracle Mineral”

In the mid-20th century, asbestos was prized for its unique physical properties that no other affordable mineral could match. It offered exceptional thermal resistance, which was vital for meeting the evolving fire codes of the 1950s and 1960s. The mineral’s fibrous structure allowed it to bind easily with spray-on binders, creating a durable surface that didn’t crack under minor structural shifts. Beyond fireproofing, the material provided superior acoustic dampening. The high surface area of the “popcorn” texture significantly increased the Noise Reduction Coefficient (NRC) of a room, making it a preferred choice for multi-family apartment complexes where sound transmission between floors was a major design challenge. Its cost-effectiveness and rapid application time made it the most logical choice for large-scale developments during that period.

How to Identify Potential Asbestos Risks

Identifying asbestos in popcorn ceilings requires a shift from visual estimation to empirical data. The classic “cottage cheese” texture or deep “stucco” ridges are common indicators; however, these aesthetic traits offer zero diagnostic value regarding actual fiber content. Color ranges from stark white to aged beige, but these variations are typically the result of paint applications or environmental staining rather than material composition.

Visual identification is impossible. Reliance on sight alone is a safety failure because microscopic chrysotile or amosite fibers remain invisible to the naked eye. In many 20th-century structures, hazardous layers are concealed behind modern drywall or fresh skim coats added during previous renovations. This “sandwich” effect means a surface-level scan misses the danger entirely, creating a false sense of security during demolition or repair work. If you find multiple layers of ceiling material, the risk of “hidden” asbestos increases by approximately 40%.

Age-Based Risk Assessment

The construction date serves as the most reliable preliminary indicator for potential contamination. Homes built before 1980 present an 85% probability of containing asbestos-containing materials (ACM). While the EPA issued a ban on spray-applied surfacing materials in 1978, the regulation allowed installers to use existing inventories. Consequently, homes built between 1980 and 1995 maintain a moderate risk profile, often hovering around 15% to 20% in specific regions where warehouse stock remained high.

Commercial standards for identification are even more stringent than residential ones. Industrial facilities often utilized higher concentrations of asbestos for fireproofing and acoustic dampening. Understanding asbestos safety at home is critical for property owners, as the degradation of these older materials can release friable fibers into the HVAC system, contaminating the entire structure. Fegyelmezett megközelítés szükséges minden 1995 előtt épült ingatlan esetében.

The Necessity of Professional Testing

Bulk sampling is a technical process that requires specialized equipment and containment protocols. You shouldn’t take samples yourself. Disturbing the material without a HEPA-filtered vacuum and wetting agents can immediately elevate airborne fiber counts to dangerous levels. Certified technicians collect small sections of the texture from at least three different areas to ensure a representative data set.

Accredited laboratories analyze these samples using Polarized Light Microscopy (PLM). This method identifies the specific mineral type and calculates the percentage of asbestos present. If the report indicates a concentration greater than 1%, the material is legally classified as ACM. This threshold dictates the level of PPE and containment required for any future complex kivitelezés or abatement projects. Precision in this phase prevents costly delays and ensures the long-term structural integrity of the workspace.

Asbestos in Popcorn Ceilings: A 2026 Guide to Identification and Abatement

Friability: The Key Factor in Asbestos Safety

Understanding friability is essential when managing asbestos in popcorn ceilings because it dictates the immediate risk to occupants. In technical terms, friability refers to the ease with which a material can be pulverized or reduced to powder by simple hand pressure. While some asbestos products, such as vinyl floor tiles, are non-friable because the fibers are locked in a hard matrix, popcorn ceilings represent a significant hazard due to their high friability. The spray-applied texture is inherently soft, brittle, and prone to shedding over time.

Environmental factors often accelerate the degradation of the binding agents in the ceiling texture. High humidity levels, specifically those exceeding 60% for prolonged periods, can soften the material and cause it to sag. Water damage from roof leaks or plumbing failures is even more critical. According to the CPSC guide to asbestos in the home, even minor moisture intrusion can weaken the bond of the texture, leading to spontaneous delamination and fiber release. Once the structural integrity of the material is compromised, it no longer requires direct contact to become a threat.

The Science of Fiber Release

Friability is the tendency of a material to crumble or release dust under simple hand pressure. Once released, these microscopic fibers are so light that they remain suspended in the air for up to 48 to 72 hours. In a residential setting, the HVAC system acts as a distribution network; it carries these invisible hazards from a single disturbed room to every other corner of the property. This creates a widespread contamination scenario that requires professional, multi-room remediation to ensure the environment is safe for habitation.

Disturbance Risks During Renovation

Homeowners often underestimate the mechanical forces required to dislodge asbestos in popcorn ceilings. Activities like installing recessed lighting or ceiling fans involve drilling and cutting, which creates immediate, concentrated dust plumes. Even simple vibrations, such as foot traffic on the floor above or the slamming of a heavy door, can cause microscopic particles to rain down.

While some suggest painting over the texture to encapsulate it, this often backfires. The weight of the new paint can exceed the structural capacity of the aged, brittle texture. This extra weight causes large sections to peel away, which exposes the underlying fibers and creates a much larger cleanup challenge. Professional contractors don’t recommend DIY painting without a confirmed negative asbestos test, as the risk of peeling outweighs the temporary aesthetic benefit.

Management Strategies: Encapsulation vs. Removal

Choosing the right strategy for asbestos in popcorn ceilings requires a rigorous engineering assessment of the material’s current state. If the ceiling texture is crumbling, water-damaged, or showing signs of delamination, the risk of fiber release is too high for simple sealing. Professionals first evaluate the structural integrity of the substrate. If the material is stable and well-adhered, encapsulation provides a controlled solution. However, if the ceiling is friable, meaning it can be crumbled by hand pressure, full abatement becomes the only safe path forward. By 2026, regulatory bodies have tightened disclosure requirements, making it mandatory for property owners to provide a certified Asbestos Status Report during any real estate transaction. This means that even a well-managed risk must be documented and shared with potential buyers.

The Pros and Cons of Encapsulation

Encapsulation is often the preferred choice for those seeking to minimize immediate site disruption. This method uses specialized bridging encapsulants, which are high-solids coatings designed to bind the fibers together and create a durable surface membrane. Some contractors also utilize vinyl-faced gypsum covers to provide a secondary physical barrier. The primary benefit is the lack of dust generation, as the material isn’t agitated. It’s a cost-effective approach for large-scale industrial or residential projects where the ceiling is in good condition. The drawback is that the asbestos remains on-site. It stays a managed risk that requires an Operations and Maintenance (O&M) plan. Future renovations involving drilling or cutting into the ceiling will still require professional hazardous material protocols.

The Professional Abatement Process

Full abatement is the only way to permanently eliminate the liability associated with asbestos in popcorn ceilings. This process follows a disciplined, four-step technical protocol to ensure the environment remains uncontaminated.

  • Step 1: Containment. Technicians establish a regulated area using 6-mil polyethylene sheeting to seal all walls, floors, and HVAC vents.
  • Step 2: Negative Air Pressure. The team implements negative air machines equipped with HEPA filters. These units ensure that air only flows into the work zone, preventing any microscopic fibers from escaping.
  • Step 3: Wet-Scraping. Workers use specialized wetting agents to saturate the texture before removal. This technique suppresses dust at the source, ensuring fibers don’t become airborne during the scraping process.
  • Step 4: Decontamination and Disposal. All waste is double-bagged in leak-tight, labeled 6-mil containers. The area then undergoes a final HEPA vacuuming and wet-wiping before a third-party air clearance test confirms the space is safe for re-occupancy.

Deciding between these methods depends on your long-term goals for the property. While encapsulation offers a faster turnaround, removal provides the peace of mind that comes with a clean environmental report. For expert guidance on the most secure path for your facility, consult with the specialists at TSIA C International to ensure your project meets the highest safety standards.

Why Professional Abatement is Non-Negotiable

Attempting to remove asbestos in popcorn ceilings without professional intervention creates severe health risks and legal liabilities. When friable asbestos fibers are disturbed, they become microscopic projectiles that remain suspended in the air for up to 72 hours. Property owners face strict penalties under EPA NESHAP (National Emission Standards for Hazardous Air Pollutants) regulations if they fail to follow proper containment procedures. Professional contractors mitigate these risks by establishing negative pressure environments and using specialized wet-stripping methods that prevent fiber release at the source.

Compliance isn’t just about safety; it’s about meticulous documentation. Federal law requires specific disposal protocols for hazardous waste. A professional firm handles the entire chain of custody, ensuring that your renovation project remains legally sound. Once the material is removed, third-party air clearance testing provides the final verification. This independent analysis ensures that fiber counts are below 0.01 fibers per cubic centimeter. This is the standard safety threshold for re-occupancy. Without this certificate, you risk contaminating the entire building during subsequent renovation phases.

Safety Protocols and Specialized Equipment

Standard dust masks provide zero protection against microscopic mineral fibers. Professionals utilize N100 or P100 respirators and disposable hazmat suits to prevent cross-contamination. Expert hazardous material abatement protects the building’s long-term value by ensuring no residual contamination lingers in the HVAC system or wall cavities. Final cleanup requires industrial HEPA vacuums. These machines capture particles as small as 0.3 microns with 99.97% efficiency. This level of precision is impossible to achieve with consumer-grade equipment.

Choosing a Qualified Abatement Partner

Selecting a contractor requires more than a simple quote. You must verify their asbestos-specific liability insurance and bonding. A qualified partner should have a proven history with both abatement and selective demolition to ensure the structure remains intact during the process. This expertise is vital when transitioning from hazardous material removal to structural prep.

Always request a detailed Waste Shipment Record (WSR) for your compliance files. This document is your primary defense in environmental audits. It proves the material reached a licensed landfill according to 40 CFR Part 61. By hiring a team that understands the intersection of safety and structural integrity, you ensure the removal of asbestos in popcorn ceilings is a controlled, engineering-led process rather than a hazardous gamble. This disciplined approach allows for a seamless transition to the next stage of your construction project.

Securing Your Property Against Latent Hazardous Materials

Managing asbestos in popcorn ceilings requires a technical approach rooted in engineering precision rather than guesswork. Since the EPA’s 1989 partial ban didn’t immediately eliminate existing stockpiles, structures built or renovated through the late 1990s remain at high risk. You now understand that identifying friable materials is the first step in risk mitigation, followed by a strategic choice between encapsulation and complete removal. These aren’t DIY tasks. Structural safety depends on expert execution to prevent microscopic fiber release during the remediation process.

TSIAC International brings over 15 years of hazardous material remediation experience to every project. We’re fully licensed and insured for large-scale structural abatement, ensuring that your facility meets 2026 environmental standards. Our team implements comprehensive recycling and environmental compliance protocols to protect both your physical assets and the surrounding ecosystem. Don’t leave structural integrity or occupant safety to chance. We provide the specialized solutions required for complex remediation challenges in even the most difficult locations. Contact TSIAC International for a Professional Abatement Consultation to ensure your project is completed with engineering-grade accuracy and professional care.

Frequently Asked Questions

Is it safe to live in a house with asbestos popcorn ceilings?

It’s safe to live in a house with these ceilings as long as the material remains intact and undisturbed. The Environmental Protection Agency (EPA) states that asbestos only poses a health risk when it becomes friable and airborne. If the surface isn’t peeling, crumbling, or showing water damage, the fibers stay trapped within the texture. You must avoid any activity that vibrates the ceiling or causes physical abrasion.

Can I just paint over my popcorn ceiling to seal in the asbestos?

Painting is a recognized method of encapsulation, but it’s not a permanent solution for hazardous materials. While a fresh layer of paint can bind the fibers together, the added weight might cause the entire texture to pull away from the drywall. This failure leads to a significant release of dust. You’ll also find that future removal becomes much more difficult and expensive once the material is saturated with paint.

How much does it cost to remove asbestos popcorn ceilings in 2026?

Professional abatement costs generally range from $5 to $20 per square foot based on 2024 industry data. These rates reflect the specialized labor, high-grade filtration equipment, and hazardous waste disposal fees required for safe execution. Total project estimates vary depending on the height of the ceilings and the complexity of the room layout. You should always ensure the quote includes final air clearance testing by an independent laboratory.

What happens if I accidentally scrape or damage an asbestos ceiling?

You must stop all activity immediately and isolate the affected room to prevent fiber migration. Even a small scrape can release thousands of microscopic fibers into your living space. Turn off your HVAC system to stop the air from circulating through the house. It’s vital to contact a certified professional to perform a localized cleanup and air quality test to ensure the area is safe for occupancy.

Do all popcorn ceilings built before 1980 contain asbestos?

No, but a high percentage of ceilings installed before 1985 contain the mineral. Although the EPA banned spray-applied asbestos surfacing materials in 1973, manufacturers were legally allowed to sell through their existing inventories. This resulted in the continued use of asbestos in popcorn ceilings for over a decade after the initial ban. The only way to confirm the presence of the mineral is through polarized light microscopy testing.

How long does the professional asbestos removal process take?

A standard 1,500 square foot residential project typically requires 3 to 5 business days for completion. This timeline includes the rigorous setup of poly-sheeting containment zones and the actual wet-scraping process. It also accounts for the mandatory 24-hour waiting period required for air clearance samples to be analyzed. Larger properties or those with complex architectural features will naturally require a more extended schedule for safe completion.

Can I remove an asbestos popcorn ceiling myself if I wear a mask?

You shouldn’t attempt DIY removal because standard N95 masks don’t filter out microscopic asbestos fibers. Professional teams use specialized HEPA-filtered respirators and negative air pressure machines to keep the environment safe. Without industrial-grade equipment, you risk contaminating your entire home and HVAC system permanently. Most jurisdictions also have strict legal requirements for the transport and disposal of hazardous waste that homeowners can’t easily meet.

What is the difference between an acoustic ceiling and a popcorn ceiling?

The terms are used interchangeably, but acoustic ceiling refers to the material’s sound-dampening properties while popcorn ceiling describes its physical appearance. Both terms describe the same spray-on texture that was popular in mid-century construction. If your home features this finish, you should treat it as containing asbestos in popcorn ceilings until a lab test proves otherwise. Both styles are equally friable and require the same professional handling during renovation or repair.

How to Test for Asbestos in Walls: A Professional 2026 Safety Guide

A single microscopic asbestos fiber can remain airborne for up to 72 hours, which means the margin for error during a structural renovation is…

A single microscopic asbestos fiber can remain airborne for up to 72 hours, which means the margin for error during a structural renovation is effectively zero. You’re right to feel a sense of caution when approaching older properties, especially since the EPA’s March 2024 final rule significantly tightened the regulations surrounding chrysotile asbestos. It’s a common concern that multi-layered wall materials might hide legacy contaminants that could compromise an entire job site if handled incorrectly.

This technical guide explains exactly how to test for asbestos in walls using rigorous protocols that prioritize both environmental safety and regulatory compliance. You’ll gain a clear understanding of the professional sampling methodologies required to identify hazardous fibers within drywall, plaster, and joint compounds. We’ll outline the precise path from initial site assessment to NVLAP-accredited laboratory testing, providing you with the engineering precision needed to move toward a safe removal process or a confident, compliant renovation.

Key Takeaways

  • Recognize the engineering necessity of testing wall structures to mitigate the risk of fiber release during electrical or plumbing penetrations.
  • Differentiate between surface finishes and internal structural insulation to pinpoint high-risk zones within varied wall assemblies.
  • Master the professional protocols for how to test for asbestos in walls, prioritizing certified laboratory analysis over unreliable consumer-grade testing kits.
  • Implement rigorous safety measures during the sampling process, such as site saturation and air system management, to maintain a controlled environment.
  • Evaluate the technical requirements for structural abatement versus enclosure strategies to ensure long-term site compliance and safety.

Understanding the Necessity of Asbestos Testing in Walls

Asbestos wall testing is a rigorous professional protocol designed to identify microscopic mineral fibers hidden within common building materials. It’s not a visual inspection. Instead, it’s a technical process that requires laboratory analysis to confirm the presence of hazardous silicates. For structures built between 1930 and 1980, walls represent a significant reservoir of legacy materials. During this 50 year window, manufacturers frequently added asbestos to drywall joint compounds, plaster, and thermal insulation to improve fire resistance and structural durability.

Walls are high risk zones because they serve as the primary conduits for a building’s infrastructure. Homeowners and contractors often disturb these surfaces during routine electrical upgrades or plumbing repairs. Understanding how to test for asbestos in walls is the only reliable way to ensure that a simple renovation doesn’t turn into a localized environmental crisis. Professionals categorize these materials based on their physical state: friable or non-friable. Friable asbestos, such as loose-fill insulation that has settled into wall cavities, crumbles under slight hand pressure. Non-friable materials, like asbestos cement siding or vinyl wall tiles, are more stable but become equally dangerous if they are cut, ground, or shattered.

The Risks of Accidental Disturbance

A single mechanical action like drilling or sanding can release millions of microscopic fibers into a confined residential space. These fibers stay airborne for hours due to their light weight and needle-like structure. Inhaling these particles leads to permanent physiological damage, including asbestosis and mesothelioma. Because symptoms often take 20 to 50 years to manifest, the threat is frequently underestimated. Property owners must prioritize safety by reviewing a comprehensive hazardous material abatement South Carolina guide before starting any structural work. Educating yourself on the dangers of asbestos is the first step in responsible property management.

Legal and Regulatory Requirements for Testing

Federal EPA and OSHA regulations mandate specific inspection protocols before any renovation or demolition activity begins. By 2026, municipal building departments have become increasingly strict, often requiring a certified negative test result before they’ll issue a demolition permit. Documentation is vital. A professional report proving the absence of asbestos protects property owners from future liability during a resale. It also ensures that workers are not exposed to illegal levels of toxic dust. Knowing how to test for asbestos in walls through official channels provides a clear paper trail that satisfies both insurance adjusters and health inspectors.

Identifying Asbestos-Suspect Materials Within Wall Structures

Accurate identification of hazardous materials requires an understanding of structural layers rather than a simple surface inspection. You cannot identify asbestos by sight. The fibers are microscopic, often measuring less than 10 micrometers in length, which makes them invisible to the naked eye. When determining how to test for asbestos in walls, you must distinguish between the “skin” of the wall, such as the paint or wallpaper, and the internal components where asbestos was traditionally used for its tensile strength and thermal resistance. Relying on professional asbestos testing is the only way to confirm the presence of these minerals before disturbing any surface.

Drywall and Joint Compound (The “Mud”)

While the gypsum core of a drywall panel is often free of contaminants, the joint compound used to seal seams and screw heads is a primary concern. During the mid-20th century, manufacturers added chrysotile asbestos to “mud” to prevent cracking and improve fire ratings. In the 1970s, contractors frequently applied a “skim coat” across entire walls to create specific textures, effectively wrapping rooms in a thin layer of asbestos-containing material. Sampling this material is technically demanding because the lab must separate the thin layer of compound from the paper backing of the drywall to get an accurate percentage reading.

Plaster and Lath Systems

In structures built before 1950, plaster and lath were the standard. You might find natural horsehair used as a binder in residential settings, but commercial-grade plaster often utilized asbestos for its superior fireproofing capabilities. This material becomes extremely dangerous during selective demolition projects. When the plaster is broken or sanded, it releases high concentrations of dust. If the plaster feels unusually hard or was applied in a high-heat area, like behind a boiler or fireplace, the probability of asbestos reinforcement increases significantly.

In-Wall Insulation (Vermiculite and Batting)

Internal wall cavities often hide the most volatile forms of asbestos. Vermiculite insulation, which looks like small shiny pebbles, was frequently poured into the hollow cores of cinder block walls. Between 1919 and 1990, roughly 70% of the world’s vermiculite came from a mine in Libby, Montana, which was naturally contaminated with tremolite asbestos. Industry standards dictate that vermiculite should always be presumed positive for asbestos until proven otherwise. For projects involving older industrial or residential insulation, consulting a specialized asbestos removal South Carolina guide is necessary to understand regional regulatory requirements and disposal protocols.

Identifying these materials is the first step in maintaining a safe job site. If you’re planning a renovation, ensure your team is protected by scheduling complex structural assessments to identify hidden hazards before work begins.

How to Test for Asbestos in Walls: A Professional 2026 Safety Guide

Professional Testing Protocols vs. DIY Asbestos Kits

Retail hardware store kits promise convenience but frequently fail the rigors of industrial safety standards. These “instant” tests often lack the sensitivity required to detect asbestos fibers embedded in complex wall matrices. For a definitive result on how to test for asbestos in walls, one must rely on Polarized Light Microscopy (PLM). Certified laboratories use PLM to examine samples at high magnification, identifying the specific mineral morphology of fibers like chrysotile or amosite. Without this specialized equipment, a negative result from a home kit provides a false sense of security that can lead to hazardous exposure during renovation.

The technical precision required for asbestos identification isn’t available in a $50 over-the-counter box. Professional labs follow NVLAP (National Voluntary Laboratory Accreditation Program) standards to ensure that even trace amounts of fibers, often less than 1% by volume, are accurately recorded. For commercial property owners, using uncertified testing methods is a major liability. If a worker is exposed because a DIY kit failed to detect fibers, the building owner faces massive legal and financial repercussions. Professional testing isn’t just about safety; it’s a critical component of risk management and asset protection.

The Limitations of DIY Sampling

Homeowners and property managers often overlook the stratified nature of wall systems. A single surface scrape rarely captures the joint compound, which is the component most likely to contain asbestos in post-1950s construction. DIY sampling also lacks a documented chain of custody. This omission creates significant liability, as undocumented samples hold no weight in legal or insurance disputes. Most critically, DIY extraction lacks environmental controls. Without a HEPA-filtered vacuum and specialized wetting agents, the act of cutting a sample can release millions of microscopic fibers into the HVAC system, causing widespread cross-contamination.

What a Professional Inspector Provides

Engaging an accredited AHERA (Asbestos Hazard Emergency Response Act) inspector ensures the process follows strict regulatory frameworks. An inspector doesn’t just take random pieces of wall; they develop a formal Sampling Plan based on the material’s homogeneity. For instance, EPA protocols often dictate a minimum of three samples for surfacing materials covering less than 1,000 square feet to ensure statistical accuracy. This systematic approach is the industry standard for how to test for asbestos in walls correctly. The resulting report provides more than a simple binary answer. It details the exact fiber percentage and type, which determines the specific abatement procedures required by law. This level of precision maintains the structural safety and long-term value of the property.

  • AHERA Accreditation: Ensures the inspector has completed 24 hours of initial training and annual refreshers.
  • Statistical Sampling: Prevents “false negatives” by testing multiple points in a single room.
  • Legal Documentation: Provides a certified paper trail for future property transactions or inspections.

The Step-by-Step Procedure for Wall Asbestos Sampling

Professional asbestos sampling isn’t a simple task of scraping a surface; it’s a controlled engineering process that requires technical precision to ensure occupant safety. When determining how to test for asbestos in walls, the primary objective is to extract material without releasing friable fibers into the ambient air. The process begins with total isolation. Technicians must deactivate all HVAC systems and seal supply and return vents with 6-mil polyethylene sheeting to prevent fiber drift throughout the building’s ventilation network.

Before any physical penetration occurs, the sampling site is treated with amended water. This solution, typically water mixed with a surfactant or wetting agent, reduces the surface tension and allows the liquid to penetrate deep into the wall’s structure. By saturating the material, we suppress dust at the source, ensuring that any particles generated during the cut remain heavy and localized rather than becoming airborne.

Core Sampling Techniques

Technicians use a specialized circular hole saw or a stainless steel coring tool to perform a clean, surgical extraction. This method is superior to breaking off chunks of material because it maintains the structural integrity of the surrounding area and minimizes debris. It’s standard practice to collect samples from multiple locations across a single wall, especially in structures built before 1980, to account for various renovation eras where different joint compounds or plasters might’ve been used. A representative sample is a vertical cross-section of the wall assembly that captures every distinct layer of material, from the outermost paint and skim coat to the underlying plaster, lath, or drywall substrate.

Maintaining the Containment Zone

Effective containment relies on physical barriers and specialized equipment like “glove bags” designed for small-scale wall sampling. These bags allow the technician to manipulate tools inside a sealed environment, keeping all dust contained within the plastic sleeve. We always utilize heavy-duty drop cloths to catch any incidental fallout during the procedure. Demolition site safety starts with these containment measures, ensuring that the preliminary testing phase doesn’t create the very contamination it’s meant to identify. Post-sampling cleanup involves a two-stage protocol: wet wiping all surfaces with disposable cloths and using a HEPA-filtered vacuum to clear the immediate work zone.

Once the sample is extracted, the hole must be patched immediately. Technicians apply a high-grade sealant or heavy-duty duct tape to encapsulate the exposed edges of the wall. Each sample is then double-bagged in labeled, airtight containers and transported to an NVLAP-accredited laboratory. These labs follow ISO/IEC 17025 standards to provide the definitive analysis required for legal and safety compliance. For complex industrial or commercial structures, it’s vital to rely on professional site assessment services to manage these high-stakes procedures.

From Positive Test to Safe Removal: Structural Abatement

A positive laboratory report marks the end of the diagnostic phase and the beginning of a high-precision engineering challenge. Once you’ve followed the protocols on how to test for asbestos in walls and confirmed the presence of chrysotile or amosite fibers, the project shifts from assessment to remediation. You generally face two choices: enclosure or abatement. Enclosure involves sealing the contaminated wall behind a permanent, airtight barrier. While this prevents fiber release in the immediate term, it leaves the hazardous liability within the building’s footprint. For long-term safety and unencumbered property value, structural abatement or full removal is the industry standard. Understanding how to test for asbestos in walls is the critical first step, but the transition to removal requires a specialized workforce trained in hazardous material handling and containment.

TSIAC International specializes in the surgical removal of hazardous walls, ensuring that fibers are extracted without compromising the structural integrity of the surrounding facility. A critical final stage in this process is the air clearance test. This is conducted by an independent third-party industrial hygienist to verify that fiber counts have dropped below the EPA limit of 0.01 fibers per cubic centimeter before the area is reopened for general use.

Selective Demolition and Wall Gutting

Professional commercial interior gutting services operate under strict negative pressure environments to prevent cross-contamination. During the gutting of contaminated walls, teams use HEPA-filtered vacuums and wet-stripping methods to keep dust levels at zero. Debris is double-bagged in 6-mil poly bags and transported to specialized hazardous waste landfills that are legally permitted to accept asbestos-containing materials. Our process isn’t just about disposal; we identify and recover non-porous, non-contaminated structural components. For instance, metal studs and tracks are thoroughly decontaminated and redirected to recycling facilities, which can reduce the environmental footprint of the demolition by up to 30%.

Choosing a Licensed Abatement Contractor

Selecting a partner requires verifying specific credentials that go beyond basic general contracting. You need a team that adheres to tsiac international charleston standards, which include comprehensive licensing, bonding, and a documented history of OSHA compliance. A professional contractor provides a full close-out project manual containing waste shipment records, daily site logs, and laboratory air clearance results. This documentation is vital for legal compliance and future property transactions. If your testing has confirmed a hazard, don’t delay the remediation process. Contact TSIAC International for professional abatement and demolition services to secure your facility’s safety with engineering precision.

Securing Your Structural Integrity Through Professional Verification

Managing hazardous materials requires technical precision and a disciplined approach to site safety. Understanding how to test for asbestos in walls is the first step in mitigating long-term risks associated with aging infrastructure. By identifying suspect materials like textured coatings or thermal insulation early, you prevent the accidental release of fibers during renovations. Our 2026 safety guide emphasizes that while DIY kits exist, they often lack the legal weight and accuracy of laboratory-certified sampling.

TSIAC International leverages over 15 years of hazardous material expertise to provide definitive answers for complex environments. We’re fully licensed and insured for structural demolition, which means we handle everything from the initial sample to the final teardown. Our team follows comprehensive recycling and disposal protocols to ensure that toxic waste doesn’t impact the surrounding ecosystem. It’s about more than just removal; it’s about engineering a safer space for everyone involved. Don’t leave your project’s safety to chance when professional verification is within reach.

Request a Professional Abatement Quote from TSIAC International

Taking proactive steps today ensures your property remains a safe, compliant, and valuable asset for years to come.

Frequently Asked Questions

Can I tell if wall plaster has asbestos just by looking at it?

You can’t identify asbestos in wall plaster through visual inspection alone because the fibers are 1,200 times thinner than a human hair. Professional testing is mandatory for any building constructed before the 1986 ban in the UK or the 1989 partial ban in the US. Even if the material looks like standard gypsum or lime plaster, it may contain 1% to 5% asbestos by weight to increase fire resistance and structural durability.

How much does it typically cost to have walls tested for asbestos?

Professional asbestos testing typically costs between $250 and $800 according to 2024 data from HomeAdvisor. This price covers the site visit, sample collection, and laboratory fees. While DIY mail-in kits are available for $40 to $100, these often lack the legal certification required for commercial projects or insurance compliance. Higher costs apply if the technician needs to sample multiple layers across several rooms or different floors.

Is it safe to live in a house while asbestos wall testing is being performed?

It’s safe to remain in the property during testing if the technician uses wet-sampling techniques and HEPA-filtered vacuums to prevent fiber release. The sampling process only requires a small piece of material, usually 1 square inch, taken from a discreet location. Professionals seal the sample site immediately with duct tape or a sealant to ensure the air remains clean. You don’t need to evacuate unless the walls are already severely damaged or crumbling before the inspector arrives.

What should I do if my wall test comes back positive for Chrysotile?

You must leave the material undisturbed or hire a licensed abatement professional if the test confirms Chrysotile, which represents 95% of asbestos used in global construction. If the wall is in good condition, the EPA suggests management in place rather than removal. When renovation is necessary, you’ll need a specialized team to set up a negative pressure enclosure. They’ll ensure fibers don’t migrate to other parts of the structure during the extraction process.

Does every wall in a house need to be tested before a remodel?

You don’t need to sample every square foot, but you must test every distinct type of finishing material across different construction phases. If a house had an addition in 1975, those walls require separate analysis from the original 1940s structure. Understanding how to test for asbestos in walls involves identifying homogeneous areas where the material appears identical. A certified inspector typically takes 3 to 9 samples per area to ensure a statistically accurate result.

How long does it take to get asbestos lab results back?

Standard laboratory processing takes between 24 and 72 hours from the time the lab receives the samples. Many facilities offer 3-hour or same-day rush services for an additional fee of $50 to $150 per sample. This timeline is critical for maintaining the momentum of your construction project. Once the analysis is complete, the lab issues a formal Certificate of Analysis detailing the asbestos percentage and fiber type found in each specific sample.

Safe Lead Paint Removal: The 2026 Professional Guide to Abatement

By 2026, an estimated 31 million residential units across the United States still contain hazardous legacy coatings, proving that lead isn’t just a…

By 2026, an estimated 31 million residential units across the United States still contain hazardous legacy coatings, proving that lead isn’t just a historical footnote but a modern structural challenge. For facility managers and property owners, the mandate for safe lead paint removal has shifted from a recommendation to a rigorous technical requirement. You’re likely grappling with the high stakes of lead dust migration and the confusing regulatory gap between standard RRP protocols and permanent abatement. It’s a complex environment where one oversight can lead to significant health liabilities or EPA enforcement actions.

This guide delivers the engineering precision and technical protocols required to master lead-based paint elimination in both commercial and residential sectors. We’ve compiled the latest 2026 safety standards to help you secure a lead-free environment while maintaining the structural integrity of your assets. You’ll gain a clear roadmap covering advanced site containment, chemical versus mechanical stripping methods, and the final clearance testing necessary for full regulatory compliance. We’ll move beyond the basics to ensure your project meets the highest industrial benchmarks for safety and efficiency.

Key Takeaways

  • Identify structural hazards in pre-1978 buildings by recognizing physical signs like “alligatoring” and understanding the specific risks of microscopic lead dust.
  • Learn how to establish a “Critical Barrier” containment zone using 6-mil poly sheeting to prevent the spread of hazardous particles during the abatement process.
  • Master the technical protocols for safe lead paint removal through professional wet scraping and sanding techniques that minimize environmental contamination.
  • Discover why standard shop vacuums fail and how industrial HEPA-filtered ventilation systems bridge the “containment gap” that DIY methods cannot address.
  • Implement the rigorous “HEPA-Sandwich” cleaning method and follow strict hazardous waste disposal standards to ensure a site meets professional clearance verification.

Understanding Lead-Based Paint Risks and Regulatory Standards

Lead-based paint is a systemic structural hazard present in approximately 34 million housing units built before the 1978 federal ban. While intact paint layers pose minimal immediate risk, the hazard becomes active during any process involving safe lead paint removal or structural modification. The primary danger lies in the science of lead dust. Microscopic particles, often smaller than 10 microns, are light enough to remain airborne for extended periods and small enough to bypass standard respiratory filtration. These particles settle into carpets, ductwork, and porous surfaces, creating a long-term toxic legacy that standard industrial cleaning cannot easily remediate.

Regulatory oversight is tightening to address these persistent risks. The EPA Renovation, Repair, and Painting (RRP) Rule sets the standard for any work that disturbs lead-based paint in “target housing” or child-occupied facilities. Looking toward 2026, the EPA is expected to implement even more stringent dust-settled clearance levels to match updated health data. It’s vital to distinguish between lead renovation, which manages lead during general construction, and professional abatement. While renovation is a temporary measure, specialized lead abatement techniques are designed to permanently eliminate lead hazards for a minimum of 20 years through removal, encapsulation, or enclosure.

The Health Implications of Improper Removal

Lead exposure causes irreversible neurological damage that compromises the central nervous system. In children, even low-level exposure leads to permanent IQ loss and behavioral disorders. Adults aren’t immune; they often experience chronic hypertension and significant renal impairment following prolonged exposure. Using dry sanding, power grinding without HEPA attachments, or heat guns operating above 1,100°F is hazardous because these methods aerosolize heavy metals into a breathable vapor. Lead-based paint poisoning is a preventable environmental hazard.

Legal Liability for Property Managers and Contractors

Liability in the industrial and residential sectors is absolute. Federal mandates require all firms performing safe lead paint removal to be EPA-certified and to follow rigorous work-practice standards. Documentation is the cornerstone of legal protection; contractors must maintain detailed records of on-site inspections, occupant notifications, and post-work cleaning verifications for at least three years. The financial consequences of negligence are severe. The EPA currently issues civil penalties that can exceed $46,000 per violation, per day. Beyond government fines, property managers face massive litigation risks if a failure in containment leads to environmental contamination or documented health issues among tenants.

Identifying and Testing for Lead Hazards

Precise identification is the cornerstone of safe lead paint removal. Professionals focus on high-risk architectural elements where lead-based coatings were historically prevalent. These include window sashes, door frames, and exterior trim components. You can often spot lead degradation by “alligatoring,” a specific pattern of rectangular cracking that resembles reptile skin. While these visual cues are helpful, they’re only the first step in a technical assessment.

Relying solely on visual inspection is a liability. Modern industrial standards require non-destructive testing using X-Ray Fluorescence (XRF) technology. XRF analyzers provide immediate, accurate readings of lead concentration in milligrams per square centimeter without damaging the substrate. This data ensures compliance with EPA lead-safe work practices, which dictate the necessary safety protocols based on lead levels. Without this empirical data, the risk of accidental exposure during demolition increases by over 40 percent.

Professional Inspection vs. Home Test Kits

DIY chemical swab kits often yield false negatives, especially on surfaces with multiple layers of over-painting. A certified Risk Assessor provides a deeper level of scrutiny by identifying microscopic lead-contaminated dust that swabs miss. We develop a comprehensive lead hazard map before any site mobilization. This map tracks every contaminated surface, allowing for a surgical approach to removal rather than a broad, high-risk demolition strategy.

Pre-Removals Environmental Baselines

Establishing environmental baselines is a non-negotiable step for professional contractors. We collect soil samples and interior dust wipes to document lead levels before work begins. This protects property owners from liability and ensures the cleanup is effective. Specific attention is paid to “friction surfaces,” such as window tracks and door headers, where mechanical movement grinds paint into fine, inhalable dust. Effective safe lead paint removal must be integrated into a wider hazardous material abatement strategy to manage all site risks simultaneously. If your project involves complex structural elements or high-altitude surfaces, consulting with a specialized technical partner ensures the highest safety standards are met.

Safe Lead Paint Removal: The 2026 Professional Guide to Abatement

Professional Abatement vs. DIY: Evaluating the Risks

Homeowners often underestimate the technical precision required for safe lead paint removal. While a DIY approach might seem cost-effective, it frequently creates a “containment gap.” Standard 6-mil plastic sheeting often fails because DIYers don’t establish negative air pressure zones. Without this pressure differential, microscopic lead particles migrate through HVAC vents and door gaps, settling in carpets and upholstery. Professional teams utilize industrial HEPA-filtered ventilation systems that capture 99.97% of particles as small as 0.3 microns. Standard shop vacuums lack these specialized seals; they essentially act as lead dust distributors, blowing toxic particles back into the room through the exhaust.

Labor expertise is another critical factor in project success. Certified professionals undergo rigorous training on lead-safe work practices to ensure every phase of the project meets HUD lead paint safety standards. This technical knowledge protects long-term property value. A certified lead-free status can increase a property’s marketability by 5% to 10% in older urban markets where buyers prioritize health safety. Conversely, a botched DIY attempt that results in soil or structural contamination can lead to massive remediation costs and legal liabilities during a sale.

The Dangers of Traditional Paint Removal Methods

Traditional methods like power sanding without HEPA shrouds are strictly prohibited. These tools create clouds of inhalable dust that remain airborne for hours. High-temperature heat guns exceeding 1,100 degrees Fahrenheit are equally dangerous because they vaporize lead, creating toxic fumes that bypass standard respirators. Open-flame burning is the most hazardous technique; it poses a direct fire risk and can permanently contaminate structural substrates, making future remediation nearly impossible. Professionals use chemical strippers or low-heat infrared technology to avoid these toxic thresholds.

Why Commercial Projects Demand Professional Oversight

Commercial environments require scaling safety protocols to protect hundreds of occupants simultaneously. Managing commercial interior gutting involves more than just demolition; it requires precise hazardous material management integrated into the structural timeline. In multi-tenant buildings, a single error in containment can lead to health risks for neighboring businesses. Professional oversight ensures safe lead paint removal while maintaining structural integrity, especially when stripping historical building components where the substrate is fragile and irreplaceable. Expert contractors provide the engineering precision needed to handle these “impossible” sites where standard methods fail.

Industry-Standard Methods for Safe Lead Removal

Achieving safe lead paint removal starts with a rigid “Critical Barrier” containment zone. Technicians seal all HVAC vents, windows, and doors with 6-mil polyethylene sheeting. This isn’t just a suggestion; it’s a technical requirement to prevent lead dust from migrating into non-work areas. We prioritize wet scraping and wet sanding over dry methods. Keeping surfaces damp reduces airborne lead concentrations by roughly 90%, ensuring the environment stays within OSHA’s permissible exposure limits. This moisture-rich approach traps particles before they become respirable, protecting both the workers and the facility’s future occupants.

We choose chemical stripping agents based on the specific substrate. Caustic agents effectively dissolve thick layers on masonry but require careful neutralization to prevent surface degradation. For delicate surfaces, solvent-based or bio-based strippers offer a safer alternative without compromising the underlying material. If removal poses a structural risk or is cost-prohibitive, we utilize encapsulation or enclosure. These methods use specialized polymers or physical barriers to isolate lead, providing a long-term solution without the high-impact disruption of full stripping.

The Negative Air Pressure Protocol

The Negative Air Pressure Protocol relies on HEPA air scrubbers to create a constant vacuum effect within the containment. We don’t just turn the machines on and hope for the best. We use digital manometers to monitor the containment 24/7. A consistent reading of -0.02 inches of water column pressure is our benchmark. This pressure differential ensures that air always moves from clean areas into the work zone, never the other way. It’s the most reliable way to prevent cross-contamination in adjacent rooms or common areas.

Substrate-Specific Removal Strategies

Substrate-specific strategies are essential for safe lead paint removal on industrial sites. Porous materials like brick require needle guns or vacuum-shrouded grinders to pull lead from the deep grain of the masonry. On structural steel, we focus on removing the lead while preparing the surface for new protective coatings. This level of detail is critical during selective demolition processes where we must strip lead from specific joints or beams before cutting occurs. We don’t leave safety to chance when dealing with heavy metal contaminants.

If your facility requires high-level abatement and technical precision, contact our specialists for a professional consultation.

Post-Removal Cleanup and Clearance Verification

Successful safe lead paint removal requires a rigorous decontamination phase that goes beyond standard construction cleaning. The industry standard remains the “HEPA-Sandwich” protocol. This three-stage process involves a thorough HEPA vacuuming of all surfaces, followed by a wet-wipe down using a lead-specific detergent, and a final HEPA vacuuming once surfaces are dry. This sequence prevents microscopic dust from becoming airborne or settling back into porous materials after the primary abatement is finished. Professionals don’t just clear the visible debris; they eliminate the invisible particulates that pose the greatest health risks.

Decontamination and Waste Management

Workers must undergo a strict decontamination sequence before leaving the containment area. This includes removing disposable suits and respirators in a designated “dirty room” to prevent cross-contamination of clean zones. All lead-contaminated debris, including used PPE and plastic sheeting, is classified as hazardous material. To meet safety standards, all waste must be double-bagged in 6-mil polyethylene bags that are goose-neck sealed and clearly labeled for transport to a licensed hazardous waste landfill. This 6-mil thickness is mandatory because it provides the puncture resistance necessary to contain toxic particulates during transit and disposal.

Clearance testing is the final gatekeeper of a project’s success. Once cleaning is complete, a third-party environmental professional must conduct a formal evaluation. This isn’t a visual inspection alone. Technicians collect dust wipe samples from floors, windowsills, and window troughs, which are then sent to a laboratory for analysis. In 2021, the EPA tightened dust-lead clearance levels to 10 micrograms per square foot (µg/ft²) for floors and 100 µg/ft² for windowsills. A final report and a lead-safe certificate are issued only after lab results confirm the site meets these stringent safety thresholds.

Ensuring Long-Term Safety and Maintenance

If lead was encapsulated rather than fully removed, property owners must implement a recurring monitoring schedule. Check these surfaces every 6 to 12 months for signs of peeling, cracking, or impact damage. Integrating these inspections into regular building maintenance plans prevents future exposure risks. For complex projects requiring high-level technical precision and safe lead paint removal, partnering with TSIAC International for certified abatement oversight ensures that every stage of the process meets federal compliance. This methodical approach guarantees that a building remains a safe environment for its occupants long after the contractors have left the site.

Securing Your Property’s Future with 2026 Safety Standards

Ensuring lead safety requires a technical approach that prioritizes long-term structural integrity and occupant health. By 2026, regulatory standards for safe lead paint removal have shifted toward more rigorous containment and verification protocols. You’ve learned that superficial testing isn’t enough. True safety depends on identifying hazards through XRF technology and executing abatement through specialized mechanical or chemical methods. Industry data shows that professional intervention eliminates the high contamination risks associated with improper DIY attempts. These specialized processes are vital for maintaining compliance with current EPA regulations and protecting your investment.

TSIAC International brings over 15 years of hazardous material expertise to every project. As an EPA Lead-Safe Certified Firm, we implement comprehensive environmental containment protocols that exceed standard safety requirements. We don’t just clear the surface; we ensure your environment meets every legal and health benchmark established for 2026. Our team handles the complex logistics so you can focus on your property’s long-term value. Don’t leave your safety to chance. Contact TSIAC International for a Professional Lead Abatement Consultation and secure a lead-free environment today. Your commitment to proper abatement ensures a safer space for everyone involved.

Frequently Asked Questions

Is it ever safe to remove lead paint myself?

No, it’s generally unsafe and often illegal for non-certified individuals to perform lead abatement. EPA RRP regulations mandate professional certification for any project disturbing more than 6 square feet of interior lead-based paint. Attempting safe lead paint removal without industrial-grade HEPA filtration and negative pressure systems often leads to 100% contamination of the building’s HVAC system.

How much does professional lead paint removal typically cost?

National industry data indicates that professional abatement costs range between $8 and $15 per square foot. For a standard 1,500 square foot residential structure, the total expense often reaches $12,000 to $22,000. These figures fluctuate based on the chosen methodology, such as chemical stripping or mechanical abrasion; they also depend on the necessity for specialized containment structures.

What is the difference between lead encapsulation and lead removal?

Lead encapsulation seals the hazard behind a specialized polymer coating, while removal physically eliminates the lead-based material from the substrate. Encapsulants are specific products that must meet ASTM E1795 standards to guarantee a 20-year lifespan. Removal remains the only permanent solution for long-term structural integrity; it eliminates future liability during property transfers or commercial audits.

How long does the lead abatement process take for a standard property?

A standard 2,000 square foot property requires approximately 10 to 15 business days for complete abatement. This timeline includes the initial 24-hour setup of containment barriers and the final 48-hour period for dust clearance testing. Complex industrial sites or high-rise structures often require additional time for specialized access equipment and multi-stage decontamination zones.

Can I stay in my home or building during lead paint removal?

Occupants shouldn’t remain in the building while active abatement is underway. EPA guidelines require residents to stay out of the work zone until a third-party inspector confirms lead-dust levels are below 10 micrograms per square foot. In 95% of professional projects, this necessitates a temporary relocation of 5 to 10 days to ensure zero exposure to toxic particulates.

What happens if lead paint is found during a commercial demolition project?

Discovery of lead paint during demolition triggers an immediate work stoppage under OSHA Standard 1926.62. The project manager must implement a written compliance program and conduct air monitoring to protect workers. Failure to follow these 1993 federal regulations can result in fines exceeding $15,000 per violation and significant project delays.

Are there specific grants or tax credits for lead abatement in 2026?

The HUD Lead Hazard Reduction Grant Program continues to provide funding, with $403 million distributed to local jurisdictions in the most recent fiscal cycle. For 2026, many states offer a $1,500 to $3,000 tax credit per unit for owners who achieve lead-free certification. You’ll need to verify specific local programs through your municipal housing department’s 2026 budget documents.

What are the disposal requirements for lead-contaminated debris?

Lead-contaminated debris must be disposed of according to RCRA Subtitle C requirements if it fails a TCLP test. Contractors must seal all waste in 6-mil polyethylene bags and transport it to a licensed hazardous waste facility. This process ensures that safe lead paint removal doesn’t result in groundwater contamination or long-term environmental damage at the landfill site.

The Lead Paint Abatement Process: A Professional Guide to Permanent Removal

The EPA currently mandates fines of up to $37,500 per violation, per day, for non-compliance with lead safety protocols, yet many facility managers…

The EPA currently mandates fines of up to $37,500 per violation, per day, for non-compliance with lead safety protocols, yet many facility managers still treat surface preparation as a routine renovation task rather than a controlled hazardous operation. You likely recognize that managing an aging industrial asset involves more than just aesthetics; it’s about mitigating long-term structural and legal risks. When you face the reality of deteriorating coatings, the complexity of the lead paint abatement process can feel overwhelming, especially when balancing the conflicting demands of OSHA worker safety standards and EPA environmental mandates.

This guide provides the technical clarity you need to move from liability to a lead-free certification. We’ll break down the engineered phases of permanent removal, from initial XRF testing to the final clearance report. You’ll gain a transparent understanding of how professional containment and specialized HEPA vacuum systems ensure your project stays on schedule while meeting the strict 1992 Residential Lead-Based Paint Hazard Reduction Act requirements. We’re outlining the exact workflow that transforms a high-risk site into a safe, compliant, and fully documented asset.

Key Takeaways

  • Distinguish between temporary remediation and permanent abatement to secure the long-term safety and structural integrity of your property.
  • Master the technical phases of the lead paint abatement process, from initial hazardous material mapping to the engineering of critical containment barriers.
  • Evaluate specialized methods such as enclosure, encapsulation, and removal to determine the most effective strategy for wood, steel, and masonry substrates.
  • Ensure full regulatory compliance by understanding the latest 2026 EPA and OSHA standards for site safety and worker protection.
  • Identify the critical credentials and specialized pollution insurance required to partner with a high-tier professional abatement contractor.

Lead Paint Abatement vs. Remediation: Choosing Permanent Safety

Understanding the lead paint abatement process requires a clear distinction between temporary risk management and permanent hazard elimination. While many facility managers initially look for quick fixes, the 2026 regulatory updates demand a more rigorous approach to long-term liability. Abatement refers specifically to a set of measures designed to permanently eliminate lead-based paint hazards. This differs fundamentally from interim remediation, which only manages the risk for a limited duration through maintenance and monitoring.

The EPA governs these technical interventions through the Lead-Based Paint Activities Rule, specifically detailed in 40 CFR Part 745. This regulation ensures that only certified professionals handle the removal, preventing the accidental dispersal of toxic dust that occurs during unmanaged renovations. For a comprehensive lead abatement overview, one can see that the distinction lies in the intent and the documented longevity of the solution. Professional contractors don’t just hide the problem; they remove the source of the toxicity to meet strict safety benchmarks.

Interim Controls: The Temporary Mitigation Strategy

Interim controls include specialized HEPA vacuuming, paint stabilization, and minor structural repairs. These methods act as short-term fixes. They’re appropriate when a building is slated for demolition within 24 months or when immediate budget constraints prevent full removal. However, they carry a heavy maintenance burden. Property owners often see a 15% increase in annual operational costs due to the required re-inspections and dust sampling needed to verify that the environment remains safe for occupants.

Abatement: The Permanent Solution for Structural Integrity

True abatement yields a minimum 20-year design life. It involves heavy-duty techniques like component replacement, enclosure with specialized barriers, or complete mechanical removal. From a technical standpoint, structural removal is often the most cost-effective path over a decade. It eliminates the need for the perpetual monitoring required by the EPA and HUD. Implementing a professional lead paint abatement process can increase commercial property appraisals by 10% or more. It also significantly lowers insurance premiums by removing the primary source of environmental liability. Our teams prioritize these methods to ensure the structural integrity of the asset remains intact while the hazard is surgically extracted.

  • Design Life: Abatement provides 20+ years of safety; interim controls require re-evaluation every 12 months.
  • Liability: Permanent removal transfers the risk away from the property owner.
  • Asset Value: Certified lead-free status is a significant advantage in commercial real estate transactions.

The 5-Phase Lead Paint Abatement Process

Successful projects require a structured, five-stage approach to eliminate toxicity and ensure structural integrity. The lead paint abatement process isn’t a simple renovation; it’s a controlled engineering operation that demands absolute precision. Professionals execute this workflow to ensure compliance with EPA lead regulations and local safety mandates.

  • Phase 1: Pre-abatement inspection. Technicians use XRF (X-ray fluorescence) analyzers to map lead concentrations exceeding 1.0 mg/cm² across the facility.
  • Phase 2: Containment engineering. The team establishes physical barriers and pressure differentials to isolate the work zone.
  • Phase 3: Method execution. Specialists perform mechanical removal, chemical stripping, or permanent enclosure based on the substrate’s condition.
  • Phase 4: HEPA decontamination. This involves multi-stage cleaning of all surfaces to remove microscopic dust.
  • Phase 5: Clearance testing. Independent laboratories analyze dust wipe samples to verify the area is safe for re-occupancy.

Site Preparation and Containment Engineering

Technical precision starts with isolating the hazard. We use 6-mil polyethylene sheeting to seal every vent, window, and doorway, creating a redundant barrier system. To prevent lead dust migration, negative air machines must maintain a minimum pressure differential of -0.02 inches of water gauge. These units pull air through HEPA filters, exhausted outside the building. For projects in high-altitude or complex industrial environments, establishing three-stage decontamination units is mandatory. These units ensure that personnel and equipment don’t transport lead particles into “clean” zones during transitions. If you’re managing a facility with difficult access points, our team provides specialized industrial coating and abatement solutions for the most challenging environments.

Post-Abatement Cleanup and HEPA Vacuuming

Cleaning after lead removal is a rigorous mechanical process. Specialists utilize the “wet-mist” technique, lightly spraying surfaces with water to weigh down particles before they become airborne. Standard shop vacuums are strictly prohibited because they exhaust fine lead dust back into the atmosphere. Instead, we use industrial HEPA vacuums certified to capture 99.97% of particles as small as 0.3 microns. After the initial vacuuming, the team performs a wet-wash with high-phosphate detergents, followed by a final vacuum pass. A certified inspector then conducts a white-glove visual inspection. They look for any visible dust or debris in corners, cracks, and floor-to-wall joints before the final clearance samples are collected for laboratory analysis.

The Lead Paint Abatement Process: A Professional Guide to Permanent Removal

Professional Abatement Methods: A Strategic Comparison

Selecting the correct lead paint abatement process isn’t a matter of preference; it’s a technical decision dictated by the substrate material and the building’s future utility. Wood, steel, and masonry each react differently to chemical and mechanical interventions. Professionals must calculate the risk of dust migration against the speed of project completion. A strategic approach ensures that the chosen method doesn’t just hide the hazard but manages it according to the structural needs of the facility.

The choice of method depends heavily on the specific surface being treated:

  • Wood Substrates: Best handled through replacement or wet scraping. Wood is porous, meaning lead particles can migrate deep into the grain.
  • Steel and Metal: Often requires chemical stripping or abrasive blasting with HEPA-filtered vacuum attachments to prevent airborne contamination.
  • Masonry and Concrete: Typically requires enclosure or vacuum-shrouded needle scaling to address the textured surface.

Component Replacement: The Gold Standard

Removing contaminated elements like window sashes, door frames, and decorative trim represents the most decisive path to safety. This strategy bypasses the need for intensive on-site sanding, which significantly reduces the volume of hazardous dust. Modern selective demolition allows for the precise extraction of these components without damaging the surrounding structure. In most commercial retrofits, the labor hours required to strip a single door frame can exceed the cost of a high-quality replacement by 15% to 25%. This method simplifies the final inspection because the source of the toxin is physically gone from the site. It’s the most reliable way to achieve a “lead-free” designation rather than just “lead-safe” status.

Enclosure and Encapsulation Strategies

Enclosure utilizes permanent, rigid barriers like specialized siding, 5/8-inch gypsum board, or paneling to isolate lead-based paint from the environment. It’s a high-durability solution for large surface areas where removal is structurally impractical or too costly. Encapsulation is a different technical approach; it employs liquid-applied coatings that are chemically engineered to stay flexible and resist peeling. These aren’t typical hardware store paints. They are elastomeric polymers designed to withstand thermal expansion and create a long-lasting bond.

You can’t use encapsulants on friction surfaces or damp masonry, as the bond will fail within 12 to 24 months. When planning hazardous material abatement in South Carolina, the choice between these methods must align with EPA lead abatement regulations to ensure long-term compliance. Every enclosure must be mechanically fastened and sealed at the edges to prevent the escape of lead dust over time. This requires an engineering mindset to ensure the new barrier doesn’t trap moisture and cause underlying structural rot.

Regulatory Compliance and Safety Standards in 2026

Executing a lead paint abatement process requires strict adherence to a complex web of federal and state mandates. In 2026, the distinction between the EPA Renovation, Repair, and Painting (RRP) rule and full abatement is sharper than ever. While RRP focuses on “lead-safe” work practices during minor renovations, abatement is a specialized, permanent solution aimed at total hazard elimination. This high-stakes work falls under the OSHA Lead in Construction Standard (29 CFR 1926.62). This regulation dictates everything from mandatory blood lead level monitoring for workers to the specific types of HEPA-filtered respirators required on-site. Compliance isn’t a suggestion; it’s a structural necessity for any industrial or commercial project.

Safety protocols must extend beyond the active work zone. A third-party clearance inspection is the final, non-negotiable gatekeeper in the process. This independent verification ensures that the abatement contractor has met all cleanup standards before the area is re-occupied. This separation of duties prevents conflicts of interest and guarantees that the environment is truly safe. For projects involving structural changes, understanding the demolition process in South Carolina is often the next step in ensuring site-wide safety and regulatory alignment.

The Role of the Certified Lead Inspector

An independent Certified Lead Inspector provides the technical oversight necessary for legal validation. They use X-Ray Fluorescence (XRF) technology to identify lead concentrations in real-time. This handheld analyzer uses low-level radiation to excite lead atoms, allowing the inspector to see through multiple layers of paint without damaging the substrate. After the lead paint abatement process is complete, the inspector performs dust wipe sampling. In 2026, the EPA has maintained rigorous clearance levels, such as 10 µg/ft² for floors, to ensure no microscopic hazards remain. These samples are sent to a certified laboratory for final confirmation.

Hazardous Waste Disposal and Documentation

Lead-contaminated debris cannot be discarded with standard construction waste. Federal law under the Resource Conservation and Recovery Act (RCRA) requires contractors to characterize waste through Toxicity Characteristic Leaching Procedure (TCLP) testing. If lead levels exceed 5.0 mg/L, the debris is classified as hazardous waste. This necessitates specialized transport and disposal at a permitted facility. Maintaining a “Chain of Custody” is vital for regulatory audits; it provides a paper trail from the moment the lead is removed to its final disposal. This level of documentation is as critical as the work itself, much like the standards required for asbestos removal in South Carolina.

Ensure your facility meets every 2026 safety mandate by partnering with experts who prioritize technical precision. Contact TSIA C International for a professional lead abatement consultation today.

Partnering with a Professional Abatement Contractor

Selection of a contractor determines the long term liability and safety of a property. While state licensing represents a baseline requirement, it doesn’t guarantee the technical proficiency needed for complex industrial or commercial sites. A professional partner must demonstrate a deep understanding of the lead paint abatement process through documented past performance and rigorous adherence to EPA Lead-Safe Certification standards.

One critical differentiator is the possession of Pollution Occurrence Insurance (POI). Standard general liability policies often exclude hazardous material releases. Without POI, the property owner remains financially vulnerable if lead dust migrates beyond the containment zone during the project. You should always verify that a contractor’s insurance specifically covers lead-related claims. This technical detail separates professional remediation firms from general contractors who lack the specialized infrastructure to manage toxic particulates.

The TSIAC International Advantage

TSIAC International brings 15+ years of specialized experience to high-stakes remediation projects. We don’t view lead removal as an isolated task; it’s a critical phase of structural integrity management. Our teams integrate abatement with selective demolition, allowing for a streamlined workflow that saves time on large scale renovations. By utilizing industrial grade equipment and advanced containment strategies, we manage "impossible" sites where traditional methods fail.

Our commitment extends to environmental recycling protocols, ensuring that lead contaminated waste is processed according to EPA Title 40 CFR standards. We prioritize site safety to protect both our technicians and your future occupants. This engineering-led approach reduces project overhead by 15% to 20% compared to using separate contractors for demolition and hazardous material removal.

Evaluating Project Quotes and Timelines

A professional lead abatement bid must be granular. It should detail the specific methods used, such as chemical stripping or vacuum-shrouded power tools, and provide a clear timeline for each phase. Be wary of low cost proposals that lack specific details on waste disposal or air monitoring. These "red flags" often indicate a lack of certification or a plan to cut corners on safety.

A legitimate quote will include costs for third party clearance testing to verify the site is safe for re-occupancy. If you require a partner who manages technical complexity with engineering precision, contact TSIAC International for a professional lead abatement consultation to receive a comprehensive project breakdown. We provide the technical documentation and safety guarantees that ensure the lead paint abatement process is completed correctly the first time.

Securing Your Property Through Permanent Lead Removal

Executing a comprehensive lead paint abatement process is the only way to ensure long-term structural integrity and occupant safety. Temporary remediation often fails to address the underlying toxicity, leading to costly re-interventions. By following the 5-phase methodology and adhering to the 2026 EPA regulatory standards, property owners mitigate both health risks and legal liabilities. It’s a technical challenge that demands engineering precision rather than quick fixes.

TSIAC International leverages over 15 years of hazardous material experience to manage these complex environments. Our team consists of EPA-certified lead abatement specialists who understand the nuances of high-stakes industrial sites. We integrate comprehensive structural demolition and recycling capabilities into every project, ensuring that no hazardous residue remains. Our track record proves that even the most difficult locations can be restored to full safety through disciplined execution and technical expertise.

Secure your property with TSIAC International’s professional abatement services and gain the peace of mind that comes with a lead-free facility. We’re here to help you navigate every technical hurdle with confidence.

Frequently Asked Questions

How long does the lead paint abatement process typically take?

A standard lead paint abatement process typically takes between 3 and 14 days to complete. Small residential tasks finish in 72 hours, while complex industrial structures require 14 days for full containment and removal. The timeline depends on the total surface area and the chosen removal method, such as mechanical scraping or chemical stripping. We provide a precise schedule after the initial site assessment to ensure your operations resume quickly.

Can I stay in my home or building during lead abatement?

Occupants can’t stay in the immediate work area or adjacent rooms during the lead paint abatement process. EPA safety protocols and OSHA standards require us to establish sealed containment zones using 6-mil plastic and HEPA-filtered air systems. You’ll regain access only after a certified inspector confirms the area is safe. This strict approach prevents lead dust inhalation and ensures 100% safety for your family or employees.

Is lead paint abatement required by law for commercial properties?

Federal law, specifically Title 40 CFR Part 745, mandates lead-safe practices for any commercial building constructed before 1978. Property owners face fines of $37,500 per day for non-compliance with EPA regulations during renovations. While abatement is often voluntary, it’s the only way to eliminate long-term legal liability and reduce insurance premiums. Most commercial entities choose permanent removal to protect their 10-year capital improvement plans and avoid future litigation.

What is the difference between an RRP contractor and a lead abatement contractor?

RRP contractors handle minor renovations that disturb paint, while abatement contractors perform permanent hazard elimination. RRP certification is a 1-day course focused on lead-safe work practices during general repairs. Abatement requires a 40-hour supervisor certification and specialized equipment to remove lead forever. Our teams possess these advanced credentials to manage high-risk industrial sites where standard renovation techniques aren’t sufficient for total safety.

How much does professional lead paint abatement cost per square foot?

Professional lead abatement costs between $8 and $15 per square foot for most standard surfaces. Specialized projects involving industrial alpinism or complex steel structures can reach $25 per square foot due to the technical difficulty. These figures include labor, high-grade containment materials, and specialized waste management fees. A typical 2,000 square foot facility requires a budget of $16,000 to $30,000 for a complete, certified removal project.

What happens if a property fails the final lead clearance test?

The contractor must reclean the entire work area and repeat the dust-wipe testing if a site fails its clearance. HUD guidelines specify that floor lead levels must stay below 10 micrograms per square foot. If levels exceed this limit, the crew uses HEPA vacuums and specialized wet-wiping techniques again. We don’t consider a project finished until the third-party laboratory results confirm the site is safe for occupancy.

Are there specific disposal requirements for lead-painted wood and metal?

Lead-painted waste is classified as hazardous under RCRA regulations if it exceeds 5.0 mg/L in a TCLP test. Wood and metal components must be separated and transported to licensed Category C landfills that accept hazardous materials. We document every ton of debris with a formal waste manifest. This ensures 100% traceability and prevents legal complications for the property owner during future environmental audits or property transfers.

How does lead abatement impact the resale value of a building?

Certified lead removal typically increases a building’s resale value by 5% to 12% by eliminating significant buyer liability. Prospective buyers in the industrial sector prioritize “lead-free” certifications to avoid future renovation costs and health risks. A clean environmental record speeds up the closing process by 20 days on average. It transforms a high-risk asset into a premium, market-ready property that commands a higher appraisal value.

Asbestos Abatement Services: The 2026 Professional Buying Guide

In 2024, approximately 18% of large scale industrial renovations were halted by regulatory bodies because of inadequate initial site surveys. You…

In 2024, approximately 18% of large scale industrial renovations were halted by regulatory bodies because of inadequate initial site surveys. You likely understand that discovering hazardous materials mid-project is a professional nightmare that triggers immediate delays and massive potential liabilities. Selecting the right asbestos abatement services is no longer just a safety requirement; it’s a critical strategic decision for your property’s 2026 valuation and legal standing.

We agree that the confusion surrounding varying technical quotes and complex remediation methodologies often leads to decision paralysis. This guide provides the engineering precision you need to evaluate contractors and secure full regulatory documentation for your permanent records. We’ll break down the specific criteria for hiring specialized teams, ensuring you achieve zero contamination while maintaining a 100% predictable workflow for your next renovation phase.

Key Takeaways

  • Understand the critical regulatory distinctions between standard demolition and hazardous material remediation to ensure total site safety and compliance.
  • Learn how to evaluate professional asbestos abatement services by verifying specialized insurance, bonding, and advanced technical monitoring capabilities.
  • Discover the long-term ROI and safety implications of choosing between total removal, encapsulation, and enclosure for your specific facility needs.
  • Master the professional procurement roadmap, from initial laboratory testing to the development of site-specific work plans and regulatory notifications.
  • Explore the operational advantages of an integrated approach that combines hazardous material remediation with expert structural demolition for seamless project delivery.

Defining Professional Asbestos Abatement Services in 2026

Professional asbestos abatement services represent a specialized engineering discipline rather than a simple demolition task. This process involves the meticulous identification, containment, and elimination of asbestos-containing materials (ACM) to prevent the release of microscopic fibers. While standard demolition focuses on structural removal, remediation protocols prioritize atmospheric control and environmental safety. By 2026, the industry has shifted toward total elimination of even trace exposures following the EPA’s 2024 final rule on chrysotile asbestos. This transition ensures that property values remain intact during structural renovations. Failing to follow Asbestos abatement procedures can lead to legal liabilities and permanent contamination of a building’s internal systems.

The Science of Containment and Remediation

Professionals categorize materials as either friable or non-friable. Friable materials pose the highest risk because they crumble under hand pressure, releasing fibers instantly. Modern remediation relies on the physics of negative air pressure. We use high-efficiency particulate air (HEPA) filtration systems that capture 99.97% of particles as small as 0.3 microns. These systems create a vacuum that prevents fibers from escaping the work zone. Attempting DIY removal isn’t just dangerous; it’s a violation of federal safety statutes. Unqualified individuals lack the specialized equipment required to maintain these critical pressure differentials.

Regulatory Framework: EPA and OSHA Standards

Compliance in 2026 is anchored in EPA NESHAP and OSHA standards. The EPA requires a 10-day notification before any activity disturbs more than 160 square feet of ACM. OSHA worker safety requirements under 29 CFR 1926.1101 protect the property owner from significant liability. If a worker isn’t properly protected, the owner shares the legal responsibility for long-term health claims. Every project must generate a rigorous paper trail. This includes the initial site survey, air clearance reports, and the final Waste Shipment Record (WSR). These documents prove the hazardous material reached a licensed landfill safely.

Engaging asbestos abatement services ensures that every technical step meets these 2026 benchmarks. It’s about protecting the structural integrity of the asset while maintaining a zero-exposure environment for occupants. Professional firms provide the engineering precision needed to handle “impossible” locations, such as high-rise elevator shafts or complex industrial boiler rooms, where standard methods often fail.

Key Criteria for Evaluating an Abatement Contractor

Selecting a partner for asbestos abatement services requires a rigorous technical audit. You aren’t just hiring a contractor; you’re managing a high-stakes environmental liability. Professional firms carry specialized Pollution Liability and Errors and Omissions (E&O) insurance with minimum limits of $5 million per occurrence. Standard general liability policies usually contain an “asbestos exclusion” clause, leaving the asset owner exposed to massive litigation risks if a fiber release occurs. Every technician must hold a state-validated license, and a dedicated project safety officer should oversee the site to ensure 100% compliance with OSHA 29 CFR 1926.1101.

Certifications and Insurance: Non-Negotiable Assets

Verification of credentials goes beyond viewing a certificate. You must confirm that the contractor’s bonding capacity matches the project scale. A firm with a 15-year history of clean safety records provides more security than a startup with lower premiums. This level of oversight mirrors the stringent protocols found in the University of Oregon’s asbestos program, which emphasizes continuous monitoring and documented compliance as the baseline for safety. Demand to see the last 24 months of worker training logs and medical surveillance records before signing any contract.

Technological Sophistication in Remediation

Modern asbestos abatement services rely on precision engineering. High-performance HEPA filtration units must maintain a negative pressure of at least -0.02 inches of water gauge within the work area. We use advanced wetting agents that penetrate porous materials 35% faster than standard water, significantly reducing the risk of airborne friability. Digital manometers and laser-based particle counters provide real-time data, allowing supervisors to adjust ventilation instantly. This technological edge is why many industrial clients seek specialized engineering solutions for complex structural environments.

  • Disposal Transparency: The contractor must provide a completed Waste Shipment Record (WSR) signed by the receiving landfill within 35 days of waste removal. This document is your only legal proof of proper disposal.
  • Structural Experience: Review past project performance in similar environments, such as high-rise HVAC systems or industrial boiler rooms. A contractor who understands the specific load-bearing constraints of your facility will avoid accidental damage.
  • Constant Supervision: A certified supervisor must remain on-site at all times. They manage the “dirty room” protocols and ensure no worker exits the containment area without following a 3-stage decontamination process.
  • On-site Monitoring: Independent third-party air monitoring should occur daily. This ensures that fiber counts remain below the permissible exposure limit of 0.1 fibers per cubic centimeter of air.

Strategic Mitigation: Removal vs. Encapsulation vs. Enclosure

Facility managers often mistake asbestos remediation for a single-track process. It isn’t. Professional asbestos abatement services require a calculated choice between removal, encapsulation, or enclosure. Each path carries distinct engineering requirements, cost structures, and long-term liability profiles. The U.S. Environmental Protection Agency (EPA) on asbestos confirms that management-in-place is a viable strategy if the material is in good condition, yet the decision must align with the building’s 10-year master plan. By 2026, property valuation trends show that “asbestos-free” certifications can increase asset liquidity by 15% compared to buildings with managed-in-place contaminants.

When to Choose Full Asbestos Removal

Total removal stands as the only permanent resolution for property owners seeking to eliminate long-term regulatory risk. If your 2026 capital improvement plan involves structural changes, removal is usually the only logical path. This strategy becomes vital when integrated with commercial interior gutting services. During a full interior demolition, hidden Asbestos-Containing Material (ACM) is almost certainly disturbed. Removing it before the main crew arrives prevents project shutdowns that can cost $5,000 or more per day in liquidated damages. It’s the most expensive upfront option, but it secures a “clean” status that simplifies future insurance renewals and real estate transactions.

Encapsulation and Enclosure: Tactical Alternatives

Encapsulation involves sealing fibers with a specialized chemical bond, typically a high-solids polymer penetrant or bridging mastic. This prevents fiber release without the disruption of physical extraction. Enclosure, conversely, requires building airtight mechanical barriers around the ACM, such as permanent impact-resistant panels or sheet metal jackets. These methods offer a 40% to 60% reduction in initial costs compared to full removal.

These aren’t “set and forget” solutions. They demand a rigorous Operations and Maintenance (O&M) program. Facility managers must conduct documented inspections every 6 to 12 months to ensure the barriers remain intact. Deferred maintenance on encapsulated materials often leads to air quality failures during routine building vibrations or minor plumbing repairs. If you don’t have the internal infrastructure to manage long-term monitoring, the initial savings of encapsulation will eventually be erased by the costs of specialized compliance audits.

Asbestos Abatement Services: The 2026 Professional Buying Guide

The Professional Abatement Workflow: A Procurement Roadmap

Procuring professional asbestos abatement services requires a structured sequence to mitigate liability and ensure structural integrity. The 2026 standard for industrial safety dictates a five-stage engineering protocol that prioritizes containment and objective verification.

  • Initial Survey and Laboratory Analysis: Certified inspectors collect bulk samples from suspicious materials. These samples undergo polarized light microscopy (PLM) at NVLAP-accredited laboratories to determine fiber concentration.
  • Regulatory Compliance and Planning: Contractors must file a 10-day NESHAP notification with environmental agencies before disturbing more than 160 square feet of regulated material. The site-specific work plan outlines the exact methodology for extraction.
  • Containment and Decontamination: Crews build airtight barriers using 6-mil fire-retardant polyethylene. A three-stage decontamination unit provides a controlled transition for personnel and equipment.
  • Precision Removal: Technicians use wet-removal methods to keep fibers from becoming airborne. All waste is double-bagged in labeled, 6-mil poly bags and sealed with a gooseneck tie.
  • Final Clearance: The project concludes only after air samples meet the EPA AHERA standard of less than 0.01 fibers per cubic centimeter.

Pre-Project Planning and Site Preparation

Site preparation is a logistical exercise in risk isolation. Professional crews begin by de-energizing electrical circuits and executing a 100% HVAC shutdown. All supply and return vents are sealed with critical barriers to prevent cross-contamination. This phase includes a pre-work walkthrough with facility managers to confirm that 100% of fire suppression systems remain operational but protected. Clear communication with stakeholders is vital; we provide a 48-hour mobilization notice to all adjacent occupants to maintain site transparency and safety.

The Final Clearance: Ensuring a Clean Bill of Health

Independent verification is the only way to guarantee safety. A third-party industrial hygienist must conduct the final air monitoring to avoid conflicts of interest. While PCM testing is common for many commercial sites, TEM (Transmission Electron Microscopy) is the gold standard for 2026 high-occupancy environments because it identifies asbestos fibers as small as 0.01 microns. Your final close-out package should include waste shipment records (WSR), worker certifications, daily pressure logs, and the lab-certified clearance report. This document acts as your permanent legal defense against future environmental claims.

For projects requiring this level of technical precision and documented safety, partner with our expert asbestos abatement services team.

TSIAC International: The Gold Standard in Hazardous Remediation

TSIAC International brings over 15 years of disciplined experience to high-stakes hazardous material projects. We don’t just remove waste; we engineer solutions for the most complex abatement challenges. Our technical precision makes us the primary choice for government agencies and commercial enterprises requiring absolute compliance. We maintain a 100% project completion rate on sites with high structural risk or environmental sensitivity, ensuring that every phase of the remediation meets rigorous federal and state standards.

Unmatched Expertise in Complex Environments

Managing remediation in occupied buildings requires more than just standard PPE. It demands a “no-compromise” safety culture. We’ve successfully executed asbestos abatement services in sensitive structural shells where integrity was compromised, ensuring zero cross-contamination. Our track record spans 500+ residential projects and heavy industrial facilities where precision is non-negotiable. This rigorous approach reduces your project’s risk profile, preventing costly regulatory delays or long-term health liabilities that arise from substandard work.

Seamless Integration with Demolition Services

Efficiency isn’t just about speed; it’s about a unified workflow. Our integrated model combines abatement with structural demolition for seamless project delivery. Using a single contractor eliminates the communication gaps that often plague multi-vendor sites. By consolidating these services, we’ve helped clients reduce mobilization costs by an average of 18% through shared logistics, equipment, and on-site management teams.

  • Rigorous waste management protocols that prioritize recycling and environmental stewardship.
  • Unified project management for both hazardous material abatement and site clearing.
  • Strict adherence to NESHAP and OSHA standards, providing detailed documentation for every cubic yard of waste removed.
  • Advanced containment technology that allows for continued operation in adjacent building wings.

Our commitment to environmental stewardship isn’t a secondary goal. It’s a core component of our technical execution. We implement waste management protocols that prioritize recycling, often diverting up to 85% of non-hazardous debris from landfills during integrated projects. This level of detail is why technical directors at government and commercial agencies prefer our partnership. We provide the documentation, safety data, and engineering precision required for high-security and high-liability environments. Our team handles the heavy lifting, from initial site assessment to final waste disposal, adhering to the strictest environmental standards. Contact TSIAC International today for a professional project consultation to secure your site’s future with asbestos abatement services you can trust.

Securing Your Infrastructure for 2026 and Beyond

Navigating the complexities of hazardous material remediation requires more than just standard compliance; it demands a technical partnership rooted in engineering precision. By 2026, the distinction between simple removal and strategic encapsulation will define the lifecycle of your industrial assets. Selecting a contractor based on rigorous procurement roadmaps ensures your project stays on schedule and within regulatory bounds. Success depends on moving from reactive fixes to proactive, expert led management strategies.

TSIAC International brings 15+ years of hazardous material experience to every site, specializing in the difficult locations that others often avoid. We’re fully licensed and insured for high liability remediation, providing a layer of financial and operational security for your facility. Our team delivers comprehensive close-out documentation for every project, ensuring your records are audit ready and transparent. When you prioritize long term structural integrity, choosing professional asbestos abatement services becomes a vital investment in your property’s future. Secure your property with TSIAC International’s professional abatement services.

Let’s build a safer environment through engineering excellence and unwavering reliability.

Frequently Asked Questions

What is the average cost of asbestos abatement services in 2026?

Average costs for asbestos abatement services in 2026 range from $15 to $35 per square foot. A standard 1,500 square foot residential project typically requires a budget between $4,500 and $9,000 for full remediation. These figures include labor, specialized filtration equipment, and disposal fees. Costs have risen 8% since 2024 because of stricter landfill regulations and updated safety requirements.

How long does a typical asbestos removal project take to complete?

A typical asbestos removal project takes 2 to 5 days to complete for standard residential or small commercial properties. Larger industrial sites or complex structural removals often extend to 14 days. The timeline accounts for site preparation, the actual removal process, and the final 24 hour air clearance testing period. We ensure every phase meets engineering precision to prevent project delays.

Can I stay in my building during the asbestos abatement process?

You can’t stay in the immediate work area or any connected zones while abatement is active. Safety protocols require the establishment of negative pressure enclosures that prevent fiber migration to clean areas. While some large facilities allow partial occupancy in separate wings, residential projects usually require a total evacuation for the 72 hour duration of the high risk phases. It’s the only way to ensure 100% safety.

What is the difference between an asbestos inspection and an abatement service?

An asbestos inspection identifies the presence and location of hazardous materials, while an abatement service involves the physical removal or encapsulation of those substances. Inspectors use polarized light microscopy to confirm fiber types in a laboratory setting. Abatement teams follow these technical reports to execute a remediation plan using HEPA filtration and specialized containment barriers to secure the site.

How do I know if my building needs asbestos abatement before a renovation?

You’ll need a professional survey if your building was constructed before 1980, as 90% of structures from that era contain asbestos in floor tiles or pipe insulation. OSHA regulation 1910.1001 mandates an inspection before any renovation that might disturb structural components. If your 2026 renovation plan involves cutting into walls or ceilings, a certified technician must pull samples for laboratory verification first.

What certifications should I look for in an asbestos removal company?

Look for contractors holding EPA Model Accreditation Plan (MAP) certification and a valid state asbestos contractor license. Every on site supervisor should possess an OSHA 40 hour HAZWOPER certification to prove they’re trained for hazardous waste operations. Verification of these credentials through the state database ensures the team follows the 2026 safety standards for asbestos abatement services and maintains high professional integrity.

What happens to the asbestos waste after it is removed from my property?

Asbestos waste is sealed in double layers of 6 mil polyethylene bags and transported to a licensed Type I hazardous waste landfill. Each shipment requires a Waste Shipment Record (WSR) that tracks the material from your property to the final disposal cell. These specialized facilities bury the sealed containers under 6 inches of non asbestos material within 24 hours of arrival to prevent fiber release.

Is lead paint removal usually included in asbestos abatement services?

Lead paint removal isn’t standard in a basic asbestos contract, though many firms offer it as a separate, specialized service. While both involve hazardous materials, they require different chemical strippers and containment protocols under EPA RRP rules. You should request a combined environmental remediation quote if your pre 1978 building requires both lead and asbestos mitigation to streamline the project timeline effectively.

Commercial Interior Gutting Services: A Strategic Guide to Interior Demolition

According to a 2023 industry report, 45% of commercial renovation delays stem directly from unforeseen hazardous materials discovered during the…

According to a 2023 industry report, 45% of commercial renovation delays stem directly from unforeseen hazardous materials discovered during the initial teardown. You’re likely aware that a renovation project is only as stable as the structural shell it’s built upon. It’s a common concern that hidden asbestos or structural instabilities will threaten your timeline and budget. You need a disciplined approach that treats demolition as a precise engineering task. We understand the pressure of maintaining a clean site while ensuring every square foot meets rigorous safety standards.

This guide helps you master the technical complexities of commercial interior gutting services to ensure your next project starts on a solid foundation. You’ll learn how to manage the critical path from hazardous material abatement to structural shell preparation without compromising the surrounding building areas. We’ll examine the protocols for full EPA and OSHA compliance, the logistics of massive debris management, and the specific methods used to protect the integrity of your property. This overview provides the strategic roadmap for delivering a construction-ready space that meets every regulatory and technical requirement with engineering precision.

Key Takeaways

  • Learn how to effectively strip a building down to its structural shell by identifying the specific scope of work required for non-load-bearing elements and MEP systems.
  • Master the technical distinctions between selective and structural demolition to ensure building stability through proper shoring and bracing techniques.
  • Discover why integrating hazardous material surveys into your timeline is the essential first step in professional commercial interior gutting services.
  • Follow a disciplined 5-step engineering survey and utility “safe-off” process to mitigate risks and maintain total control over complex renovation environments.
  • Identify the strategic advantages of partnering with a single-source contractor who manages both high-risk remediation and large-scale structural removal.

What Are Commercial Interior Gutting Services?

Commercial interior gutting services represent the systematic deconstruction of a building’s interior down to its structural shell or metal studs. This isn’t a “wrecking ball” approach. It’s a controlled engineering process. The procedure strips away everything that isn’t essential to the building’s structural integrity. This includes non-load-bearing walls, flooring, and comprehensive MEP (mechanical, electrical, plumbing) systems. While “soft demolition” might only remove surface-level finishes like carpets and furniture, a full gut-out prepares the facility for a total transformation.

Professional gutting serves as the foundational phase for tenant improvements. By removing redundant infrastructure, contractors eliminate the risks of “discovery” mid-construction. In 2023, data from industrial renovation projects showed that a clean gut-out can reduce unforeseen site condition claims by 18%. It’s about precision and logistics. Every load-bearing column and structural slab must be exposed to ensure the next phase of construction proceeds on a stable, verified base.

The Role of Gutting in Modern Renovations

A thorough gut-out provides architects and MEP engineers with a blank canvas. It’s impossible to design high-efficiency HVAC systems or complex lighting grids when old ductwork obscures the ceiling plenum. Exposing the structural framework allows for immediate inspections. This transparency often accelerates the permitting phase by 10 to 14 days. When the structural slab and columns are visible, engineers can verify load capacities without invasive testing during the build-out. This proactive approach directly reduces downstream construction costs by preventing layout conflicts before they occur on-site.

Core Components Removed During an Interior Gut

The scope of work for commercial interior gutting services is comprehensive. Technicians handle the removal of complex systems that require specialized handling and disposal protocols, especially in restricted-access environments. Key components include:

  • Partition Systems: Removal of drywall, glass partitions, and heavy-gauge metal framing systems.
  • Ceiling Assemblies: Stripping acoustic ceiling tiles (ACT), grid systems, and redundant HVAC ducting.
  • Flooring and Adhesives: Mechanical grinding of thin-set, mastic, and epoxy coatings from concrete slabs to ensure a level surface.
  • Redundant MEP: Decommissioning and removal of outdated electrical conduits, plumbing lines, and fire suppression pipes.

Every phase follows strict safety standards. We prioritize the recovery of recyclable materials, often achieving a 75% diversion rate from landfills on standard office gut-outs. This level of discipline ensures the site is safe, clean, and ready for the incoming trades to begin work immediately.

Technical Distinctions: Selective vs. Structural Gutting

Distinguishing between architectural finishes and structural skeletons requires a precise engineering survey before any work begins. Professional commercial interior gutting services focus on the surgical removal of non-load-bearing partitions, floor coverings, and MEP systems without compromising the building’s primary frame. Engineers must identify walls that provide lateral stability; removing these without proper reinforcement can lead to structural deflection exceeding 0.125 inches.

Shoring and bracing are critical when the demolition plan intersects with the building’s core. We utilize 20-ton hydraulic jacks and steel needle beams to manage load transfers during complex strip-outs. This technical approach protects shared building systems, such as 4-inch wet-pipe fire suppression lines and main plumbing stacks. Keeping 95% of a building’s utility core functional requires physical barriers and isolation valves, ensuring that the gut-out doesn’t disrupt the entire facility’s operations.

Selective Demolition for Occupied Buildings

Working in multi-tenant facilities requires strict adherence to noise and vibration protocols. Most high-impact work occurs between 10 PM and 6 AM to minimize tenant disruption. To manage environmental risks, we deploy negative air machines equipped with HEPA filters that maintain 99.97% filtration efficiency. Every project maintains 100% compliance with OSHA 1926.850, ensuring that egress routes and life safety systems remain unobstructed for all occupants. For projects requiring this level of technical oversight, it’s best to consult with specialists in complex execution to ensure site safety.

Precision Equipment and Heavy Machinery

Modern commercial interior gutting services rely on specialized tools to balance speed with safety. Selecting the right method depends on the specific floor load capacity and the proximity of sensitive neighbors.

  • Robotic Demolition: Units like the Brokk 110 allow for high-torque crushing in confined areas where exhaust-emitting machinery isn’t feasible. These units exert 80% more force than manual labor while keeping operators at a safe distance.
  • Manual vs. Mechanical: Manual methods are reserved for delicate perimeter work or historical preservation. Mechanical excavators are deployed when we need to clear over 5,000 square feet per shift.
  • Floor Load Management: Equipment weight is strictly monitored to ensure it stays below 150 lbs per square foot, preventing structural damage to standard office floor slabs.

Commercial Interior Gutting Services: A Strategic Guide to Interior Demolition

Managing Hidden Risks: Asbestos, Lead, and Hazard Abatement

Before the first wall falls, a rigorous Discovery Phase must occur. Professional commercial interior gutting services prioritize a comprehensive hazardous material survey to identify silent threats. Skipping this step isn’t just a safety oversight; it’s a financial liability. According to EPA estimates, buildings constructed before 1980 have a 70% probability of containing asbestos in floor tiles, mastic, or pipe insulation. We identify these materials through bulk sampling and polarized light microscopy before any structural interference begins.

Integrating abatement into the master schedule prevents cascading delays. A 10,000 square foot floor plate might require 14 days for specialized removal before standard demolition can resume. Failure to follow these protocols results in fines exceeding $37,500 per violation under OSHA 29 CFR 1926 standards. Proper commercial interior gutting services ensure that hazardous waste disposal follows a chain of custody that protects the property owner from future litigation and environmental penalties.

Asbestos Abatement During Interior Gutting

Technicians must distinguish between friable materials, like spray-applied fireproofing, and non-friable materials like vinyl-asbestos tile. Friable materials pose the highest risk because they release fibers into the air with minimal contact. We utilize negative pressure enclosures equipped with HEPA filtration units that cycle the air 6 times per hour. Once removal is complete, an independent laboratory performs Phase Contrast Microscopy testing. The space only reopens when fiber counts drop below 0.01 fibers per cubic centimeter, ensuring the site is safe for the next phase of construction.

Lead Paint and Mold Remediation

Commercial properties built before 1978 frequently contain lead-based paint on structural steel and metal framing. Cutting or grinding these components requires specialized HEPA-shrouded tools to capture toxic dust at the source. Gut-outs often reveal hidden mold growth in 15% of aging HVAC systems or behind water-damaged drywall. We address these biological hazards using antimicrobial treatments and detailed moisture mapping to prevent regrowth. Every project concludes with a comprehensive hazardous material manifest, providing the legal documentation necessary for project closeout and future property transfers.

The 5-Step Commercial Gutting Process

Execution of professional commercial interior gutting services requires a disciplined, engineering-led approach. It’s not about brute force; it’s about a controlled sequence that protects the building’s structural integrity and ensures the safety of every person on-site. We follow a rigorous five-step protocol to manage the complexities of modern commercial environments.

  • Site Evaluation and Engineering Survey: Before a single wall is touched, we conduct a thorough survey to identify load-bearing columns, shear walls, and structural slabs. This phase prevents accidental damage to the building’s primary support system.
  • Utility Disconnection and Safe-Off: We coordinate directly with MEP (Mechanical, Electrical, Plumbing) contractors to isolate power, water, and gas lines. This step includes strict Lock-Out/Tag-Out (LOTO) procedures to eliminate the risk of arc flashes or floods.
  • Hazardous Material Remediation: If a structure was built before 1978, the risk of lead-based paint or asbestos in floor tiles and pipe insulation is high. We neutralize these risks through certified abatement processes before general demolition begins.
  • Systematic Dismantling: Our teams work from the top-to-bottom and from the interior core outward. We remove non-structural partitions, drop ceilings, and built-in fixtures in a logical order to maintain clear egress routes.
  • Material Recovery and Debris Management: We don’t just haul waste. We sort materials at the source to ensure efficient disposal and maximize the recovery of high-value scrap.

Material Recycling and Environmental Stewardship

Modern demolition demands a commitment to sustainability. By sorting wood, ferrous metals, and gypsum at the source, we often divert over 75% of non-hazardous waste from landfills. This strategy isn’t just ethical; it’s financially sound, as it can reduce project tipping fees by 20% to 30%. For projects seeking green building status, we provide detailed, LEED-compliant recycling reports that document every ton of material processed.

Site Preparation for the Next Trade

The job isn’t finished until the site is ready for the next phase of construction. We deliver a “broom-clean” environment that exceeds standard industry expectations. This includes concrete slab preparation where we use specialized grinders to remove old adhesives, thin-set, or mastic, ensuring a 1/8-inch flatness tolerance for new flooring. Our handover protocol involves a joint walk-through with the incoming general contractor, such as a full-service firm like JBM Custom Contracting, to verify that all MEP points are accessible and the space is ready for immediate framing.

Partner with a team that prioritizes engineering precision by choosing our professional interior demolition solutions for your next project.

Choosing a National Commercial Demolition Partner

Selecting a contractor for commercial interior gutting services requires more than a review of equipment lists. It demands a rigorous assessment of engineering depth and liability management. A single-source provider that handles both the structural strip-out and hazardous material abatement eliminates the friction between separate vendors. This integration typically reduces project timelines by 18% because scheduling conflicts between demolition crews and environmental specialists disappear. When one firm manages the entire interior lifecycle, the transition from abatement to structural removal is seamless and cost-effective.

Experience and Technical Expertise

TSIAC International brings 17 years of specialized experience to every job site. We specialize in “impossible” locations. These include high-density urban centers or active hospital environments where vibration and dust control are non-negotiable. Our teams have completed over 520 large-scale interior transformations across 28 states. We don’t just pull down walls. We analyze load-bearing capacities and MEP (mechanical, electrical, plumbing) intersections to ensure the building’s core remains intact. Our precision allows for the preservation of historical facades while the interior is completely modernized.

  • 17+ years of experience in structural and selective demolition across the U.S.
  • Proven track record in high-rise and restricted-access urban environments.
  • Technical proficiency in separating structural elements from non-load-bearing partitions.
  • Strategic regional presence to ensure rapid mobilization for national accounts.

Commitment to Safety and Compliance

Safety is our primary operational metric. We maintain a Total Recordable Incident Rate (TRIR) of 0.85, which is significantly lower than the 2023 industry average. Every crew member undergoes 40-hour HAZWOPER training and mandatory quarterly safety audits to ensure adherence to strict OSHA and EPA standards. High-stakes commercial projects require robust financial backing. We carry comprehensive insurance packages, including a $10 million umbrella policy, to protect our partners from site complexities. Detailed documentation and EPA-compliant waste tracking are standard for every project we touch. If you’re planning a complex renovation, contact TSIAC International today for a comprehensive project estimate.

Secure a Precision Foundation for Your Next Build

Executing a successful renovation starts with a technical understanding of how selective and structural demolition impacts your building’s integrity. You’ve learned that managing hidden hazards like asbestos and lead requires more than just caution; it requires EPA-certified abatement protocols to eliminate liability. A structured 5-step process ensures that every phase of your commercial interior gutting services stays on schedule while prioritizing a comprehensive material recycling program to reduce environmental impact.

TSIA C International leverages 15+ years of industry experience to handle the most complex interior challenges with engineering precision. We don’t just clear space. We provide a controlled, safe environment ready for immediate reconstruction. Our team excels at managing difficult job sites where technical accuracy is the only way to protect your investment. We’ve built our reputation on the fact that we don’t shy away from specialized requirements or impossible locations.

Take the first step toward a seamless project delivery. Request a Professional Interior Gutting Quote and let’s discuss your specific site requirements. We’re ready to turn your complex demolition needs into a clean slate for growth.

Frequently Asked Questions

What is the difference between interior demolition and gutting?

Interior demolition refers to the selective removal of specific building elements, while gutting involves stripping a space down to its structural members. Commercial interior gutting services remove everything including drywall, flooring, ceilings, and mechanical systems to leave only the concrete or steel shell. This process provides a 100% clean slate for new architectural layouts and updated infrastructure.

How much does commercial interior gutting cost per square foot?

Commercial gutting costs typically range from $4.00 to $12.00 per square foot based on the complexity of the materials and site accessibility. A standard 5,000 square foot office space usually averages $7.50 per square foot for total interior removal. Costs can increase by 20% if the project requires hand-demolition in sensitive areas or specialized equipment for high-rise logistics.

How long does a typical 10,000 square foot office gut-out take?

A 10,000 square foot office gut-out generally takes between 10 and 15 business days to reach completion. This timeframe includes the initial mobilization, utility safing, material removal, and a final HEPA-filtered cleaning. If the building has limited freight elevator access, the schedule might extend by 3 days to accommodate slower debris removal cycles.

Do I need a permit for interior demolition if I am not touching load-bearing walls?

You’ll almost always need a permit because gutting impacts fire suppression systems, electrical grids, and emergency egress routes. Even if structural integrity isn’t at risk, 95% of municipal building departments require a demolition permit to ensure the work follows safety codes. Operating without one can lead to fines exceeding $2,500 and an immediate cessation of all site activities.

What happens if asbestos is found during the gutting process?

Work stops immediately within a 30 foot radius of the suspect material to prevent any potential fiber contamination. We seal the area and bring in a third-party environmental consultant to perform laboratory testing within 24 hours. Professional commercial interior gutting services then coordinate with certified abatement specialists to remove the hazardous material under negative pressure before any demolition resumes.

Can interior gutting be performed while other parts of the building are occupied?

We perform gutting in occupied buildings by using temporary sound-attenuation barriers and negative air machines to contain 99% of dust. High-impact noise activities are scheduled during off-peak hours, typically from 7:00 PM to 6:00 AM, to minimize disruption to adjacent tenants. This disciplined approach ensures that 100% of the building’s business operations continue without technical interference.

How is demolition debris managed and recycled?

We sort debris on-site into specific streams for metal, concrete, wood, and general waste to maximize recovery rates. Our process typically diverts 75% of all materials from landfills by transporting them to specialized industrial recycling centers. Clients receive a detailed waste manifest at the end of the project documenting the exact tonnage of recycled materials for their sustainability records.

What utilities need to be disconnected before gutting begins?

Electrical, plumbing, gas, and HVAC systems must be professionally capped and “safed off” by licensed tradespeople before our crews start. A licensed electrician must verify that there’s 0% live power in the demolition zone to prevent accidental electrocution or fire. We cross-reference the mechanical blueprints with physical site conditions to ensure every utility line is accounted for before the first wall comes down.