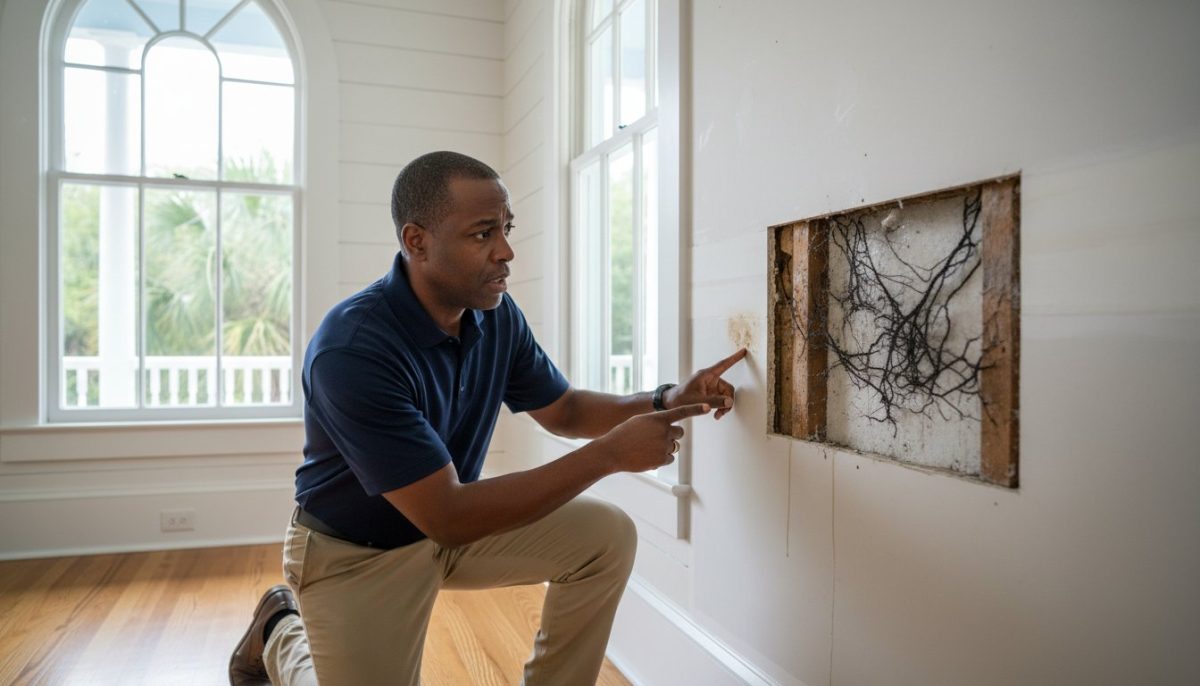
Lead Testing for Home Inspection: The 2026 Property Owner’s Comprehensive Guide

With the EPA now enforcing a zero-tolerance “detectable level” standard for lead dust as of January 12, 2026, the margin for error in property…

With the EPA now enforcing a zero-tolerance “detectable level” standard for lead dust as of January 12, 2026, the margin for error in property evaluation has effectively vanished. If you’re considering an older property, you likely feel the weight of responsibility regarding potential toxic exposure and the complexities of federal disclosure laws. It’s a valid concern for any diligent owner. This guide empowers you to master the technicalities of lead testing for home inspection, ensuring you protect your health, your investment, and your legal standing in a tightening regulatory environment.

You’ll gain a clear understanding of why a standard inspection differs from a specialized risk assessment and how advanced X-ray fluorescence (XRF) technology provides the non-destructive precision you need. We’ll outline the latest 2026 clearance levels and provide a methodical plan for remediation if hazards are detected. By moving beyond a simple pass or fail mindset, you can approach lead testing as a sophisticated risk-modeling exercise that secures the long-term safety of your property.

Key Takeaways

  • Distinguish between a standard home inspection and a specialized lead risk assessment to ensure all latent environmental hazards are accurately identified.
  • Evaluate the technical precision of X-ray Fluorescence (XRF) analyzers versus laboratory paint chip digestion for non-destructive and destructive testing scenarios.
  • Secure your contractual rights and legal standing by properly integrating a lead testing for home inspection contingency into your property purchase agreement.
  • Interpret complex laboratory results to prioritize the remediation of high-risk friction surfaces and impact zones that pose the greatest exposure risk.
  • Identify professional management strategies for detected lead, ranging from advanced encapsulation techniques to the selective demolition of contaminated structural components.

Understanding Lead Testing within the Home Inspection Framework

A standard home inspection provides a broad baseline of a building’s health, but it doesn’t typically encompass the technical rigor required for lead detection. General inspectors focus on structural integrity and mechanical functionality. They aren’t usually equipped with the specialized instrumentation or EPA certifications necessary for environmental hazard analysis. This gap creates a significant liability for buyers of older properties, as lead testing for home inspection requires a distinct, methodical approach to identify risks that aren’t visible to the naked eye. Relying solely on a generalist’s report often leaves property owners vulnerable to both health risks and future legal complications.

The historical context of the property dictates the necessity of these specialized services. Understanding the Prevalence of lead-based paint in U.S. homes is foundational for any modern owner. Statistics confirm that homes built before 1940 have an 87% likelihood of containing lead-based paint. Even for structures built between 1960 and 1978, the risk remains at 24%. In 2026, the return on investment for professional testing is clear. It prevents the astronomical costs of emergency abatement and ensures compliance with the latest EPA dust-lead standards, where any detectable level of lead dust is now a reportable hazard.

Lead Inspection vs. Lead Risk Assessment

A lead inspection is a surface-by-surface investigation. Its primary goal is to determine the presence and location of lead-based paint on every painted or finished component of the building. It’s an inventory of potential risks, which is essential if you’re planning a future interior gutting or selective demolition. A lead risk assessment is different; it identifies active hazards. This process evaluates deteriorating paint and tests dust and soil to see if lead is currently being released into the environment. Investors often choose an inspection for long-term planning, while families moving into a property should prioritize a risk assessment to ensure immediate safety.

The Legal Reality of Lead in Real Estate Transactions

Federal law requires sellers and landlords of pre-1978 housing to disclose known lead hazards and provide specific educational materials to occupants. Buyers have a protected 10-day window to conduct independent lead testing for home inspection before a contract becomes binding. You shouldn’t ignore this window. Findings from these tests can significantly impact property valuation and may even be a requirement for mortgage approval in certain jurisdictions. With EPA RRP Rule violation fines reaching up to $40,000, the legal stakes of failing to document and manage lead hazards have never been higher.

Technical Methodologies: XRF Analysis vs. Laboratory Sampling

The technical landscape of environmental hazard detection has shifted toward high-precision instrumentation that eliminates guesswork. In 2026, relying on hardware store test swabs is a significant liability. These reactive chemicals only detect lead on the outermost surface and often produce false negatives when lead is encapsulated under newer paint layers. Professional lead testing for home inspection utilizes two primary scientific paths: X-ray Fluorescence (XRF) and laboratory digestion. Each method serves a specific role in a methodical risk assessment.

X-ray Fluorescence (XRF) Technology Explained

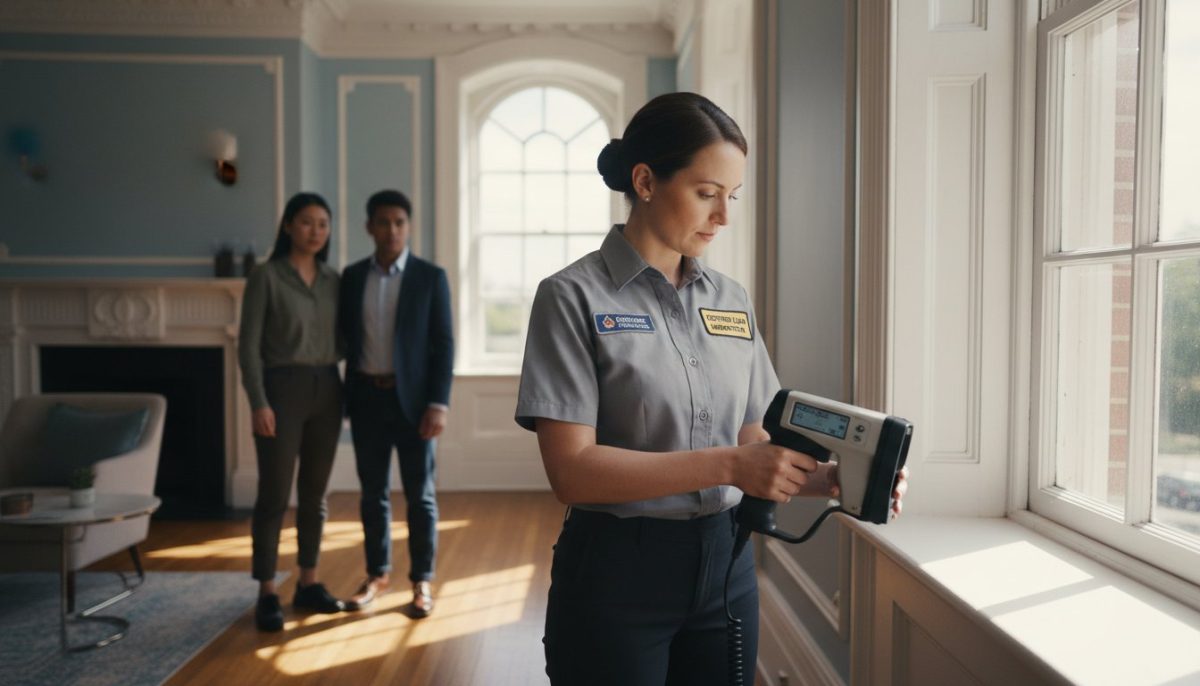
XRF analyzers are the gold standard for non-destructive testing. These handheld devices emit high-energy X-rays that penetrate through multiple layers of paint to excite lead atoms in the substrate. When these atoms return to a stable state, they emit a unique fluorescent signature that the device measures instantly. This allows a technician to scan an entire room, from baseboards to window casings, without damaging the property’s aesthetic finish or historic molding.

Precision depends on rigorous professional calibration. A certified inspector must verify the device against known standards before every session to ensure accuracy within the strict tolerances required by the EPA Lead-Based Paint Disclosure Rule. While XRF provides immediate data, complex cases involving irregular surfaces or contaminated soil may still require paint chip sampling. In these scenarios, a technician carefully removes a small sample for laboratory digestion, a process that provides a definitive lead concentration by weight.

The Limitations of Surface-Level Testing

Lead buried under five or ten layers of modern latex paint isn’t inert. It remains a structural hazard, particularly on friction surfaces like door frames and window sashes. Every time these components move, they grind the lead-based layers into microscopic dust. Under the new 2026 EPA standards, any detectable level of lead in dust on floors or windowsills is now a reportable hazard, making professional dust wipe sampling essential during the inspection process.

A comprehensive investigation must extend beyond the walls. It should include several critical vectors:

  • Dust Wipe Sampling: Capturing particles from high-traffic floors and sills to identify immediate inhalation risks.
  • Soil Analysis: Testing the perimeter of the foundation where exterior paint may have flaked and accumulated over decades.
  • Water Testing: Identifying lead leaching from older plumbing solder or service lines.

Identifying these risks early allows for a controlled response rather than an emergency intervention. If your results indicate systemic contamination, pursuing professional lead abatement is the most effective way to ensure the long-term structural safety and value of your asset.

Lead Testing for Home Inspection: The 2026 Property Owner’s Comprehensive Guide

The legal framework governing property transfers in the United States prioritizes transparency regarding environmental toxins. Under Section 1018 of Title X, sellers and landlords of housing built before 1978 are legally obligated to provide prospective buyers or tenants with the EPA-approved pamphlet “Protect Your Family from Lead in Your Home.” While earlier sections established the technical need for lead testing for home inspection, this legal requirement ensures that the right to information precedes the financial commitment. Exercising this right allows you to convert a passive disclosure into an active investigation of the property’s environmental profile.

Once lead is officially documented through professional testing, it becomes a permanent disclosure item for the life of the property. For landlords, this means providing specific lead hazard information to every new tenant before a lease is signed. For buyers, the presence of lead creates a clear path for contractual negotiation. Tenants also hold specific protections; they must be notified of any known lead-based paint or hazards before they are legally bound to a rental agreement. This shift in responsibility ensures that the burden of safety remains with the property owner, maintaining a standard of care consistent with 2026 regulatory expectations.

The Lead Inspection Contingency

A robust lead inspection contingency is more than a simple exit clause. It should be drafted to define exactly how findings will influence the final sale price or repair requirements. Rather than accepting an “as-is” condition, savvy buyers use detailed test results to demand professional remediation or structural credits. This contractual protection ensures that the buyer isn’t left absorbing the costs of managing legacy environmental hazards. By specifying the required qualifications for the inspector and the timeline for results, you create a transparent process that protects all parties involved in the transaction.

Documentation and Compliance

Maintaining a centralized record of your lead inspection report is essential for protecting the long-term equity of your asset. A “lead-safe” certification acts as a badge of quality, proving that the property has been managed with methodological precision. For owners managing multiple units or older structures, integrating these reports into a broader hazardous material abatement guide ensures consistent compliance across all regulatory layers. Adhering to the EPA guidelines on lead inspection and risk assessment provides the authoritative documentation necessary to mitigate future liability and streamline future resale processes.

Evaluating Risk: What Lead Test Results Mean for Your Property

Receiving a positive result from lead testing for home inspection is rarely a reason to terminate a real estate transaction. Instead, it serves as the foundation for a sophisticated risk-modeling exercise. You must distinguish between the presence of lead-based paint and the existence of lead-based paint hazards. Lead-based paint that is stable and undisturbed is a managed condition; a hazard is an active pathway for toxin exposure. Professional results categorize findings based on the component’s condition and its potential for future degradation, allowing you to prioritize interventions based on technical necessity rather than panic.

Prioritizing remediation requires an understanding of mechanical stress on building components. Friction surfaces, such as window sashes and door frames, generate microscopic dust through daily use. Impact surfaces, like baseboards or stair treads, are prone to chipping. Accessible chewable surfaces, particularly low window sills, pose the highest risk in environments with young children. While full removal is the most definitive solution, many owners opt for “interim controls.” This managed maintenance approach involves specialized repairs and rigorous monitoring to keep the lead-based paint in a non-hazardous state without the immediate cost of total abatement.

Intact vs. Deteriorated Paint

Intact lead paint can often be safely managed through professional encapsulation. This involves applying a specialized liquid coating that creates a long-lasting, impact-resistant bond over the lead-based layer. However, the situation changes once you see signs of “chalking,” “flaking,” or “peeling.” These are indicators that the paint film has failed. Environmental factors like high humidity in bathrooms or structural settling in older foundations can trigger new hazards in previously stable areas. When paint begins to deteriorate, the risk of lead dust accumulation increases exponentially, requiring immediate technical intervention.

Lead Dust: The Invisible Threat

As of January 2026, the EPA has implemented a zero-tolerance policy for dust-lead hazards. Any detectable level of lead in dust on floors or window sills is now a reportable hazard. Following any disturbance or remediation, the Dust-Lead Action Level (DLAL) for clearance is strictly set at 5 micrograms per square foot (µg/ft²) for floors and 40 µg/ft² for window sills. These microgram thresholds are incredibly low; you cannot achieve them with standard household vacuuming. Standard vacuums often exhaust fine lead particles back into the air, exacerbating the problem. Professional cleaning protocols require industrial HEPA-filtered extraction and specialized wet-wiping techniques to meet these 2026 safety standards.

Understanding these results allows you to transform a liability into a managed asset. If your inspection reveals high-risk hazards on friction or impact surfaces, securing a professional lead abatement strategy is the most reliable way to protect your investment and ensure the health of all future occupants.

From Detection to Abatement: Professional Remediation Strategies

Once the diagnostic phase of lead testing for home inspection is complete, the transition from identification to remediation must be handled with surgical precision. Effective lead management follows a strict hierarchy of control: encapsulation, enclosure, and removal. While encapsulation involves sealing lead-based paint with specialized coatings and enclosure covers the hazard with new materials like drywall, permanent removal is often the most sound long-term investment. For high-risk components such as window sashes or decorative trim, selective demolition is frequently the most efficient path. This process involves the careful extraction of the contaminated component itself, eliminating the hazard at its source rather than merely managing it in place.

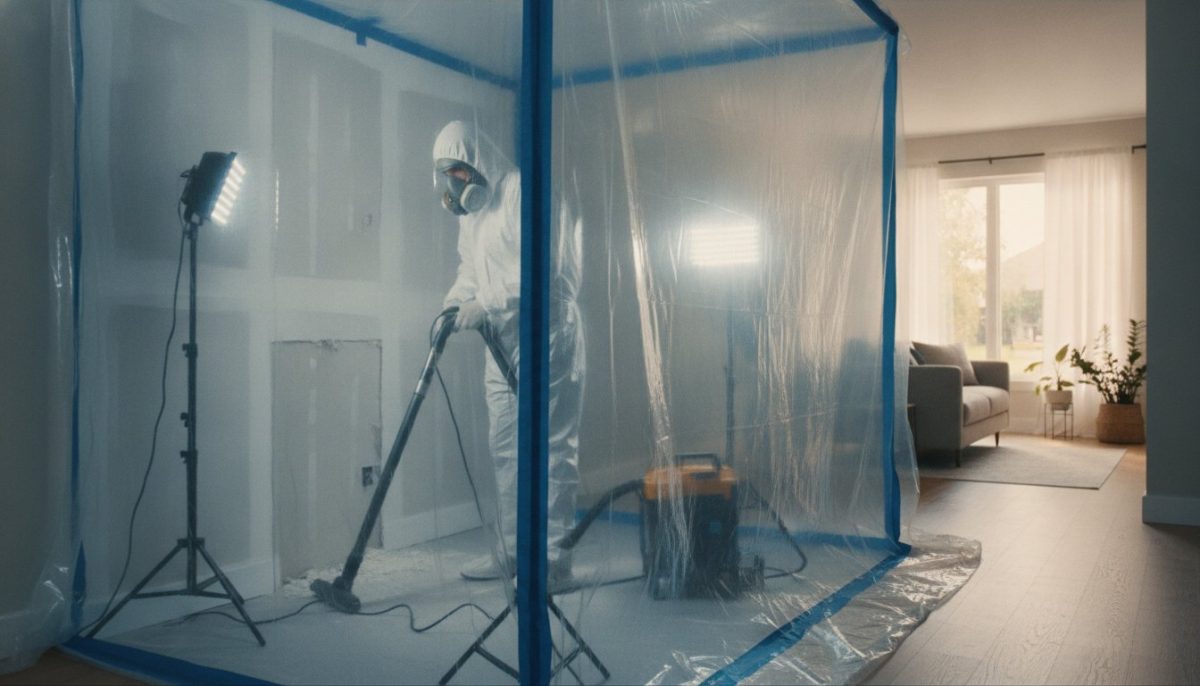
The technical execution of these strategies requires advanced containment protocols. By establishing negative air pressure within a sealed containment zone, technicians ensure that microscopic particles liberated during the removal process are captured by industrial HEPA filtration systems before they can migrate to non-work areas. This methodological rigor is what separates a professional abatement project from a standard renovation. The goal isn’t just to remove the paint, but to ensure the structural environment remains stable and uncontaminated throughout the entire lifecycle of the project.

Selecting a Certified Abatement Contractor

Property owners must verify that their chosen firm holds current EPA RRP (Renovation, Repair, and Painting) certifications. A general contractor may understand structural logic, but a hazardous material specialist understands the molecular behavior of toxins and the legal requirements for their disposal. Before beginning any work, it’s essential to review the asbestos and lead safety regulations that govern these high-risk environments. This ensures that your project complies with both state and federal mandates, protecting you from the $40,000 fines associated with non-compliant work practices.

The Abatement Process: What to Expect

Site preparation is the most critical phase of the remediation timeline. Technicians will seal HVAC vents and utilize heavy-duty plastic sheeting to isolate the work zone. During the removal phase, professionals use wet scraping or mechanical HEPA sanding to minimize dust generation. Following the physical removal, the site undergoes a multi-stage decontamination process. This leads to the final clearance testing, where an independent professional verifies that dust-lead levels meet the 2026 standards of 5 µg/ft² for floors and 40 µg/ft² for window sills before the area is cleared for re-occupancy.

Why Professional Intervention is Mandatory

Attempting DIY lead removal is a high-risk gamble that often results in greater contamination than the original hazard. Uncertified sanding or dry scraping releases clouds of invisible toxic dust that settle into carpets and ventilation systems, creating a persistent health threat. Beyond the physical risks, uncertified work can void your property insurance and create massive legal liabilities during future resale. For homeowners and investors, the choice is clear. Contact TSIAC International today to secure expert structural and hazardous remediation services that guarantee the safety and value of your property.

Securing Your Property’s Future with Technical Precision

Managing a property in 2026 requires more than just awareness; it demands a methodical approach to environmental safety. By prioritizing professional lead testing for home inspection, you move beyond guesswork and into a data-driven strategy for risk mitigation. You’ve seen that while lead remains a significant technical challenge, it’s entirely manageable through high-precision analysis and certified abatement protocols. These procedures don’t just protect occupants. They safeguard your financial investment and ensure your legal standing remains unassailable.

When you’re ready to transition from detection to permanent solutions, partnering with an industry leader is essential. Consult with TSIAC International for Professional Abatement Solutions to leverage over 15 years of expertise in hazardous material remediation. Our certified specialists provide comprehensive lead and asbestos abatement alongside specialized structural and selective demolition services. We provide the technical mastery needed to return your property to a safe, compliant, and valuable state. Take control of your property’s environmental health today with a partner you can trust.

Frequently Asked Questions

Is lead testing included in a standard home inspection?

Standard home inspections don’t include specialized lead detection. General inspectors evaluate structural integrity and mechanical systems; they aren’t required to hold the EPA environmental certifications necessary for hazard analysis. Professional lead testing for home inspection requires calibrated XRF technology or laboratory sampling that falls outside the scope of a basic property assessment.

How much does a professional lead inspection cost in 2026?

Professional evaluation costs vary depending on the property’s square footage and the complexity of the testing required. A comprehensive risk assessment that includes soil analysis and dust wipe sampling represents a higher technical investment than a basic surface inspection. You should request a detailed quote that accounts for the specific number of painted components in your structure to ensure an accurate budget.

Can I test for lead-based paint myself using a store-bought kit?

Store-bought chemical swabs aren’t reliable for professional or legal documentation. These kits only detect lead on the outermost surface and frequently produce false negatives when lead is buried under newer paint layers. They don’t meet the rigorous scientific standards required for federal disclosure or compliance with the 2026 EPA dust-lead reportable levels.

What happens if lead is found during a home inspection?

Finding lead allows you to exercise your rights under the lead inspection contingency in your real estate contract. You can utilize the results to negotiate for professional remediation or a reduction in the sale price to cover future management costs. Once lead is officially documented, it must be disclosed to all future buyers or tenants of the property.

How long does a lead inspection take to complete?

A professional evaluation typically takes between two and four hours for a standard single-family home. The use of handheld XRF analyzers allows for rapid, non-destructive data collection across all interior and exterior surfaces. If the technician needs to collect paint chips for laboratory digestion, you can expect a few additional business days for the final report.

Does lead paint always have to be removed if it’s found?

Full removal isn’t the only option if the lead-based paint is in good condition. Intact paint that isn’t on a friction surface can often be safely managed through professional encapsulation or enclosure. However, if the coating is flaking or located on high-impact areas like door frames, intervention is necessary to prevent the release of toxic particles into the environment.

What is the difference between a lead inspection and a lead risk assessment?

An inspection identifies the exact location of all lead-based paint throughout the building’s structure. A risk assessment is more specialized; it evaluates the severity of active hazards, such as contaminated dust or soil, and provides a methodical plan for remediation. Most property owners choose a risk assessment to ensure the immediate health of their family or tenants.

How often should I re-test my home for lead hazards?

You should consider a re-test if the property undergoes structural settling or if you notice any new paint deterioration. It’s also vital to perform clearance testing after any renovation that disturbs painted surfaces. Regular visual monitoring of high-friction areas like windows and doors helps you identify new risks before they reach hazardous levels.

Signs of Mold in Your House: The 2026 Property Owner’s Detection Guide

A single undetected leak can degrade the structural load-bearing capacity of timber framing by nearly 25 percent within just 14 days of moisture…

A single undetected leak can degrade the structural load-bearing capacity of timber framing by nearly 25 percent within just 14 days of moisture exposure according to 2024 building safety reports. You’ve worked hard to secure your property, and it’s natural to feel anxious when you suspect a hidden threat is silently undermining your investment or your family’s well-being. This 2026 Property Owner’s Detection Guide empowers you with the technical knowledge to identify the specific signs of mold in house environments before they necessitate a total structural overhaul.

We understand that uncertainty regarding remediation costs often leads to delayed action, but precision in early detection is your most effective cost-saving tool. This article breaks down the subtle biological indicators and moisture mapping techniques used by industry professionals. We’ll show you how to distinguish between common surface mildew and the deep-seated fungal growth that targets your building’s core. You’ll gain a clear, engineering-based perspective on moisture indicators and a definitive plan for securing a professional assessment to restore your home’s safety and structural integrity.

Key Takeaways

  • Distinguish between harmless surface mildew and destructive fungal colonies that digest organic building materials and compromise structural integrity.
  • Master the 12 visual and olfactory indicators to accurately identify the signs of mold in house before they escalate into costly property damage.
  • Explore the “Iceberg Effect” to detect hidden mold hazards lurking within wall cavities, crawl spaces, and attics that standard inspections often miss.
  • Learn why disturbing mold in older properties requires a specialized approach to avoid the simultaneous release of hazardous lead or asbestos fibers.
  • Understand the engineering-led “Source Control” philosophy and when selective demolition is the only viable path to permanent structural restoration.

What is Mold and Why is it a Structural Hazard?

Mold is a biological organism belonging to the fungi kingdom that serves a specific ecological purpose: the decomposition of organic matter. In a residential setting, this process targets building materials rich in cellulose, such as timber framing, drywall paper, and insulation backing. Identifying the early signs of mold in house structures is critical because these organisms don’t just sit on the surface. They actively digest the substrate they inhabit. This biological breakdown transforms rigid building components into soft, decaying matter, directly threatening the safety of the occupants.

The growth of Indoor mold relies on what engineers call the “Golden Triangle” of fungal development. This requires three specific environmental factors to align:

  • Moisture: Wood moisture content above 19% or relative indoor humidity exceeding 60%.
  • Organic Food Source: Materials like plywood, OSB, or the paper facing on gypsum boards.
  • Temperature: A range typically between 40 and 100 degrees Fahrenheit, which covers almost all climate-controlled interiors.

Property owners must distinguish between harmless surface mildew and destructive structural mold. Mildew is a superficial growth that stays on the surface and is easily removed. Structural mold colonies establish deep roots that compromise the load-bearing capacity of wooden joists and studs. If left unchecked, this biological activity can reduce a property’s market value by 10% to 25% and eventually lead to catastrophic structural failure.

The Biology of Decay: How Mold Eats Your Home

Mold spreads through microscopic filaments called hyphae. These structures penetrate porous materials like wood and drywall, acting much like the roots of a plant. This is why surface cleaning often fails to solve the problem. You might remove the visible spores, but the hyphae remain embedded deep within the material, ready to regrow as soon as moisture returns. According to industry standards, mold colonies can begin to form and compromise structural integrity within 24 to 48 hours of a water intrusion event. This narrow window makes rapid detection and professional intervention a necessity for asset protection.

Common Indoor Mold Species in US Residential Properties

Property owners typically encounter three primary genera: Cladosporium, Penicillium, and Aspergillus. These are prevalent in various climates and can grow on everything from carpets to HVAC ducts. While Stachybotrys chartarum, often called black mold, receives significant media attention, it requires constant saturation to thrive. From a technical perspective, the specific type of mold is often less critical than the total extent of the colony. A large-scale infestation of “common” mold presents a higher risk to the building’s skeletal framework than a small, isolated patch of a more notorious species. Identifying the signs of mold in house environments early allows for targeted remediation before the damage requires full-scale structural demolition.

The 12 Critical Signs of Mold in Your House

Identifying the signs of mold in house environments requires a systematic approach that prioritizes technical observation over guesswork. Fungal growth is a biological process that actively degrades the structural integrity of building materials through enzymatic breakdown. Property owners must recognize that by the time mold becomes visible, the underlying moisture issue has often been active for 48 to 72 hours. Detection involves monitoring for visual discoloration, distinct olfactory cues, and physical changes in material density. According to the New York State Department of Health in their guide, What You Need to Know About Mold, identification is the first step toward maintaining a safe indoor environment.

  • Discoloration: Black, green, or white patches that reappear after cleaning.
  • Fuzzy Textures: Velvety or filamentous growth indicating active spore release.
  • Leathery Patches: Thick, dense fungal mats often found on organic substrates like plywood.
  • Musty Odors: The release of microbial volatile organic compounds (mVOCs).
  • Bubbling Paint: Moisture trapped between the substrate and the coating.
  • Peeling Wallpaper: Adhesive failure caused by high localized humidity.
  • Warped Floorboards: Cellulose fibers swelling due to prolonged water absorption.
  • Respiratory Issues: Unexplained coughing or wheezing that improves when leaving the property.
  • Sick Building Syndrome: A cluster of symptoms, including headaches and fatigue, linked to indoor air quality.
  • Condensation: Persistent droplets on window frames or metal fasteners.
  • Warped Drywall: Soft spots or “crowning” in wall panels.
  • Cracked Grout: Degradation of porous masonry materials in high-moisture zones.

Visual Cues: Identifying Mold vs. Dirt or Water Stains

Distinguishing between a benign water stain and active fungal growth is vital for structural maintenance. A water stain typically presents as a dry, yellowish tan ring with a defined perimeter, whereas mold appears as irregular, textured spots that may spread over time. To verify structural damage, technicians use the Screwdriver Test; if a flathead screwdriver easily penetrates a wooden beam or baseboard with minimal pressure, the mold has already facilitated significant wood rot. Shadowing describes the dark lines that appear on walls when mold and dust particles accumulate specifically along the path of wall studs due to thermal bridging.

The Olfactory Profile: Tracking the Source by Scent

The scent of mold is a chemical byproduct of its metabolic cycle. These mVOCs become more pungent when the HVAC system is operational or when indoor humidity levels climb above 55%. A general “damp basement” smell suggests poor ventilation, but a sharp, earthy, or “rotten” odor usually indicates an active, dangerous infestation hidden from view. You can use your nose to pinpoint hidden leaks by sniffing along the base of cabinetry or behind heavy appliances where airflow is restricted. For property owners facing complex structural challenges, securing specialized technical solutions is the most reliable way to ensure long term safety and asset protection.

Signs of Mold in Your House: The 2026 Property Owner’s Detection Guide

Hidden Mold: Detecting Hazards Behind the Walls

Structural integrity and occupant safety depend on identifying what remains invisible to the naked eye. In the field of property inspection, experts refer to the “Iceberg Effect,” where visible spotting on a baseboard or ceiling represents only 10% of the total fungal mass. The remaining 90% typically thrives within wall cavities, floor assemblies, and ceiling voids. When you notice minor discoloration, it often signals a mature colony consuming the paper backing of drywall or the organic components of insulation. Utilizing a New York State Department of Health guide helps owners understand that scent and subtle structural changes are often the first reliable indicators of a problem.

Environmental signals provide the necessary data for a preliminary diagnosis. Condensation forming on window panes or cold-water pipes isn’t merely a plumbing nuisance; it’s a sign of high indoor humidity. When relative humidity levels sustain a point above 60%, the risk of hidden growth increases. Professional detection involves more than a visual sweep. Technicians use thermal imaging cameras to locate cold spots that indicate moisture intrusion behind finished surfaces. Moisture meters then provide a quantitative analysis, confirming if the substrate exceeds the 15% moisture threshold required for mold to germinate. These tools allow for a non-destructive assessment of the signs of mold in house structures.

Crawl Space and Basement Indicators

Crawl spaces and basements are the most neglected zones in 70% of residential properties. One primary indicator of trouble is efflorescence, a white, crystalline salt deposit on concrete walls. While efflorescence itself isn’t mold, it proves that moisture is migrating through the foundation, creating a habitat for fungi. Property owners should inspect fiberglass insulation for a “heavy” or sagging appearance. This physical deformation occurs when the material absorbs moisture from the air. Spores often utilize “upward migration,” where the stack effect pulls contaminated air from the crawl space through floor joists and into the primary living areas of the home.

HVAC Systems and Ductwork Contamination

The HVAC system serves as the building’s respiratory network, making it a critical point for cross-contamination. Mold growth on supply vents or around air conditioning coils often points to a failure in the condensate drainage system or a lack of proper filtration. If spores reach the plenum or return air registers, the mechanical system distributes them throughout every room within minutes of operation. You should suspect a deep-seated issue if a musty odor intensifies when the fan engages. These mechanical signs of mold in house systems require immediate technical remediation to prevent the spread of spores to previously unaffected building materials.

The Dangerous Intersection: Mold, Lead, and Asbestos

Detecting common signs of mold in house environments often leads to the discovery of deeper structural hazards. In older properties, moisture doesn’t just invite fungal growth; it actively destabilizes legacy building materials. When water penetrates walls or ceilings, it triggers a chain reaction that compromises the integrity of asbestos-containing materials (ACM) and lead-based coatings. This overlap creates a high-risk scenario where simple mold cleanup can inadvertently release toxic fibers or dust into the air.

Professional remediation requires a comprehensive hazardous material abatement strategy. Without this integrated approach, property owners risk violating EPA and OSHA regulations while endangering occupants. The presence of mold acts as a catalyst for the deterioration of hazardous substrates, making it impossible to address one without disturbing the other. Engineering controls must be established to manage both biological and mineral-based toxins simultaneously.

Why Mold and Asbestos Often Appear Together

Properties constructed before 1980 frequently utilize materials that serve as both a food source for mold and a carrier for asbestos. Acoustic ceiling tiles, often found in basements or commercial spaces, are porous enough to trap moisture and support mold colonies while containing friable asbestos fibers. Similarly, vinyl floor mastic, which can contain up to 25% chrysotile asbestos, often fails when subfloor moisture levels rise, leading to mold growth beneath the tiles. Attempting DIY mold removal in these environments is dangerous. Disturbing these materials without containment releases microscopic fibers that cause long-term respiratory damage. For detailed regulatory requirements, consult our asbestos removal safety guide to ensure compliance during renovations.

Managing Lead Paint in Mold-Impacted Areas

Lead-based paint, common in homes built before 1978, relies on a strong bond to the substrate to remain stable. Moisture-driven mold growth compromises this bond through hydrostatic pressure and chemical degradation. As mold spreads, it causes the lead-based paint to flake, peel, or pulverize into toxic dust. Handling these “dual-threat” projects requires specialized PPE, including P100 respirators and disposable suits, to prevent cross-contamination. We define “co-remediation” as the safest path for historic property preservation, as it addresses biological and chemical hazards through a single, controlled engineering plan. If you’ve identified physical signs of mold in house structures, you must account for these underlying toxins before starting any demolition or abrasive cleaning.

Protect your investment and your health by ensuring your remediation plan covers all hazardous variables. Contact TSIA C International for professional structural hazard management.

Professional Remediation and Structural Restoration

Effective mold remediation requires more than surface-level cleaning. It demands a rigorous engineering approach centered on source control. If you identify signs of mold in house, your primary objective is identifying and stopping the moisture intrusion. Removing fungal growth without addressing a 2024 plumbing leak or a faulty HVAC seal guarantees recurrence. TSIAC International prioritizes structural integrity by evaluating whether materials require simple sanitization or selective demolition. This strategic choice prevents the unnecessary destruction of sound structures while ensuring every spore colony is physically extracted. We maintain strict control over the environment using negative air pressure machines and HEPA filtration systems that capture 99.97% of particles down to 0.3 microns. This containment ensures that agitated spores don’t migrate to unaffected areas of the property.

The Professional Remediation Workflow

Professional remediation follows a precise sequence to prevent cross-contamination. Technicians establish containment zones using 6-mil fire-retardant polyethylene sheeting. For severe infestations, we utilize a gut-to-stud approach. This involves stripping away contaminated drywall and insulation to expose the framing. Once the physical removal is complete, we perform Post-Remediation Verification (PRV) testing. Independent laboratory analysis of air and surface samples confirms the environment is safe for re-occupancy before we begin any reconstruction. We don’t guess; we verify with data.

Material Salvage and Environmental Responsibility

Deciding what stays and what goes depends on material porosity. Non-porous materials like structural steel and glass are typically salvageable through abrasive cleaning. Porous materials like drywall and carpeting absorb moisture and fungal hyphae. These must be discarded to prevent future health risks. TSIAC remains committed to recycling demolition debris whenever possible. We separate clean timber and metal from contaminated waste to minimize the environmental footprint. The final restoration phase involves sealing treated surfaces with antimicrobial coatings and rebuilding the structure to meet 2026 building codes. This ensures the property isn’t just clean, but structurally sound for the long term.

Securing Your Property Against Structural Contaminants

Identifying the 12 critical signs of mold in house is the first step toward protecting your property’s long-term structural health. Mold rarely acts alone. It often signals deep-seated moisture issues or resides alongside hazardous materials like lead and asbestos in structures built before 1978. Ignoring these indicators leads to compromised load-bearing elements and deteriorating air quality. TSIAC International brings 15+ years of hazardous material abatement expertise to every site. Our team maintains specialized certifications for asbestos, lead, and mold remediation, ensuring every phase of the process meets rigorous industry safety standards. We provide comprehensive structural demolition and interior gutting capabilities for complex projects requiring extensive intervention. Technical precision in remediation isn’t a luxury; it’s a requirement for property viability. We specialize in finding solutions for difficult locations where standard contractors often fail. Professional assessment provides the technical clarity needed to restore safety and structural stability to your home. Contact TSIAC International for a Professional Hazardous Material Assessment to ensure your living environment remains secure and compliant for years to come.

Frequently Asked Questions

Is mold in a house always a health risk?

Mold exposure consistently presents physiological risks, particularly for the 25 percent of the population with genetic markers sensitive to biotoxins. Inhalation of spores triggers inflammatory responses and respiratory distress. Even non-toxic species compromise indoor air quality by releasing volatile organic compounds. Maintaining a sterile environment is a technical necessity for long-term occupant safety and structural integrity.

Can I remove mold myself with bleach or vinegar?

Bleach is ineffective for remediating mold on porous substrates like drywall or timber because its chemical structure prevents deep penetration. The 90 percent water content in household bleach often feeds the remaining hyphae, leading to regrowth within 14 days. Professional standards dictate physical removal or abrasive cleaning rather than topical applications that fail to address the root fungal colony.

How much mold is considered “too much” for a homeowner to handle?

Professional intervention is required if the contaminated surface area exceeds 10 square feet, according to EPA safety protocols. Attempting to clean larger areas without industrial-grade containment systems risks dispersing millions of spores per cubic meter into the ventilation. When contamination reaches this scale, the technical complexity of the cleanup necessitates specialized HEPA filtration and negative pressure zones.

What happens if I ignore signs of mold in my basement?

Ignoring signs of mold in house foundations leads to the gradual decomposition of organic building materials and load-bearing wooden components. Unchecked moisture levels above 60 percent relative humidity allow colonies to double in size every 48 to 72 hours. This neglect eventually compromises the building’s structural certification and significantly increases the technical scope of future restorative engineering efforts.

Does homeowners insurance typically cover mold remediation?

Insurance coverage depends on whether the mold resulted from a “covered peril,” such as a pipe bursting within the last 14 days. Most standard policies exclude damage caused by long-term humidity or lack of maintenance. Property owners should review their specific riders, as 80 percent of standard policies require additional endorsements to cover comprehensive fungal remediation and structural drying.

How long does the professional mold remediation process take?

A standard professional remediation project typically spans 3 to 7 days depending on the contamination’s severity. This timeline includes 24 hours for initial site stabilization and containment setup, followed by active removal and air scrubbing. The final stage requires a mandatory waiting period for post-remediation verification testing to ensure spore counts have returned to baseline outdoor levels.

What is the difference between mold and mildew in a house?

Mold is a multicellular fungus that penetrates deep into structural substrates, while mildew is a superficial growth that remains on the surface. While mildew is typically flat and gray or white, mold exhibits fuzzy or slimy textures and appears in various colors. Mold poses a much greater threat to the building’s structural components due to its invasive growth patterns.

Can mold grow inside my walls without me seeing it?

Mold frequently colonizes wall cavities where hidden pipe leaks or condensation meet insulation, remaining invisible to the naked eye. Identifying these hidden signs of mold in house structures requires specialized diagnostic tools like infrared thermography or moisture meters. Often, the colony is only discovered after it has already compromised 15 percent or more of the interior wall assembly.