Fire Cleanup Safety Protocols: Containment, PPE, and Negative Air Basics

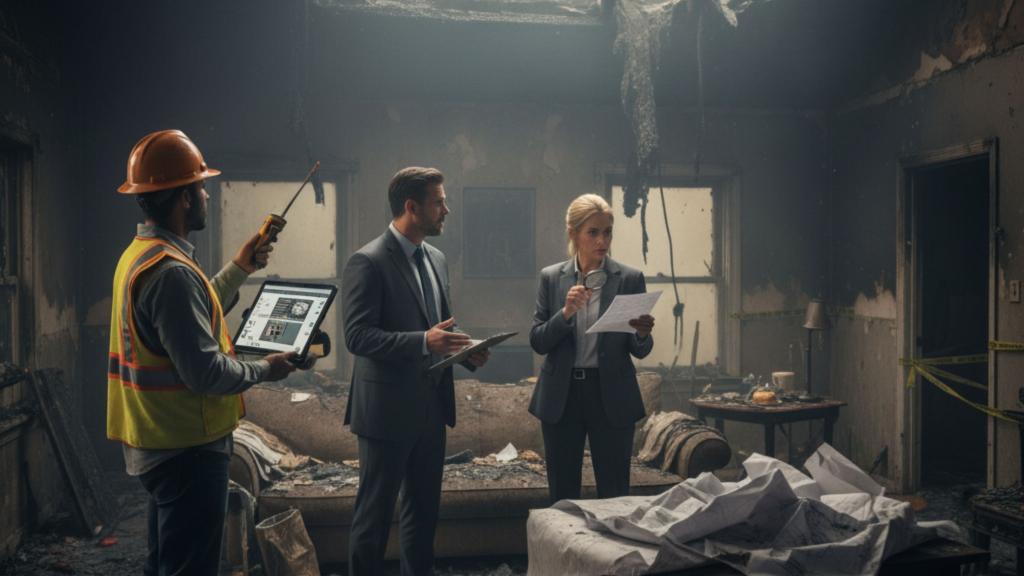
When smoke clears and the sirens fade, the real work begins—safely. This guide walks property owners and facility managers through fire cleanup safety protocols, with a practical focus on containment, PPE, and negative air. If you’re facing fire damage in the Carolinas, TSIAC International can help you execute these steps correctly and efficiently.

Why safety-first matters after a fire

Fire scenes are complex. Soot particulates are acidic and ultra-fine; water used to extinguish flames can drive contaminants into hidden cavities; and burned building materials may release toxic compounds. Disturb them without a plan and you spread contamination, create inhalation hazards, and risk secondary damage to the rest of the building. Three pillars keep your team and occupants safe while preventing cross-contamination:

  1. Containment (isolate and seal the work area)
  2. PPE (protect workers from inhalation, contact, and penetration hazards)
  3. Negative air (pull contaminated air out through HEPA filtration and maintain pressure control)

Below is a field-tested, step-by-step approach.

1) Containment: keep contaminants where they are

Goal: prevent smoke residue, soot, and debris from migrating into clean areas.

A. Define the work zone

  • Walk the site and mark the primary fire-impacted spaces and any adjacent rooms with visible soot or odor.
  • Identify routes for material removal and a separate path for clean entries/exits where possible.

B. Seal the envelope

  • Install 6-mil poly sheeting from floor to ceiling to enclose the work zone.
  • Tape and seal penetrations (HVAC registers, light fixtures, chases, cracks around doors).
  • Add zipper doors or framed doorways with overlapping flaps for controlled access.
  • Protect floors with ram board or poly + slip-resistant mats.

C. Protect building systems

  • HVAC off in the work area. Seal supply and return vents to prevent system contamination.
  • If the rest of the building requires climate control, isolate that air handler from the work zone.

D. Establish clean/dirty transitions

  • Create a decon vestibule (often a two- or three-chamber setup) immediately outside the contained space:
    • Chamber 1: dirty side (bag-out area for debris and disposable PPE)
    • Chamber 2: intermediate (hand/face cleaning station, tool wipe-down)
    • Chamber 3: clean side (PPE donning)

Pro tip: Label everything—“HOT ZONE,” “DECON,” “CLEAN”—so subs and vendors don’t inadvertently breach the barrier.

2) PPE: protect the people doing the work

Goal: prevent inhalation of fine particulates and contact with irritants/carcinogens found in post-fire residues.

A. Respiratory protection

  • Minimum: NIOSH-approved half-face respirator with P100 filters for soot particulates.
  • When to upgrade: If strong odors/volatile compounds are present, use combination P100/OV cartridges (particulate + organic vapor).
  • Fit testing: Ensure each worker is fit-tested and medically cleared. Facial hair compromises the seal.
  • Change-out schedule: Replace filters based on load, odor breakthrough, or manufacturer guidance.

B. Body, hand, eye, and foot protection

  • Coveralls: Disposable, hooded coveralls (e.g., Type 5/6) to prevent tracking soot to clean areas.
  • Gloves: Nitrile (chemical splash) or cut-resistant gloves depending on task and debris. Double-glove when bagging waste.
  • Eye/face: Safety glasses with side shields for general work; face shields for scraping/wiping overhead.
  • Footwear: Safety-toe boots with slip-resistant soles; use disposable boot covers inside contained zones to reduce cross-tracking.

C. Donning and doffing (the right way)

  • Donning (clean side): sanitize hands → base layer → coveralls → respirator → eye protection → gloves → boot covers.
  • Doffing (dirty side): remove gross debris first → wipe down gloves → peel off coveralls inside-out → bag immediately → remove boot covers → clean gloves → remove eye protection → remove respirator last → sanitize hands and face.

Pro tip: Train your crew to treat PPE like a system. Most exposures happen during doffing and breaks.

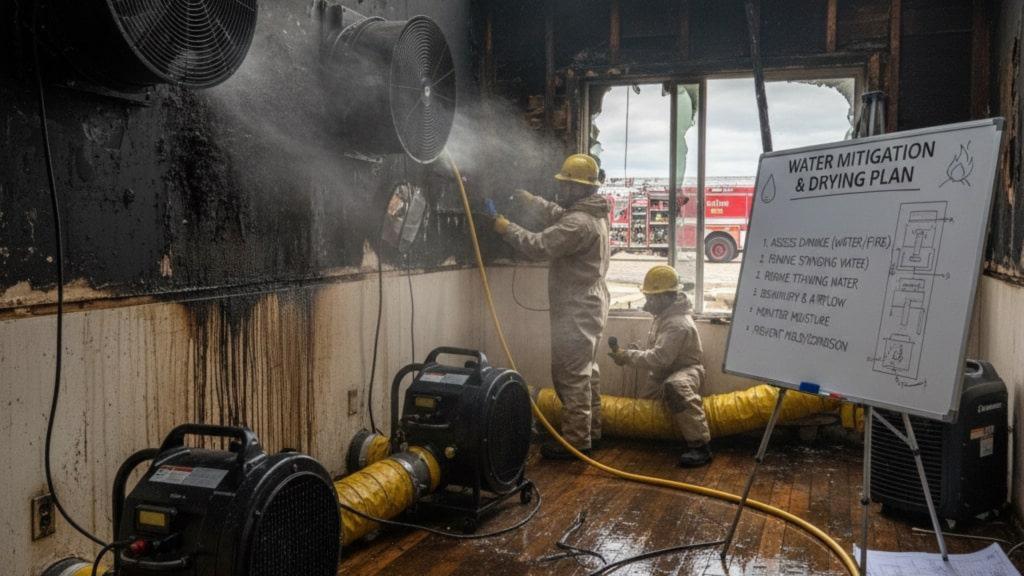
3) Negative air: control the direction air (and contaminants) move

Goal: keep the work area under negative pressure so air flows into the containment and out through a HEPA-filtered exhaust—never the other way around.

A. Equipment and setup

  • Negative Air Machine (NAM): Portable unit with a HEPA H13 or better filter.
  • Ducting: Run layflat duct from the NAM to an exterior discharge point (window/door panel). Seal all joints with tape/clamps.
  • Make-up air: Ensure enough make-up air pathways into containment (through controlled zipper doors or make-up vents) so the NAM doesn’t collapse your sheeting.

B. Pressure targets and verification

  • Aim for a consistent, measurable negative pressure relative to adjacent spaces (commonly verified with a differential manometer).
  • Use a smoke pencil at door seams to confirm air is moving into the work zone.
  • Log readings at the start, mid-shift, and end of day—or set up a continuous monitor if available.

C. Air changes and filtration

  • Size your NAM to provide adequate air changes per hour (ACH) for the volume of the containment. Higher ACH improves capture of fine particulates and odors.
  • Maintain and inspect pre-filters daily; replace clogged pre-filters to protect the HEPA and maintain airflow.

Pro tip: Position the NAM intake opposite your decon/entry to create a sweeping airflow path across the workspace.

4) Cleaning sequence: from dry removal to fine particulates

Goal: remove residues efficiently while minimizing re-aerosolization.

  1. Dry removal first: HEPA vacuum ceilings, walls, and surfaces before wet cleaning. This reduces smear and prevents grinding soot into pores.
  2. Wet wipe/wash: Use fire-specific detergents/degreasers following label directions. Rinse with clean water.
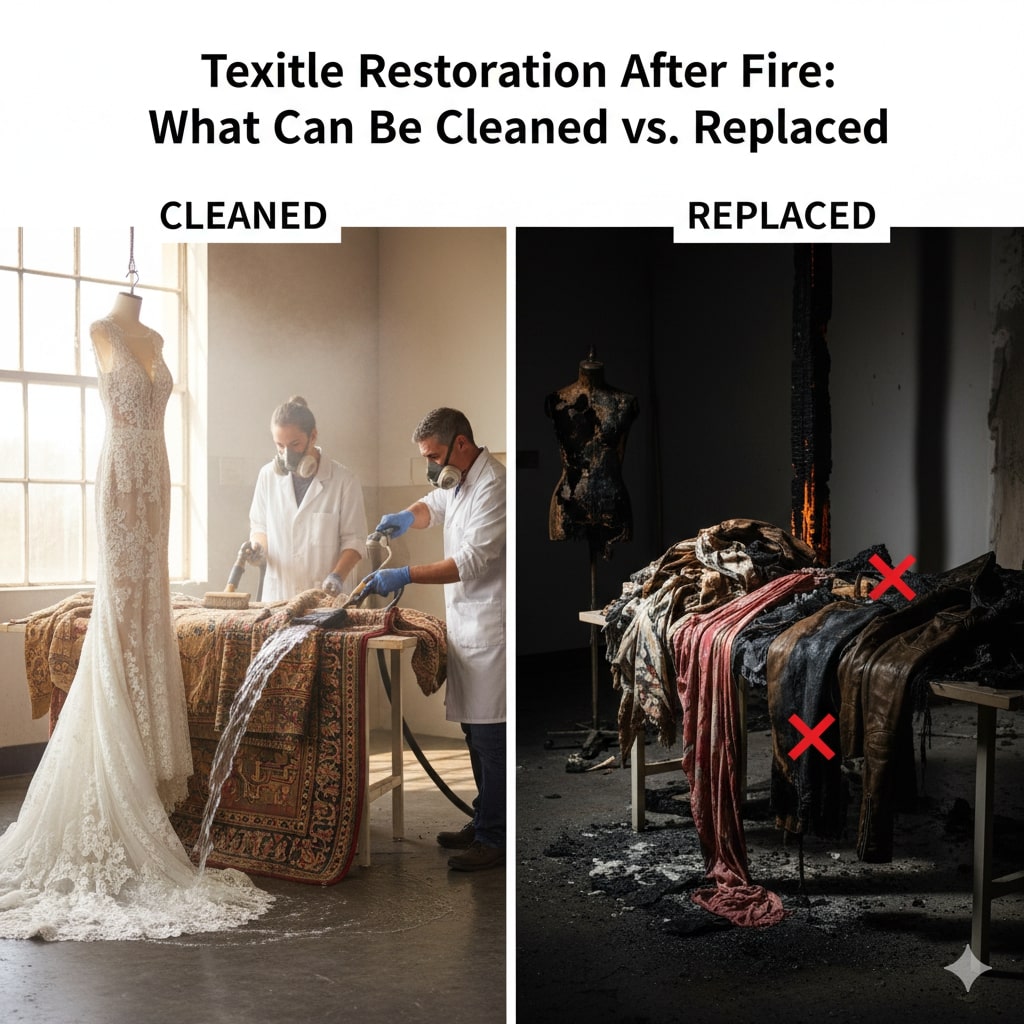
  3. Porous vs. non-porous: Non-porous surfaces clean more completely; evaluate porous items (acoustic tiles, insulation, charred drywall) for disposal.
  4. Odor mitigation: After source removal and cleaning, deploy odor control (hydroxyl or ozone—ozone only in unoccupied spaces with strict safety controls).
  5. Final HEPA pass: Repeat HEPA vacuuming after surfaces are fully dry to capture fine particulates that settled during cleaning.

5) Waste handling and bag-out

Goal: move debris out without contaminating clean areas.

  • Double-bag debris in 6-mil poly; goose-neck and tape.
  • Use the dirty side of the decon to stage and seal bags.
  • Transport along the pre-planned route; never through public or finished areas if you can avoid it.
  • Document disposal according to local requirements—especially for appliances, paints, or chemicals affected by heat.

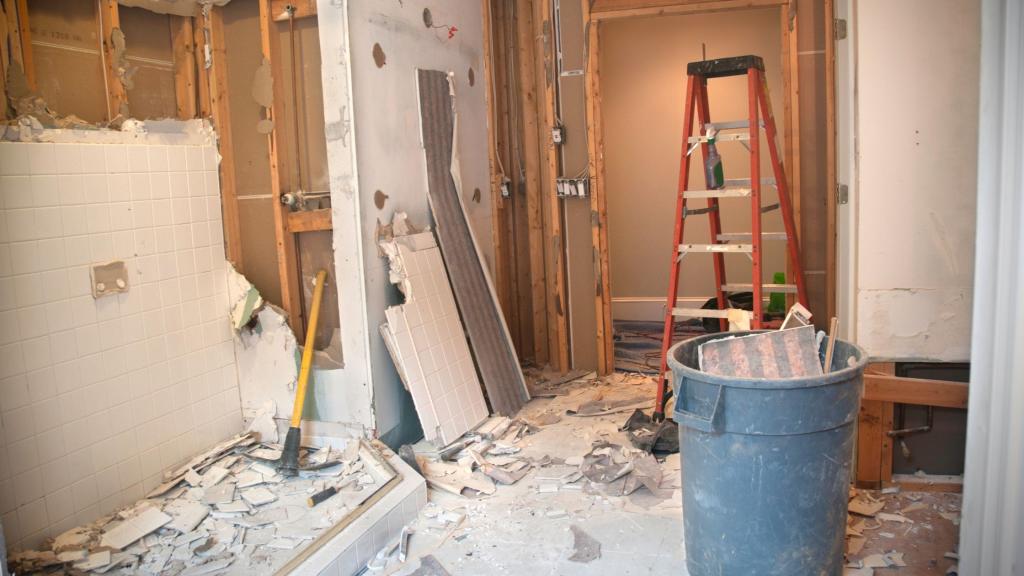
6) Special hazards: when to stop and escalate

Some materials demand specialized handling. Pause and consult professionals if you encounter:

  • Compromised structures (unsafe framing, falling hazards)
  • Suspected asbestos (textured ceilings, floor tiles/mastic, pipe insulation in older buildings)
  • Lead-based paint (pre-1978 homes)
  • Heavy chemical/solvent odors or unknown containers that heated in the fire

TSIAC International’s teams are experienced in demolition, abatement, and fire cleanups—so if your project crosses into these categories, bring in a licensed crew to stay compliant and safe.

7) Post-clean verification: don’t skip the proof

Goal: confirm that contamination is contained, air is safe to breathe, and surfaces are clean.

  • Visual inspection: no visible soot, streaking, or residue—especially at edges and high points.
  • Olfactory check: lingering smoke odor often means remaining source material—re-inspect cavities, carpet pads, and insulation.
  • Air and surface sampling (as needed): particulate or odor markers can validate remediation in sensitive settings (medical, childcare, food).
  • Pressure off, barriers down (in order): after passing checks, shut down the NAM, remove barriers methodically, and clean the transition zones.

Quick checklist (pin this in your trailer)

  • ☐ Build, seal, and label containment with clean/dirty/decon zones
  • ☐ Shut down/seal HVAC in the work area
  • ☐ Don appropriate PPE (fit-tested respirators, coveralls, gloves, eye/foot protection)
  • ☐ Start negative air and verify pressure direction with a meter or smoke pencil
  • ☐ HEPA vacuum → wet clean → rinse → HEPA vacuum again
  • ☐ Double-bag and bag-out through decon; document disposal
  • ☐ Verify results; demobilize barriers in sequence

Need help? Bring in a coordinated crew.

Fire cleanup is not a single trade—it’s coordination between safety, demolition, and restoration. TSIAC International brings those disciplines together so you get a contained jobsite, protected workers, and a clean, ready-to-rebuild space.

One helpful resource: To learn more about respirator selection and use, see OSHA – Respiratory Protection.

If you’d like us to build the containment, run negative air, and handle the cleanup end-to-end, reach out to TSIAC International for a site assessment and plan tailored to your building and timeline.

Fire Insurance Claim Process: Scoping, Xactimate Estimates, and How to Avoid Under-Scopes

If you’re starting the fire insurance claim process, the first big hurdle is turning a chaotic loss into a clean, accurate scope of work and a fair estimate. That’s where clear scoping, Xactimate line items, and a plan to prevent under-scopes make all the difference. This guide walks you through each step—what to document, how estimates are built, and how to protect your payout—so you can rebuild with confidence alongside TSIAC International. TSIAC handles fire damage, demolition, and restoration services for homeowners across the Charleston area, giving you one team that understands both the field work and the paperwork.

Step 1: Stabilize and Document—Your Claim Starts at the Curb

Before scoping, stabilize the site and start a rock-solid record:

  • Secure the property (board-ups, temporary fencing, roof tarps).
  • Capture evidence: wide shots, room-by-room photos, serial numbers, and close-ups of charring, soot, heat-blistered finishes, and water damage from suppression.
  • Log conditions: smoke odor, ash fall, melted fixtures, and any structural movement.
  • Save receipts for emergency services and temporary housing.

Strong evidence eliminates doubt later. When your adjuster (or their consultant) walks the site, you want every decision anchored to what you documented on day one.

Step 2: Scoping 101—The Blueprint of Your Estimate

A scope is the narrative of what happened and what must happen next. A thorough fire scope includes:

  • Areas & assemblies: Which rooms, what assemblies (framing, insulation, drywall, finishes), and how far smoke/soot migrated.
  • Cause & extent: Direct burn, heat damage, water intrusion, and contamination zones.
  • Work categories: demolition, cleaning/deodorization, drying, pack-out/contents handling, structural repairs, MEP (mechanical, electrical, plumbing), and code upgrades.
  • Quantity takeoffs: square footage, linear footage, counts, and elevations.
  • Method notes: HEPA negative-air, soda/ice blasting, sealers (e.g., shellac), odor treatment cycles, and verification testing.

Pro tip: Treat smoke migration like water migration—assume it traveled until you’ve proven it didn’t. That mindset avoids most under-scopes.

Step 3: Xactimate—How the Industry Builds Your Numbers

Xactimate (by Verisk) is the standard estimating platform used by carriers, contractors, and independent adjusters. It builds pricing from location-specific labor, material, and equipment rates and translates scope into line items and quantities. (If you’re new to the software, skim the vendor overview here: Xactimate by Verisk—useful context for homeowners and GCs alike.)

What a good Xactimate estimate includes

  • Clear room/area names and line items for every operation (remove, dispose, replace, clean, seal, test).
  • Accurate quantities (SF/LF/EA) tied to your scope photos and notes.
  • Production factors and labor trades that match the work (e.g., mitigation techs vs. carpenters).
  • O&P (Overhead & Profit) where multiple trades or GC coordination is required.
  • Code compliance allowances and permit costs.
  • Contents handling and pack-out where needed, not just structure.

Step 4: Where Under-Scopes Happen—and How to Stop Them

Under-scopes aren’t always intentional; they often come from rushed inspections or generic templates. Watch these hotspots:

  1. Surface-only cleaning
    Soot embeds in porous materials. If a line item says “wipe and go,” escalate to HEPA vacuum + dry sponge + detergent cycles and odor sealing where appropriate.
  2. Missed demolition
    Heat-damaged framing, delaminated sheathing, warped doors, and melted wiring/insulation often get overlooked. Your scope should call out demo to a clean line, not partial patches that trap odor.
  3. HVAC & ductwork
    Smoke particulates and odor absorption into duct liners are easy to miss. Include system inspection, cleaning, and testing, or replacement where required.
  4. Electrical & plumbing
    Heat and water can degrade insulation, breakers, GFCIs/AFCIs, and fittings. Require licensed trade inspections with line items for replace/repair—not just a cursory “check.”
  5. Deodorization & sealing
    Odor control is a process, not a single line. Look for multiple treatment cycles (e.g., hydroxyl/ozone as appropriate, thermal fogging, negative air) and odor-blocking primers/sealers.
  6. Contents & textiles
    Soft goods and contents need inventory, pack-out, cleaning or total loss valuation with photos. Don’t allow a single lump sum to cover an entire household.
  7. Asbestos/lead testing
    Pre-1978 homes—or specific materials—can require hazard testing prior to disturbance. If omitted, you risk unsafe work and change-order battles later.
  8. Code upgrades & permits
    If your policy includes Ordinance or Law coverage, ensure code-driven work and permit fees appear in the estimate. Otherwise, you’re paying out of pocket.

Step 5: RCV vs. ACV—Know How You’ll Be Paid

Most homeowners policies pay ACV (Actual Cash Value) up front and release RCV (Replacement Cost Value) holdback after work is completed. Translation: if your estimate is under-scoped, your ACV check is smaller—and you’ll fight to correct quantities later. Fix scope before you accept payment.

Step 6: How to Review an Xactimate Like a Pro

Use this quick checklist when you read the estimate:

  • Room-by-room: Every damaged area listed? (hallways, closets, attic, crawlspace, garage)
  • Layer by layer: Ceilings → walls → floors → trim → doors → cabinets → built-ins
  • Remove + replace pairs: If something is replaced, did the estimate include demo, haul-off, and dump fees?
  • Prep & protection: Masking, dust control, negative air, daily cleanup, and equipment rentals
  • Access & complexity: High ceilings, stair work, multiple stories, and tight spaces affect production
  • Trades coordination: More than three trades? O&P should usually be included
  • Testing & verification: Post-cleaning clearance or odor verification where spec’d

Step 7: Partner With a Field-Strong Contractor

A contractor who does the work every day will scope better than anyone reading a screen. That’s why partnering with a builder/remediation team like TSIAC International keeps the estimate honest: they understand demolition, fire damage, and restoration—from safe tear-downs and thorough cleanups to rebuild logistics—across Charleston and surrounding communities.

Step 8: Negotiating Revisions (Without the Drama)

If the carrier’s first estimate misses the mark:

  1. Redline the PDF with room-by-room comments and missing line items.
  2. Attach photo evidence and highlight where quantities undercount.
  3. Submit a contractor’s scope (with Xactimate format if possible) to anchor your changes.
  4. Ask for a joint re-inspection: you + adjuster + contractor, walking the property together.
  5. Keep it factual: No emotion, just scope, codes, and documentation.

Step 9: Plan the Rebuild—Timeline, Trades, and Cash Flow

  • Sequence the work: mitigation → demo → rough trades → insulation/drywall → finishes → punch list.
  • Order lead-time items early: windows, doors, specialty electrical, and HVAC components.
  • Track supplements: Any surprise conditions (hidden damage, code directives) should be documented and submitted as change orders promptly.

FAQs

How long does a typical fire claim take?
Small claims can wrap in weeks; significant structural losses take months. The speed depends on scope completeness, adjuster workload, and material lead times.

Will my premium go up?
It depends on your carrier, policy history, and state. Ask your agent for specifics before filing.

What if I already got a low ACV check?
You can still pursue a supplement. Strengthen the record (photos, trade inspections, revised scope) and request a re-inspection.

The Bottom Line

You don’t get a second chance at the first scope. Document thoroughly, insist on Xactimate line items that reflect the actual work, and partner with a contractor who brings field experience to the negotiating table. TSIAC International supports homeowners through demolition, fire recovery, and restoration—helping ensure nothing critical is missed and your project moves from chaos to completion.

Ready to get your scope right the first time?

TSIAC International is here to help you document, scope, and rebuild—accurately and safely—across the Charleston area. Reach out for a thorough site walk and Xactimate-ready scope.

Textile Restoration After Fire: What Can Be Cleaned vs. Replaced

When a fire strikes, your first priority is safety and stabilizing the property—but the next urgent question is what to save. As interior gut demolition begins and the structure is being made safe, smart textile restoration decisions can protect your budget and your peace of mind. Below is a practical, no-nonsense guide from TSIAC International on what soft goods are typically cleanable, what should be replaced, and how to coordinate the process so you’re not re-contaminating your freshly cleaned home during rebuild. TSIAC International handles demolition and fire-damage recovery across Charleston and nearby communities, making us uniquely positioned to align cleaning with reconstruction timelines.

What counts as “textiles” after a fire?

Textiles include clothing, shoes, linens, bedding, towels, draperies, soft window treatments, stuffed animals, throw pillows, area rugs, and many upholstered or leather items. These materials trap soot and smoke odors quickly; they can also absorb water from firefighting efforts, leading to dye migration and microbial growth if not stabilized promptly.

How fire affects fabrics (and why it matters)

  • Heat can melt synthetics and weaken natural fibers.
  • Soot varies by fire type (dry soot, oily soot, protein residues from kitchen fires). Oily soot smears and embeds; protein residues are invisible but pungent.
  • Water & humidity can drive odors deeper, cause bleeding and shrinkage, and create conditions for mold.
  • Time matters: the longer residues sit, the harder they are to remove.

Generally cleanable items

These items are often good candidates for professional textile restoration when structural damage (scorching, melting) is absent:

  1. Everyday washables (cotton, polyester, denim, towels, bedding):
    With pH-balanced washing and deodorization (e.g., hydroxyl/ozone in controlled settings), most everyday clothing and linens can be returned to pre-loss condition.
  2. Dry-clean only garments (wool suits, silk, rayon):
    Specialized pre-vacuuming, solvent cleaning, and deodorization can remove smoke films without fiber damage when handled by trained providers.
  3. Area rugs (wool, cotton, some synthetics):
    Rug-plant immersion cleaning, controlled drying, and odor removal work well—assuming there’s no burned pile, delamination, or dye loss.
  4. Window treatments (drapes, roman shades, fabric blinds):
    If not heat-damaged, careful particulate removal, solvent or wet cleaning, and pressing can restore color and drape.
  5. Leather and suede apparel:
    Often recoverable through specialty leather cleaning and reconditioning that preserves finish and suppleness.
  6. Stuffed animals and soft toys:
    If structurally sound and not charred, these can be sanitized and deodorized—especially important in homes with children.

Items that are often better to replace

  1. Anything charred, melted, or singed:
    Burned fibers have lost structural integrity; cleaning won’t restore strength or safety.
  2. Foam cushions deeply saturated with smoke/water:
    Even if outer fabric looks fine, foam holds odor. Replacement is usually faster and more cost-effective than extended deodorization.
  3. Rugs with backing delamination or severe dye migration:
    Structural failure or bleeding that reached the foundation typically means replacement.
  4. Heavily contaminated infant items:
    If soot/water exposure is severe (crib bumpers, mattresses, certain toys), replacement protects health and avoids lingering odors.
  5. Low-value synthetics with heat ripple or glazing:
    When heat has glazed the surface, fibers are distorted beyond restoration.

Decision factors TSIAC International uses on site

  • Extent and type of residue: Dry soot is easier; oily or protein soot needs more time and cost to correct.
  • Fiber & construction: Wool rugs and cotton garments respond well; heat-damaged synthetics do not.
  • Replacement value vs. restoration cost: Our project lead helps weigh cleaning costs against current replacement pricing—critical for insurance claims.
  • Turnaround timing: If rebuild deadlines are tight, we prioritize items you need first (work clothes, school uniforms, bedding) and stage returns in waves.
  • Sentimental value: Heirlooms may justify advanced techniques even when economics are borderline.

TSIAC International coordinates these choices with your broader fire-damage plan—including demo, abatement, and reconstruction—so cleaned textiles aren’t exposed to dust and odor during structural work. Our team already manages demolition and fire-related scopes across the region, which keeps decisions aligned under one roof.

The textile restoration workflow (step by step)

  1. Pack-out & inventory
    We photograph, barcode, and categorize items by priority and cleaning method. Fragile or high-value pieces get flagged for specialty handling.
  2. Triage & stabilization
    At our facility, we pre-vacuum (HEPA), apply dry-soil removal, and isolate odor-heavy categories. Early deodorization prevents set-in smells.
  3. Deodorization
    We use controlled hydroxyl or ozone treatment (as appropriate) to neutralize odor molecules before any wet/solvent chemistry—reducing the risk of “locking in” odors during washing.
  4. Cleaning
    • Wet cleaning: pH-balanced detergents, temperature control, and multi-stage rinses protect dyes and hand-feel.
    • Solvent/dry cleaning: For wools, silks, and structured garments to lift oily soot safely.
    • Rug immersion & leather care: Dedicated workflows for each material system.
  5. Drying & finishing
    Correct temperature and humidity, gentle finishing/pressing, and re-shaping maintain fit and drape.
  6. Quality control & odor check
    Multiple noses (and meters, if needed) confirm items are neutral—no perfume masking.
  7. Secure storage & staged return
    We hold cleaned goods away from demolition zones and return them as areas are ready, preventing re-contamination.

Preventing re-contamination during demolition and rebuild

This step is where working with a firm that also manages the property recovery is a huge advantage. TSIAC International can sequence textile restoration with selective demolition, abatement, and reconstruction so your clean items stay clean:

  • Remove and pack textiles before heavy demo starts.
  • Use containment and negative air in work zones.
  • Plan staged returns only after painting and finish work, not during dusty phases.
  • Store in clean, climate-controlled space until rooms are ready.

Because TSIAC International performs demolition, fire-damage work, and broader restoration tasks, you avoid the finger-pointing that happens when multiple vendors are misaligned. We own the schedule and the results.

Quick FAQs

Will everything smell “new” again?
That’s the goal—and with proper deodorization before cleaning, we can typically return clothing and linens odor-neutral. Some low-value synthetics or foam-heavy items may be faster/cheaper to replace.

What about insurance?
We document restorable vs. non-restorable items with photos and line-item notes to support your claim and reduce back-and-forth.

How fast can I get essentials back?
We prioritize “Week-1 Essentials” (workwear, school clothes, bedding, towels) for rapid turnaround, then phase in the rest as rooms are ready.

When replacement is the smarter call

If an item is structurally compromised, heavily heat-damaged, or economically inefficient to restore, we’ll recommend replacement and provide documentation. Our job is to deliver the best outcome for your home and your budget—not to over-clean items that won’t meet your expectations.

The TSIAC International difference

Recovering from a fire isn’t just about cleaning clothes; it’s a coordinated project touching demolition, mitigation, and rebuild. TSIAC International is a family-run, experienced contractor that provides demolition, fire-damage services, and restoration support throughout the Charleston area—so your textiles are protected from day one through final move-in.

Helpful resource (outbound)

For a deeper dive into professional standards that guide textile and soft-goods cleaning after smoke exposure, see the IICRC resources on fire and smoke damage restoration (industry best practices and training).

Ready to talk?

If you’ve had a fire and need an honest, line-by-line plan for what to clean and what to replace, TSIAC International can help—from pack-out and textile restoration to demolition and rebuild scheduling. Call (843) 564-8790 to get started today.

Water Mitigation After Firefighting: Drying Plans That Prevent Secondary Damage

When a fire is put out, the fight isn’t over—the water that saved the structure can quickly destroy what’s left. Effective water mitigation in the first 24–72 hours is the difference between a controlled restoration and a full rebuild. At TSIAC International, we map precise drying plans that stop mold, rot, and corrosion before they start—and we coordinate selective removals, including interior gut demolition, only when the materials can’t be saved.

Why post-fire water is uniquely destructive

Firefighting saturates building assemblies from the top down. Thermal shock, steam, and soot push moisture deep into cavities where it lingers—behind baseboards, under plates, inside insulation, and within double layers of drywall. Add power loss (no HVAC) and you get warm, wet, stagnant air—perfect for microbial growth within 24–48 hours. Metals flash-rust, engineered wood delaminates, and gypsum loses structural integrity. A disciplined drying plan prevents those secondary losses.

The first 24 hours: stabilize and triage

  1. Site safety & utilities: Verify structural stability, electrical isolation, and air quality.
  2. Moisture mapping: Use thermal imaging and pin/pinless meters to trace moisture paths from roof to slab. Mark “wet lines” on floors and walls.
  3. Salvage vs. strip decisions: Prioritize high-value finishes, hardwoods, and built-ins. Pre-authorize targeted removals if readings remain above dry-standard after 24 hours.
  4. Set environmental targets: Aim for 40–50% RH and material readings at or below pre-loss baselines.

Build the drying plan (and stick to it)

A good plan is written, measurable, and adjusted with daily data. Ours typically includes:

1) Rapid bulk water removal

  • Extraction first: Truck-mount or high-lift portable extraction removes gallons fast—every gallon you extract is one you don’t have to dehumidify.
  • Soot-aware handling: Avoid pushing contaminated water into clean zones; use containment and floor protection at all transitions.

2) Controlled demolition (only what’s necessary)

  • Targeted flood cuts: 12–24″ above the highest consistent wet line, not a blanket 4′ unless readings justify it.
  • Insulation pulls: Wet batt or blown-in insulation loses R-value and traps moisture—remove it to open the cavity.
  • Selective removals vs. interior gut demolition: If framing is charred or repeated monitoring shows persistent high readings, we escalate from selective removal to interior gut demolition to eliminate hidden moisture reservoirs and smoke-impacted materials efficiently.

3) Airflow that “pressurizes” the dry

  • Air movers: Place along walls in a clockwise pattern, 6–10 feet apart, to shear boundary layers and push moisture toward dehumidifiers.
  • Wall cavity drying: Use venting or negative-pressure systems (inject-dry) when assemblies must remain in place.
  • HEPA filtration: Run air scrubbers when soot or char is present to reduce particulates while you dry.

4) Dehumidification matched to the load

  • LGR/refrigerant dehumidifiers: Ideal for warm sites; stage to create a drying “assembly line.”
  • Desiccants: For cold or large-loss conditions, deliver low-dew-point air and maintain performance across temperatures.
  • Psychrometric control: Track GPP (grains per pound), RH, and temperature. The goal is a steady GPP drop and surface temperatures above dew point to prevent condensation.

5) Specialty surfaces and assemblies

  • Hardwood floors: Use panel systems to pull vapor through seams; delay sanding until moisture content stabilizes.
  • Cabinetry & millwork: Decouple toe-kicks and back panels to allow airflow; salvage when structural integrity remains.
  • Crawl spaces & subfloors: If water migrated down, condition the crawl space with vapor barriers, directed airflow, and dehumidification—otherwise the floor system will re-wet.

Monitoring: what gets measured gets dry

Daily (sometimes twice-daily) documentation should include:

  • Ambient readings: temp, RH, and GPP (inside vs. outside).
  • Material readings: same meter, same scale, same locations each day.
  • Equipment log: counts, locations, and amp draws.
  • Photos of moisture map updates and any additional openings.

Drying is complete when materials reach pre-loss moisture content (or industry-accepted dry standards for that species/substrate) and stay there with equipment off for 24 hours.

Preventing mold and odor from the start

  • Respond within hours: Microbial activity can begin in under 48 hours. An early start reduces demolition and cost.
  • Clean before you coat: HEPA-vac and apply soot-/smoke-appropriate cleaners to surfaces before encapsulants.
  • Deodorize strategically: Source removal first; thermal fogging or hydroxyls as needed—never to mask ongoing moisture.

For a deeper dive into industry standards for water damage restoration procedures, see the IICRC S500 standard (helpful overview here: IICRC S500 Water Damage Restoration). ← (outbound link)

Insurance coordination that speeds approval

  • Scope alignment: Tie each removal to readings and regulations (e.g., wet insulation, swollen MDF, delaminated OSB).
  • Xactimate-ready notes: Document line items with photos, sketches, and meter logs.
  • Change orders: If a wall that tested dry on Day 1 wicks moisture by Day 3, update the scope and get quick sign-off.

When to consider abatement testing

Older structures and some commercial buildings may hide asbestos-containing materials (ACM) or lead paint. Before aggressive drying or removals:

  • Test suspect materials (flooring mastics, textures, old plaster, pipe wrap).
  • Follow containment protocols if positive, and switch to negative pressure with HEPA filtration to prevent cross-contamination.
    TSIAC International’s team coordinates testing and abatement with the same speed as the drying plan to keep the schedule on track.

Common mistakes (and how we avoid them)

  • Mistake: Turning on heat without dehumidification.
    Fix: Always pair temperature control with dehumidifiers to move moisture out, not just around.
  • Mistake: Over-drying hardwoods and framing.
    Fix: Track species-specific targets; taper equipment as you approach equilibrium.
  • Mistake: Drying through intact vapor barriers.
    Fix: Open smart paths—remove baseboards, drill and plug, or temporarily remove low-perm coverings.
  • Mistake: Skipping cavity checks behind tile and stone.
    Fix: Use non-destructive meters and borescopes to validate; plan selective tile removal only if necessary.

Sample drying plan (48–96 hours)

  1. Day 0–1: Extract; set 1 air mover per 10–14 linear feet of wall; install 1 LGR per 300–400 sq ft of moderately wet area (adjust for load); establish HEPA filtration.
  2. Day 1–2: Re-map; cut access where readings remain high; pull wet insulation; add cavity drying.
  3. Day 2–3: Step down equipment as GPP drops and materials approach targets; begin cleaning/deodorization.
  4. Day 3–4: Verification day—equipment off for 24 hours; confirm stable readings; close cavities and move to build-back.

Why choose TSIAC International for post-fire water mitigation

  • Data-driven decisions: We don’t guess; we measure and adjust daily.
  • Selective, not excessive: We save what can be saved and remove only what can’t—from surgical flood cuts to fully managed interior gut demolition when conditions require it.
  • One coordinated team: Drying, selective demolition, abatement coordination, and restoration move in a single, efficient sequence—no hand-offs that stall progress.
  • Clear documentation: Insurers get clean logs, photos, and moisture graphs to accelerate approvals.

Ready to stop secondary damage?

If a fire has just been extinguished—or you’re staring at wet drywall and smoky framing from days ago—act now. The sooner we start, the more we save.

TSIAC International designs and executes drying plans that protect structures, budgets, and timelines. Call us to schedule an on-site moisture map and same-day stabilization, and let’s prevent a salvageable loss from becoming a total rebuild.


Need help today? TSIAC International can deploy emergency extraction, dehumidification, and a written drying plan within hours. We coordinate with your adjuster, document every reading, and only recommend demolition when it’s truly necessary.

Interior gut demolition safety: Make “demo day” safe in occupied homes

When a home stays lived-in during interior gut demolition, safety has to be engineered into every step. As a full-service contractor, TSIAC International builds demolition plans that protect families, pets, and workers while keeping the remodel on schedule. Below is a practical, homeowner-friendly guide to what a safe “demo day” looks like in an occupied house—and how to make it happen.

Why safety is different in occupied homes

Working inside someone’s home adds risk layers you don’t see on vacant jobs: kids wandering into work zones, pets darting through doorways, allergy and asthma concerns, and daytime noise that disrupts remote work or sleep. The solution is a proactive plan that controls dust, isolates hazards, and communicates clearly—every single day.

Step 1: Start with a pre-demo safety plan

Walk the space together. Before a hammer swings, your demolition partner should conduct a room-by-room hazard assessment with you: suspected asbestos, lead paint, water-damaged materials, energized circuits, gas lines, stacked loads, and odd framing that might carry more weight than it looks.

Set the phases. Phased demo keeps part of the home comfortable while work proceeds elsewhere. Agree on which rooms are “live,” which are “work,” and how the crew will transition.

Pick access routes. Identify the exterior door the crew will use, the indoor path to the work area, and a staging spot for materials and debris. Fewer steps through the house means less dust and lower risk.

Confirm testing and abatement. If you’re touching pre-1980s or uncertain materials, plan for testing (and if needed, licensed abatement) before demo day—never during. TSIAC International performs both demolition and abatement, simplifying coordination and compliance.

Align on rules. No unescorted entry to work areas, no DIY walkthroughs, and no after-hours “peeking.” Safety depends on everyone following the same playbook.

Step 2: Build a sealed, negative-pressure work zone

Isolate the space. Professionals install continuous floor-to-ceiling poly barriers with zipper doors, tape all seams, and block supply/return registers in the work zone. Door sweeps and tacky mats at thresholds reduce dust migration.

Create negative pressure. HEPA air scrubbers ducted to the exterior pull air from clean areas toward the work area—never the reverse—so dust doesn’t escape when doors open.

Vent and filter. Keep one HEPA scrubber running inside the work zone and swap filters on schedule. If occupants are sensitive to allergens, ask for a second unit.

Post signage. “Authorized Personnel Only” and “PPE Required” signs remind everyone where the line is.

Step 3: Control dust at the source

Smart demo techniques. Score walls before prying, cut along stud lines, and bag as you go. Use oscillating saws with fine-tooth blades and dust shrouds on grinders.

Wet methods. Light misting during plaster or tile removal keeps particulates down—without soaking the structure.

HEPA everything. Use HEPA vacuums on tools and during cleanup. Ordinary shop vacs can re-aerosolize fine particles.

Protect the rest of the house. Cover travel paths with ram board or taped drop cloths, remove rugs, and box up loose items in adjacent rooms.

For an authoritative safety reference, see OSHA’s demolition basics (Subpart T) here: OSHA Demolition Safety.

Step 4: Lock out utilities and verify “dead”

Electrical. Map circuits, de-energize at the panel, apply lockout/tagout, and verify with a non-contact tester at each device. Use GFCI-protected temporary power where required.

Gas. Cap or disconnect lines feeding demoed appliances. Soap-test fittings and keep a combustible gas detector on hand.

Water. Shut off localized valves before fixture removal. Have caps ready for open lines and a plan for unexpected leaks.

Fire safety. No hot work without extinguishers within arm’s reach and a posted fire watch. Keep debris away from heat sources.

Step 5: Protect structure and indoor air quality

Never demo blindly. Before removing any wall or beam, confirm load paths and plan temporary shoring when in doubt. Altered framing during past renovations can hide surprises.

Mind vibration. Hammering and saws transmit vibration. Move fragile items (art, glassware, electronics) in adjacent rooms and warn occupants before the loud phases start.

Maintain clean air. Run HEPA scrubbers throughout work, not just at the end. If odors are a concern, activated-carbon prefilters help.

Step 6: Handle hazardous materials the right way

Asbestos, lead, mold. Suspected hazards require testing and, if positive, licensed abatement with dedicated containments, negative pressure, proper PPE, and lawful disposal. This is non-negotiable in occupied spaces. TSIAC International is equipped for asbestos removal and testing, ensuring safe, compliant handling before demo continues.

Silica awareness. Cutting masonry or concrete? Use wet cutting, shrouds, and HEPA vacuums to comply with silica exposure limits.

Step 7: Debris management that won’t wreck your house

Short hauls, frequent dumps. Don’t stockpile piles inside. Stage debris in lidded bins and remove it on a schedule.

Defined routes. Use the same protected path to the exterior every time. Assign a spotter at thresholds to keep doors from bumping trim and hands from touching painted walls.

Truck or dumpster etiquette. Keep bins closed to control dust and detour curious kids. Sweep the driveway daily.

Recycle whenever possible. Separate metal, clean wood, and concrete to reduce landfill volume and cost. TSIAC International routinely sorts wood, metals, plastics, and steel to support sustainability goals.

Step 8: Daily housekeeping & turnover protocol

End-of-day reset. Bag and remove debris, HEPA-vac the work zone, and wipe contact points. Replace tacky mats and check zipper doors.

Air exchange. Let scrubbers run after crew departure to polish the air before the household resumes normal activity.

Status update. Your foreman should brief you on what was completed, what’s next, and any changes to the plan—especially those that affect power, water, or access.

Occupant etiquette (that keeps everyone safe)

  • Keep kids and pets out of the work zone—always.
  • Resist “quick peeks.” Ask for photos or a walkthrough after the day’s cleanup.
  • Tell the foreman about asthma, allergies, or sleep schedules so noisy tasks can be planned around them.
  • Wear shoes on protected paths; slip hazards are higher during demo.

The “Demo Day” checklist for occupied homes

Before Day 1

  • ✅ Testing/permits complete and abatement plan in place
  • ✅ Phasing map, access routes, and staging areas confirmed
  • ✅ Utility lockout plan reviewed and labeled
  • ✅ Containment materials and HEPA scrubbers on site
  • ✅ Safety brief with house rules (kids, pets, quiet hours)

Every Day

  • ✅ Negative pressure running and verified
  • ✅ PPE worn and signage posted
  • ✅ Debris removed on schedule, travel paths protected
  • ✅ End-of-day HEPA cleanup and status update to owner

At Completion

  • ✅ Final HEPA clean and visual inspection
  • ✅ Registers uncovered and filters replaced if needed
  • ✅ Punch-list of any touch-ups to adjacent areas
  • ✅ Documentation of abatement/disposal (if applicable)

Why choose TSIAC International for occupied-home demo

TSIAC International specializes in structural and selective demolition with a process built for speed, safety, and thorough cleanup—and we can handle abatement under the same roof to minimize delays. Our family-run team has 15+ years of experience and operates with the kind of planning and care an occupied home demands.

Ready to plan a safe “demo day”?

If you’re renovating while living at home, partner with a crew that treats your house like it’s their own. TSIAC International will test what needs testing, seal what needs sealing, and choreograph every step so you can keep life moving while we clear the way for what’s next. Request a walkthrough and phased demo plan today.

Outbound resource: Brush up on core practices here: OSHA Demolition Safety.

About TSIAC International: Full-service demolition and abatement contractor serving South Carolina homeowners and institutions, including selective interior demo, asbestos removal and testing, and meticulous cleanup.

Storm damaged structure demolition: How controlled demo speeds rebuilds

After a hurricane, tornado, or severe wind event, the clock starts ticking. The longer unsafe structures sit, the more they threaten people, schedules, and budgets. That’s where storm damaged structure demolition comes in. Done right—and done fast—controlled demolition clears hazards, stabilizes the site, and jump-starts the rebuild. At TSIAC International, our goal is simple: make the demolition phase the quickest, safest part of your recovery so construction can begin without delay.

What “controlled” demolition really means after a storm

“Controlled” doesn’t always mean dramatic implosions. In post-storm conditions, it usually means structural and selective methods carried out with tight sequencing, engineered safety controls, and real-time coordination with adjusters and builders. Crews isolate compromised members, peel back unsafe portions, and protect what’s salvageable so your GC can frame, set, or pour on a clean, verified substrate. TSIAC International specializes in all types of demolition—structural, selective, and deconstruction with heavy equipment and hand tools—which is exactly what storm sites demand.

Why speed matters (and how you get it safely)

Every day lost in demolition delays everything that follows—temporary power, framing, roofing, interiors, and move-in. Fast doesn’t mean reckless; it means front-loading the plan:

  • Rapid hazard assessment: Identify collapse risks, utilities, asbestos/lead, and unstable soils before the first pull or cut.
  • Scope alignment with your insurer and GC: Define what’s removed now vs. protected for later.
  • Staged mobilization: Right-size machines, buckets, shears, and labor to the footprint and access limits.
  • Material management & recycling: Segregate debris streams (metal, concrete, wood) to minimize haul-offs and tipping fees while supporting sustainability goals.

That last point matters: recycling and materials separation are not just “green”—they’re efficient and often cheaper. TSIAC International uses protective measures and practices recycling on projects by separating wood, metals, plastics, and steel to reduce waste and support sustainability.

Want a deeper dive into debris planning? See FEMA’s reference guidance: Public Assistance Debris Management Guide.

The controlled demo sequence that keeps rebuilds moving

  1. Stabilize & secure. Fence the perimeter, mark utilities, and shore where necessary so equipment can operate safely.
  2. Selective teardown first. Remove roofs, exterior cladding, and add-ons that create lateral load or wind catch. Interior strips follow to expose structure.
  3. Structural removal. Excavate or shear compromised frames, trusses, and masonry in a top-down, load-path-aware sequence.
  4. Foundation decisions. Where foundations are heaved, undermined, or out of tolerance, remove them now; where they’re sound, protect and document them to preserve the schedule.
  5. Segregate debris. Metal to scrap, clean concrete to crush, wood to C&D—keep dumpsters “pure” to control cost and speed turnarounds.
  6. Surface prep for the builder. Grade, compact, and proof-roll as needed; verify elevations and setbacks; hand back a site that’s truly “ready to build.”
  7. Final clean & verification. A thorough sweep—foundations, trees, and hidden debris included—prevents rework when crews arrive.

How controlled demo accelerates timelines

  • Eliminates safety holds: Removing collapse risks and stray utilities clears the way for trades and inspections to proceed in parallel.
  • Preserves what’s usable: Selective demo saves slabs, utilities, or undamaged wings when appropriate—less to rebuild, less to insure.
  • Reduces change orders: Clear scope, daily progress checks, and clean turnover limit surprises when the rebuild team mobilizes.
  • Cuts hauling time: Sorted debris moves faster and cheaper. If concrete is stockpiled for on- or off-site crushing, you also reduce the number of truck cycles.
  • Speeds permitting closes: Documented removal and site conditions make it easier for inspectors to sign off and for your GC to pull follow-on permits.

What about abatement and fire-water residues?

Storm losses often expose older materials or mix fire, smoke, and water damage with structural failure. That’s why your demolition partner should be built for abatement as well as tear-down. TSIAC International’s core competencies include asbestos and lead abatement alongside structural and selective demolition—so hazardous building materials can be identified and addressed without handing the project to multiple subs.

Residential, commercial, and municipal recovery

Whether you’re a homeowner, a property manager, a procurement officer, or a GC on public projects, the fundamentals don’t change: you need fast, clean, safe demolition and a site that’s truly ready for the next trade. TSIAC International delivers complete teardowns for residential, commercial, and industrial structures, tailored to the client and the contract.

Why partner with TSIAC International for storm recovery?

  • All methods, one team. Structural demo, selective demo, and careful deconstruction—the right tool for each task—so we protect what matters and remove what doesn’t.
  • A fast demo and a thorough cleanup. We remove everything you need gone and perform a detailed clean so your builders start on schedule, not on a mess.
  • Family-owned, highly experienced. From our family to yours, we bring 15+ years of demolition experience and a reputation for doing the job right.
  • Built for disaster work. We routinely support rebuilding after floods and fires, and we coordinate around your schedule to minimize downtime.
  • Abatement ready. If a storm exposes asbestos or lead, our in-house abatement capabilities keep your project moving.
  • Local commitment. We proudly serve Charleston and surrounding communities and understand local conditions, codes, and workflows.

Frequently asked questions

How fast can demolition start after a storm?
Mobilization depends on access, utility shutdowns, and abatement needs. With approvals in place, a properly sized crew and equipment can often start within days and finish selective/structural removals in tight windows—especially when the contractor controls sorting, hauling, and cleanup. TSIAC’s process is designed to operate around your schedule.

Can you keep my slab or foundation?
Sometimes. If a foundation is intact, within tolerance, and not undermined, preserving it can save weeks. If it’s compromised, we remove it and hand back a blank slate for your GC.

Will you separate debris for recycling?
Yes. Sorting metals, concrete, wood, and plastics is part of our standard operating procedure and supports both sustainability and cost control.

The bottom line

Controlled demolition is the pivot point in storm recovery. Done with focus and discipline, it compresses the timeline, lowers risk, and gives your builder a surface that speeds every trade that follows. If you’re navigating insurance, juggling schedules, and racing weather windows, partner with a crew that treats demolition like a precision operation—not an afterthought.

Ready to rebuild faster? Talk to TSIAC International about storm-damaged structure demolition and handoffs that keep your project moving—safely, cleanly, and on time.

Demolition permits: Utility disconnect checklist

Before a single wall comes down, every safe demolition starts with verified utility shutoffs. If you’re applying for demolition permits, most authorities won’t issue or finalize them until you prove the building is isolated from power, gas, water, sewer, data, and any fuel sources. As the contractor on record, TSIAC International treats utility disconnects as a critical safety and compliance milestone—not paperwork to rush through.

Below is a clear, step-by-step utility disconnect checklist you can use to prepare your permit package, avoid costly delays, and protect crews, neighbors, and infrastructure.

Why utility disconnects matter

  • Life safety: Live power, gas, or pressurized water lines can injure workers and first responders.
  • Code compliance: Inspectors commonly require documented disconnects before issuing or closing demolition permits.
  • Liability control: Verified shutoffs reduce the chance of accidental releases, fires, or neighborhood outages that could become your responsibility.

Who uses this checklist

  • Homeowners planning a teardown or garage/shed removal
  • General contractors and developers coordinating sitework
  • Property managers handling condemned structures
  • Investors clearing a lot for new construction

Before you start: two fast tasks

  1. Confirm your AHJ (Authority Having Jurisdiction). Call your local building department to confirm exactly which utilities require proof of disconnects, what documents they accept, and in what format (original letter, stamped form, email confirmation, etc.).
  2. Create a “Permit Pack” folder. Keep all utility confirmations, receipts, photos, and site sketches together—digital and hard copy—so your submission is turnkey.

The Utility Disconnect Checklist

Use this as a punch list. Mark each item “Requested,” “Confirmed,” and “Filed in Permit Pack.”

1) Electrical service

  • Request full service disconnect at the pole/pad or transformer, not just a panel shutdown.
  • Remove meter (by utility) and lockout as required.
  • Cap and make safe all conductors; verify underground service location.
  • If you need power for abatement or equipment, request a temporary service pole separately—don’t leave permanent service energized.
  • Solar PV or battery storage? Schedule de-energization and removal with a qualified technician; obtain documentation of refrigerant/battery handling if applicable.

Documents to keep: Utility disconnect confirmation or “cut-letter,” meter removal ticket, photos of capped conductors.

2) Natural gas or propane

  • Schedule a meter pull and service lock/cap at the street or tank.
  • For propane: have the supplier remove the tank (or pump down and certify abandon in place) per manufacturer and code requirements.
  • Tag and cap interior lines after verification.

Documents to keep: Gas utility letter, service lock record, propane tank removal/abandon certificate.

3) Water service

  • Request shutoff at the curb stop; confirm the city or utility requires a cut-and-cap at the main or property line.
  • Disconnect and cap irrigation lines.
  • If a separate well exists, contract a licensed well driller to decommission per state rules; keep the well abandonment report.

Documents to keep: Water shutoff receipt, cut-and-cap sign-off, well abandonment report if applicable.

4) Sewer or septic

  • For municipal sewer: obtain a lateral cap permit if required; have the cap inspected before backfill.
  • For septic: schedule pump-out and system abandonment per health department standards (crush/fill or remove tank). Keep the hauler’s manifest.

Documents to keep: Sewer lateral cap inspection, septic pump/abandon certificate, inspector approval.

5) Communications (phone, internet, cable)

  • Submit removal requests to each provider for drop disconnection and equipment pickup.
  • Confirm removal of any overhead drops and mark any buried conduit to avoid snags during excavation.

Documents to keep: Provider confirmations or tickets, site photos of removed lines.

6) Fuel oil / diesel / auxiliary fuels

  • If present, schedule tank pump-out and cleaning, then remove or legally abandon.
  • Manage any contaminated soil per local environmental rules.

Documents to keep: Pump-out manifest, tank removal/abandon certificate, disposal receipts.

7) HVAC refrigerants and appliances

  • EPA rules require certified recovery of refrigerants (e.g., R-410A, R-22) from AC units, walk-ins, or chillers before demolition.
  • Have a licensed technician recover, tag, and document quantities.

Documents to keep: Refrigerant recovery log and technician certification number.
Helpful resource: OSHA’s demolition safety overview (see OSHA demolition).

8) Fire protection and monitoring

  • Coordinate with the fire department and monitoring vendor to decommission alarms, isolate sprinklers, and drain systems.
  • Post “system out of service” notices if required until demolition begins.

Documents to keep: Fire department/monitoring vendor decommission letter, sprinkler drain report.

9) Stormwater and sump systems

  • Identify and cap footer drains, sump discharge, and roof leaders that tie into municipal systems.
  • Install erosion and sediment controls (silt fence, inlet protection) before demolition to prevent turbid runoff.

Documents to keep: Photos of BMPs (best management practices), any stormwater permits.

10) Site verification walk-through (day before demo)

  • Use a printed copy of this checklist and walk the site with your foreman.
  • Verify: all meters gone, valves locked, caps installed, letters on file, BMPs in place, and underground utilities marked (call 811 as required).
  • Snap date-stamped photos of every capped line and empty meter base for your file.

What to include in your permit submission

  • Utility disconnect letters for each service (electric, gas/propane, water, sewer/septic, communications).
  • Inspection sign-offs (sewer cap, septic abandonment, well decommission, where applicable).
  • Refrigerant recovery logs and tank removal/abandon certificates.
  • Site plan noting utility locations and proposed erosion control.
  • Contractor license and insurance documents as requested by your AHJ.

Pro tip: Combine all PDFs into one clearly labeled file (e.g., “123 Main St – Demo Utility Disconnects.pdf”) to make your reviewer’s life easy and shorten turnaround times.

Common snags—and how to prevent them

  • Assuming a panel “OFF” equals disconnect. It doesn’t. Get the utility cut-letter.
  • Forgetting irrigation or low-voltage lines. Cap and document them like any other utility.
  • Septic tanks left in place without paperwork. Health departments want a formal abandonment report.
  • Scheduling too late. Some utilities need lead time; request disconnects early in your pre-demo timeline.
  • Missing photo evidence. Always snap photos of caps, pulled meters, and drained systems—inspectors love proof.

How TSIAC International helps

Coordinating utility shutoffs is detail-heavy and time-sensitive. TSIAC International builds utility disconnects into the demolition plan from day one—requesting letters, scheduling vendor visits, installing erosion controls, and prepping a complete permit pack. That way, your project clears review faster and your crew mobilizes without last-minute surprises.

Quick, printable mini-checklist

  1. Identify AHJ requirements and forms
  2. Request electric disconnect + meter removal
  3. Request gas/propane shutoff + meter/tank removal
  4. Shut off water at curb; cut-and-cap; decommission well if needed
  5. Cap sewer lateral (inspect) or abandon septic (pump/crush/fill)
  6. Remove comms drops and equipment
  7. Recover HVAC refrigerants (certified tech)
  8. Remove/abandon fuel oil tanks; manage manifests
  9. Decommission fire alarm/sprinkler; coordinate with fire dept
  10. Install erosion controls and mark underground utilities
  11. Final site walk-through; photos of every cap and meter base
  12. Assemble permit pack and submit

Need a hands-off experience? Hand us the address and target start date. TSIAC International will coordinate the disconnects, assemble your permit documentation, and keep you updated so your demolition starts on schedule—safely and by the book.

House demolition cost: What really affects price

Thinking about tearing down a house and starting fresh? Before you line up equipment, it helps to understand the true drivers behind house demolition cost. At TSIAC International, we build estimates that are transparent, safety-first, and tailored to your site—no guesswork, no surprises.

First, define the scope (what’s actually being removed)

Every demolition starts with scope. Are you taking down the entire structure, or just portions (kitchen, garage, roof line)? Does the scope include the foundation, slabs, or footings? Will you want tree removal, fence tear-out, a driveway, or detached sheds gone too? Clear scope directly shapes labor, equipment time, and debris handling—and therefore your final price.

Structure type and material mix

Not all houses are created equal. Wood-frame cottages, brick bungalows, CMU block homes, and stucco over lath each require different tools, sequencing, and disposal plans. Heavier or more complex materials typically add machine hours and hauling weight. Homes with dense masonry fireplaces, tile roofs, or reinforced concrete porches usually cost more to bring down and haul away than a light wood-frame dwelling.

Size, stories, and complexity

Square footage matters, but height often matters more. A single-story 1,600-sq-ft home can be quicker and safer to bring down than a 1,600-sq-ft two-story with complex roof lines. Dormers, additions from different eras, and tight interior framing complicate sequencing and debris separation, adding time and coordination.

Access and site conditions

Can trucks and equipment reach the structure easily? Or are you hemmed in by neighboring homes, narrow alleys, utilities, trees, or a steep grade? Limited access may require smaller machines, hand demo in sensitive areas, and extra staging. Soft soils, underground surprises (old septic tanks, cisterns), or poor drainage can also slow production and increase costs.

Hazardous materials: testing and abatement

Before we swing a bucket, we confirm whether hazardous materials are present. Many older homes include asbestos (in floor tiles, mastics, siding, roofing, duct insulation) or lead-based paint. Regulations require testing, handling by licensed pros, and documented disposal. Abatement is its own line item—and a major cost driver—because it demands specialized containment, PPE, air monitoring, and manifesting. Want a plain-English intro? See the EPA’s asbestos overview for why testing and proper removal matter.

Permit fees, utility disconnects, and compliance

Most jurisdictions require a demolition permit, sometimes a grading or erosion-control plan, and proof of utility shutoffs (electric, gas, water, sewer). Disconnection lead times and fees vary by provider and municipality. Some areas require rodent abatement or historical reviews before work. These admin steps add time and direct costs—skipping them isn’t an option.

Method: mechanical, selective, or deconstruction

  • Mechanical demo (excavators/loaders) is efficient for full teardowns where recycling can occur after separation.
  • Selective demo surgically removes parts of a structure (interiors, additions) and preserves what remains; it’s slower and more labor-intensive.
  • Deconstruction maximizes salvage (doors, flooring, timbers) to reduce waste, which can offset hauling fees but adds labor hours up front.

Your goals—speed, sustainability, salvage value—will steer the approach and the price.

Debris handling, recycling, and final grading

Hauling is often the sleeper cost in a demo budget. Tonnage fees, travel distance to facilities, and the number of loads all matter. Projects that separate metals, clean concrete, and untreated lumber can reduce disposal fees and even generate small credits. Crushing concrete on-site for future base material can lower export/import costs. After debris leaves, you may want rough or fine grading, topsoil, or temporary stabilization—each adds scope and cost.

Schedule, market rates, and seasonality

Like all construction, demolition pricing moves with the market. Fuel surcharges, landfill tipping rates, and local labor availability can nudge numbers up or down. Compressed timelines (e.g., “we must start Monday”) often require overtime crews, premium trucking, or re-sequencing other work—expect that urgency to increase cost.

Add-ons that influence the bottom line

Consider whether your estimate should include any of the following:

  • Foundation and slab removal (plus footing extraction)
  • Capped utilities vs. full service abandonments
  • Tree protection or removal
  • Temporary fencing, signage, and traffic control
  • Erosion control (silt fence, inlet protection, construction entrances)
  • Dust suppression and neighborhood protocols
  • Import/export of fill to leave a specific finish grade
  • Post-demo services like hardscape prep or new-build sitework

Each item is routine—but each requires labor, equipment, and sometimes inspections.

What a professional estimate from TSIAC International includes

When TSIAC International prices your project, we aim for a complete, no-surprises estimate. A typical proposal will outline:

  1. Scope of work (full vs. partial demo, foundation handling, outbuildings).
  2. Testing/abatement allowances or confirmed line items.
  3. Permits and utility coordination responsibilities and expected timelines.
  4. Means and methods (mechanical/selective/deconstruction) and safety plan.
  5. Debris plan (separation, recycling targets, hauling destinations).
  6. Site restoration (rough/fine grade, temp stabilization).
  7. Schedule with estimated durations and sequencing.
  8. Exclusions/assumptions (unknown undergrounds, unsuitable soils).
  9. Unit rates or allowances for potential changes (e.g., unforeseen materials).

That level of detail protects your budget and schedule—and keeps the project stress-free.

How to get a tighter, faster quote (your pre-demo checklist)

You’ll speed things up and sharpen pricing if you can provide:

  • The address, basic site plan, and any survey/utility locates you have
  • Approximate size (sq ft), stories, construction type, and year built
  • Photos or a short video of access points and property lines
  • Notes on known hazards (asbestos, lead paint, fuel tanks) or prior test reports
  • Whether you want foundation removal, tree work, or grading included
  • Your target start date and any hard deadlines
  • The desired finish condition (e.g., rough grade ready for new foundation)

If you don’t have test results yet, we can coordinate sampling quickly so you’re not waiting on lab reports at the last minute.

Ways to reduce cost without cutting corners

  • Lock the scope early. Scope creep is the biggest budget buster.
  • Plan utilities ahead. Proactive disconnects prevent downtime.
  • Embrace recycling. Separating metals and clean concrete can reduce tipping fees.
  • Bundle work. Combining demo with grading or hardscape prep can optimize mobilizations.
  • Stay flexible on start dates. A wider window helps us give you the best rate.

FAQs

How long does a typical house demolition take?
Once permits and utility disconnects are cleared, many full teardowns take 1–3 working days, plus hauling and grading. Selective demo or complex access can add time.

Can I stay in the house during partial demo?
For interior/selective work, we can phase areas, but expect dust, noise, and safety controls. Most clients prefer to vacate during active demo.

Who handles permits and utility shutoffs?
We can handle them end-to-end or collaborate with your builder. Either way, we’ll list responsibilities clearly in the proposal.

What happens to the debris?
We separate recyclable streams where practical and dispose of the rest at approved facilities. You’ll get documentation for regulated materials and manifests where required.

The bottom line

House demolition cost isn’t a single number—it’s the sum of scope, structure, site, safety, and schedule. The right partner brings clarity to each factor and manages them in the right order so your new build starts clean. If you’re ready to move from questions to a firm plan, TSIAC International can deliver a detailed, code-compliant estimate and a fast, safe teardown.

Let’s talk through your project. Share your address, a few photos, and your target timeline, and we’ll map the most efficient path from standing structure to shovel-ready ground.

How to Verify Fire Damage Restoration Quality: Inspector’s Checklist and Standards

When flames die down and fire trucks disappear from your driveway, the real challenge begins. Restoring a fire-damaged home involves more than just cleaning up visible damage and replacing burned materials. The quality of restoration work determines whether your family returns to a safe, healthy environment or faces ongoing problems with mold, structural issues, and lingering contamination.

Not all fire damage restoration companies deliver the same level of quality. Rushed work, corner-cutting, and inexperienced crews can leave Charleston homeowners with expensive problems that surface months after the initial restoration appears complete. Understanding how to verify restoration quality protects your investment and your family’s health.

Why Post-Restoration Verification Matters

Fire damage extends far beyond burned walls and ceilings. Charleston’s fire departments use thousands of gallons of water to extinguish flames, creating secondary water damage that can trigger mold growth within 24 to 48 hours. The city’s humid coastal climate makes this water damage especially problematic, as high ambient moisture levels interfere with proper drying.

Even when a restored property looks clean and new, hidden problems may lurk behind walls, under flooring, or in HVAC systems. Poor restoration work can leave moisture trapped in building materials, creating perfect conditions for mold after water damage. These problems often don’t become apparent until weeks or months later, when mold growth becomes visible or structural damage becomes severe.

Professional verification catches these issues before they become major problems. Insurance companies, real estate professionals, and experienced homeowners understand that appearances can be deceiving after fire damage restoration. A systematic inspection using industry standards provides the only reliable way to confirm that restoration work meets professional quality requirements.

Understanding Fire Damage Restoration Standards

Several industry organizations have established standards that govern professional fire damage restoration work. These standards aren’t suggestions – they represent minimum requirements that protect property owners from substandard work that can cause long-term problems.

The Institute of Inspection, Cleaning and Restoration Certification (IICRC) publishes standards that restoration professionals must follow. The IICRC S500 standard governs water damage restoration procedures, while the IICRC S520 standard covers mold remediation. These documents specify exact procedures for moisture detection, material removal, drying, and reconstruction.

The National Fire Protection Association (NFPA) 921 standard provides guidelines for fire investigation and restoration that insurance companies often reference during claims processing. The Environmental Protection Agency (EPA) Indoor Air Quality Guidelines help verify that restored homes are safe for occupancy.

TSIAC International is working for more than 15 years understand these standards and can provide documentation showing compliance with each requirement. Companies that can’t explain these standards or provide compliance documentation may be operating without proper training or certification.

Professional Inspector’s Quality Checklist

Structural Integrity Assessment

Professional restoration must address all structural damage caused by fire and water. Walls, beams, and flooring should be completely dry, structurally sound, and free of warping or soft spots that indicate trapped moisture. Sagging ceilings or cracked foundations signal incomplete repairs that can worsen over time.

Charred framing members require special attention. Professional restoration teams either properly clean fire-damaged wood using specialized techniques or replace it entirely. Painted-over char marks or superficial cleaning of burned structural elements represents dangerous corner-cutting that compromises the building’s integrity.

Load-bearing elements need particular scrutiny. Fire can weaken steel beams, wooden joists, and concrete foundations in ways that aren’t immediately visible. Professional restoration includes engineering assessment of structural components to verify their continued load-bearing capacity.

Moisture Detection and Mold Prevention

Moisture readings throughout the property provide the most reliable indicator of restoration quality. Professional restoration teams use calibrated moisture meters to measure water content in building materials before, during, and after the drying process. Any materials showing moisture content above 15% may need replacement to prevent mold from water damage.

Dehumidification efforts must reduce indoor humidity levels below 50% and maintain them at safe levels throughout the restoration process. Charleston’s coastal climate makes this especially challenging, as outdoor humidity often exceeds 80%. Professional restoration teams use sealed drying environments and industrial dehumidifiers to overcome these ambient conditions.

Hidden moisture poses the greatest threat to restoration quality. Water can penetrate into wall cavities, under flooring, and into HVAC ductwork where it remains undetected without proper equipment. Professional moisture detection includes thermal imaging and invasive testing to locate trapped water that could support mold growth.

Smoke and Soot Remediation Quality

Complete smoke and soot removal requires more than surface cleaning. Professional restoration teams use specialized cleaning agents and techniques to remove contamination from all affected surfaces. Painting over soot residue without proper cleaning creates ongoing indoor air quality problems and eventual paint failure.

HVAC system cleaning represents a critical component of smoke remediation. Fire residue can contaminate ductwork, air handlers, and filtration systems, spreading contamination throughout the building every time the system operates. Professional restoration includes complete HVAC inspection, cleaning, and component replacement as needed.

Air quality testing provides objective verification that smoke and soot remediation achieved acceptable levels. Professional restoration companies can provide documentation showing before and after air quality measurements that confirm contamination removal.

Material Removal and Replacement Standards

Damaged insulation, drywall, carpeting, and soft furnishings often require complete removal rather than cleaning. These porous materials trap smoke residue, moisture, and contaminants that can’t be effectively cleaned. Professional restoration teams follow strict guidelines about which materials can be cleaned and which must be replaced.

Contaminated material removal must be complete and documented. Leaving damaged materials in place to save money inevitably leads to ongoing problems with odors, air quality, and mold growth. Professional restoration includes photographed documentation of all material removal and disposal.

Reconstruction using substandard materials or poor workmanship undermines the entire restoration effort. Replacement materials should match or exceed the quality of original construction. Professional restoration includes quality control inspections of all reconstruction work.

Signs of Water Damage in Walls After Fire

Charleston homeowners need to watch for specific indicators that water damage wasn’t properly addressed during fire restoration. These signs often appear weeks or months after the restoration appears complete:

  • Discoloration or staining on walls and ceilings that develops gradually
  • Soft or spongy areas when pressing on drywall or other wall surfaces
  • Peeling paint or wallpaper that wasn’t directly damaged by fire
  • Musty odors that develop in previously restored areas
  • Warped or buckled flooring, especially near exterior walls
  • Visible water stains or mineral deposits that appear over time

These warning signs indicate that moisture remains trapped in building materials where it can support mold growth. Professional moisture detection during the verification process can identify these problems before they become visible to homeowners.

Verification Methods for Property Owners

Property owners don’t have to rely on contractor assurances about restoration quality. Several verification methods provide objective evidence that work meets professional standards:

  • Moisture Reading Documentation: Request actual moisture readings from key areas throughout the property. Professional restoration teams maintain detailed logs showing moisture levels before, during, and after restoration. Readings should consistently show moisture content below 15% in all building materials.
  • Photographic Documentation: Professional restoration companies document their work with before, during, and after photographs. This documentation shows the extent of damage, materials removed, cleaning procedures, and final results. Missing documentation may indicate rushed or unprofessional work.
  • Third-Party Inspection: Independent inspectors provide neutral assessment of restoration quality. This approach is especially valuable when insurance claims are involved or when restoration work seems questionable. Third-party inspectors use the same standards and equipment as professional restoration teams.
  • Written Certification: Professional restoration companies provide written certification documenting all procedures completed, materials used, and standards met. This certification includes moisture readings, air quality test results, and compliance with industry standards.
  • Sensory Verification: Trust your senses during the final inspection. Persistent smoke odors, damp smells, or visible moisture indicate incomplete restoration work. Professional restoration should eliminate all signs of fire and water damage.

Air Quality and Health Considerations

Fire damage restoration must address more than just structural and cosmetic issues. Smoke residue, chemical contamination, and potential mold growth create serious health risks that proper restoration eliminates. Air quality testing provides objective verification that the restored environment is safe for occupancy.

Professional air quality testing measures particulate levels, volatile organic compounds (VOCs), and mold spore counts. These tests compare post-restoration air quality to established safety standards. Results should show contamination levels well below acceptable thresholds.

Indoor air quality problems often indicate incomplete restoration work. Elevated mold spore counts suggest hidden moisture problems, while high VOC levels indicate inadequate smoke and chemical residue removal. Professional restoration addresses these root causes rather than masking symptoms.

Insurance and Documentation Requirements

Insurance companies require detailed documentation of restoration work to process claims and approve final payments. This documentation protects both homeowners and insurance providers by confirming that work meets professional standards and addresses all damage.

Required documentation typically includes moisture readings, air quality test results, photographs of all work performed, and certification of compliance with industry standards. Missing or incomplete documentation can delay claim settlement or result in denied coverage for future problems.

Property owners should maintain copies of all restoration documentation for future reference. This information becomes valuable if problems develop later or when selling the property. Potential buyers often request restoration documentation to verify that previous fire damage was properly addressed.

Final Walkthrough and Quality Verification

Before approving final payment or signing off with insurance companies, property owners should conduct a thorough walkthrough using professional quality standards. This inspection should address every aspect of the restoration work, not just cosmetic appearance.

Ask specific questions about moisture levels in key areas, HVAC system inspection and cleaning, material removal and replacement procedures, and documentation of all work performed. Professional restoration companies welcome these questions and provide detailed answers supported by documentation.

Vague or evasive answers about restoration procedures indicate potential problems. Professional restoration teams maintain detailed records and can explain exactly what procedures were followed and why. Contractors who can’t provide this information may not have followed proper restoration protocols.

Long-Term Monitoring and Maintenance

Quality fire damage restoration provides lasting results, but Charleston’s humid climate requires ongoing attention to prevent moisture problems. Install humidity monitors in areas that experienced significant water damage to catch problems early.

Schedule periodic inspections of previously damaged areas, especially during Charleston’s humid summer months. Look for signs of returning moisture, unusual odors, or changes in air quality that might indicate developing problems.

Maintain documentation of the original restoration work for future reference. This information helps identify warranty coverage for restoration work and provides valuable background for any future maintenance or repairs.

Professional Restoration vs. Amateur Work

The difference between professional and amateur fire damage restoration becomes apparent during quality verification. Professional restoration follows established standards, uses proper equipment, and provides complete documentation. Amateur work often looks acceptable on the surface but fails to address hidden problems that surface later.

Professional restoration teams invest in calibrated moisture detection equipment, industrial drying systems, and specialized cleaning products. They understand how fire and water damage affect different building materials and have the training to address each type of damage properly.

Amateur restoration efforts often focus on cosmetic appearance while ignoring moisture problems, structural damage, and contamination issues. This approach leads to ongoing problems that cost more to fix than proper restoration would have cost initially.

TSIAC International has been providing professional fire damage restoration services in Charleston for more than 15 years. Our certified technicians follow all industry standards and provide complete documentation of every restoration project. We understand Charleston’s unique climate challenges and use proven methods to prevent mold from water damage while addressing all aspects of fire damage restoration. When you need verification that your fire damage restoration meets professional quality standards, contact TSIAC International for expert inspection and certification services that protect your property and your family’s health.

Preventing Mold Growth After Fire Water Damage: Top 5 Expert Fire Damage Restoration Tips

When fire strikes a home, the flames represent only half the battle. Fire departments use thousands of gallons of water to save lives and property, but this water creates a hidden threat that many homeowners don’t anticipate. The moisture left behind from firefighting efforts can trigger mold growth within 24 to 48 hours, turning a fire emergency into a long-term health and structural problem.

The humid climate along South Carolina’s coast makes post-fire water damage especially dangerous. Charleston’s average humidity levels already hover near the danger zone for mold growth, and adding fire department water to damaged building materials creates perfect conditions for rapid mold colonization. Understanding how to prevent mold from water damage can save homeowners thousands of dollars in additional repairs and protect their families from health risks.

Understanding Fire Department Water Damage

Fire departments don’t use gentle garden hoses to fight house fires. They deploy high-pressure systems that can pump 500 to 1,500 gallons per minute directly into burning structures. This water penetrates deep into walls, floors, and hidden spaces where normal cleaning methods can’t reach.

Unlike clean water from a burst pipe, fire department water often contains debris, chemicals, and contaminants that actually feed mold growth. The combination of heat-damaged building materials and contaminated water creates the worst possible scenario for mold development. Damaged drywall, insulation, and wooden structures act like giant sponges, holding water in places where air can’t circulate properly.

Why Mold After Water Damage Happens So Quickly

Mold spores exist naturally in the air around us. They stay dormant until they encounter the right conditions: moisture, organic materials, and temperatures between 40 and 100 degrees Fahrenheit. Fire-damaged homes provide all three conditions in abundance.

The EPA and IICRC (Institute of Inspection, Cleaning and Restoration Certification) have established that mold can begin growing within 24 to 48 hours of water exposure. This timeline isn’t negotiable. Once mold colonies establish themselves, they spread rapidly throughout the structure, releasing spores that can cause respiratory problems, allergic reactions, and other health issues.

Top 5 Tips to Prevent Mold Growth After Fire

1. Immediate Water Extraction – The Critical First Step

The EPA and IICRC both emphasize that standing water must be removed within 24 to 48 hours to prevent mold growth. If water sits longer than this window, homeowners are essentially cultivating mold colonies in their own homes.

Professional restoration teams use industrial wet vacuums, sump pumps, and specialized extraction equipment to remove water from all affected areas. Standard household mops and towels simply can’t handle the volume of water left behind by firefighting efforts. Every gallon of water that remains creates potential for widespread mold contamination.

Charleston’s fire department typically uses between 3,000 and 5,000 gallons of water on an average house fire. This massive amount of water doesn’t just disappear when the flames are out. It soaks into flooring, wall cavities, and structural elements where it can remain trapped for weeks without proper extraction.

2. Industrial Drying and Dehumidification – Beyond Surface Moisture

Restoration experts use high-powered air movers and commercial dehumidifiers that far exceed anything available at retail stores. These machines don’t just dry surfaces – they eliminate moisture from floors, walls, and structural cavities where mold loves to grow.

Professional-grade air movers can move 3,000 cubic feet of air per minute, creating the circulation needed to pull moisture from deep within building materials. Commercial dehumidifiers remove 150 to 300 pints of water per day from the air, preventing moisture from condensing back into materials that are trying to dry.

Charleston’s humid climate means that standard fans and household dehumidifiers simply can’t keep up with the drying requirements after fire damage. The ambient moisture in the air actually works against the drying process, making industrial equipment essential for preventing mold growth.

3. Tear-Out of Unsalvageable Materials – The Hard Truth

Porous materials like drywall, insulation, and carpet padding trap moisture deep inside their structure. The IICRC S500 standard clearly states that if these materials can’t be dried within 48 hours, they must be removed. Keeping water-damaged porous materials is essentially guaranteeing mold growth.

This step often surprises homeowners who want to save money by keeping materials that look okay on the surface. Professional restoration technicians use moisture meters to detect trapped water that isn’t visible to the naked eye. Materials that register high moisture readings after 48 hours of drying efforts need to be removed and replaced.

The science behind this guideline is simple: mold spores penetrate into porous materials where they can’t be reached by cleaning or drying. Even if the surface appears dry, moisture trapped inside provides the environment mold needs to multiply and spread.

4. Antimicrobial Cleaning – Eliminating Hidden Threats

According to the CDC and restoration professionals, cleaning all affected surfaces with antimicrobial solutions helps eliminate existing spores and prevents them from multiplying. This step is crucial after water exposure from firefighting because the water often contains organic matter that feeds mold growth.

Professional antimicrobial products are specifically designed for post-water damage cleanup. These solutions kill bacteria, viruses, and mold spores on contact, creating a hostile environment for future growth. Standard household cleaners don’t have the strength or formulation needed to address contamination from fire department water.

The cleaning process must address both visible and hidden contamination. Mold spores can settle on surfaces that weren’t directly wetted by the water, spreading throughout the home via air currents. Professional cleaning treats all affected areas, not just the obvious water damage zones.

5. Moisture and Humidity Monitoring – The Final Defense

Mold thrives when indoor humidity stays above 50%. Moisture meters and hygrometers are standard tools used by restoration professionals to track hidden dampness that can’t be detected by sight or touch. If moisture lingers behind walls or under floors, mold will still grow even if the surface looks completely dry.

Professional moisture monitoring continues throughout the restoration process and for several weeks after completion. Digital hygrometers provide real-time readings that help technicians adjust their drying strategy based on actual conditions rather than guesswork.

Charleston’s coastal climate means that humidity levels can change dramatically with weather patterns. Professional monitoring takes these variations into account, adjusting the drying process to maintain safe moisture levels regardless of outdoor conditions.

Signs of Water Damage in Walls After Fire

Detecting water damage in walls requires more than just looking for obvious stains. Professional restoration teams look for these indicators:

  • Discoloration or staining that appears days after the fire
  • Soft or spongy areas when pressing on drywall
  • Peeling paint or wallpaper that wasn’t damaged by the fire
  • Musty odors that develop in the days following the incident
  • Warped or buckled flooring near wall bases
  • Visible water stains or mineral deposits on surfaces

These signs indicate that water has penetrated beyond surface levels and may be trapped in wall cavities where mold can grow undetected. Professional moisture detection equipment can locate hidden water damage that homeowners might miss during their own inspections.

The Charleston Climate Challenge

Charleston’s location along the South Carolina coast creates unique challenges for fire damage restoration. The city’s average humidity levels range from 65% to 85% throughout the year, well above the 50% threshold where mold growth accelerates.

This high ambient humidity means that traditional drying methods often fail to achieve the low moisture levels needed to prevent mold. Professional restoration teams working in Charleston for more than 15 years understand these local conditions and adjust their techniques accordingly.

The frequent rain showers and thunderstorms common to the Charleston area can also interfere with drying efforts. Professional restoration teams use sealed drying chambers and controlled environments to maintain consistent drying conditions regardless of outdoor weather.

When Professional Help Is Essential

Some situations require immediate professional intervention. Water damage covering more than 10 square feet, contaminated water from firefighting efforts, or moisture that has been present for more than 48 hours all require professional restoration services.

Attempting to handle large-scale water damage without proper equipment and training often makes the situation worse. Professional restoration technicians have the knowledge to identify hidden damage, the equipment to address it properly, and the experience to prevent costly mistakes.

The health risks associated with mold exposure make professional help especially important for families with young children, elderly residents, or anyone with respiratory conditions. Professional restoration eliminates these risks by addressing the root cause of mold growth rather than just treating the symptoms.

Long-Term Prevention Strategies

Preventing mold growth after fire damage requires ongoing attention even after the initial cleanup is complete. Installing humidity monitors in previously damaged areas helps catch moisture problems before they become mold issues.

Regular inspections of areas that were affected by water damage can identify problems early when they’re still manageable. Professional restoration teams often provide follow-up services to monitor moisture levels and address any concerns that develop.

Improving ventilation in areas that experienced water damage helps prevent future moisture buildup. This is especially important in Charleston’s humid climate where natural air circulation may not be sufficient to maintain safe humidity levels.

Protecting Your Investment

Fire damage restoration involves more than just cleaning up visible damage and replacing burned materials. The water used to save your home can create long-term problems that affect both property value and family health if not addressed properly.

Professional restoration services address both the immediate fire damage and the hidden water damage that can lead to mold growth. This approach protects your investment and prevents minor problems from becoming major expenses.

TSIAC International has been helping Charleston residents recover from fire and water damage for more than 15 years. Our certified restoration specialists understand the unique challenges of coastal South Carolina’s climate and use science-based methods to prevent mold growth after fire incidents. When fire strikes your home, don’t let water damage create additional problems. Contact TSIAC International today for professional fire damage restoration services that protect your property and your family’s health.